Intraoral scanners are being applied in many dental indications. Starting from restorative dentistry through prosthodontics and of course orthodontics. They are present in chairside systems, the aligner business, patient monitoring apps and treatment planning. Let’s see what benefits they can bring for implant surgery-oriented dental practitioners.
Advantages for the digital workflow
To start with, IO scanners will improve your data acquisition and patient experience tremendously. The attractive appearance of IO scanners will most likely not only impress your patients, but they will also appreciate the experience, as they can avoid uncomfortable effects of conventional impressions such as the gagging reflex and breathing discomfort.
As a clinician, you get a very important asset – more time. Do not get me wrong – intraoral scanning will not always be faster than taking an alginate impression. In cases such as mandibular free-end situations, with a canine as a last tooth, a lot of vertical bone loss (oral cavity bottom and tongue close to ridge top) and highly mobile mucosa on the arch, do not waste your time – take an impression and ask a lab to scan the model for you. The time saved that comes with a scanner will be visible on a larger scale. You will be able to skip the step of waiting for the models to be poured and you might just decide to use the scans in surgical planning software right away.
IO scanners help us with immediacy – not only as means of data collection for guided surgery, but also for impressions for prosthodontics. Taking an IO scan with a scanbody (digital implant impression transfer) indeed saves on chair time and material costs, as compared to traditional polyether/silicone impressions. Many scanners will offer to choose the color for you, so if you properly calibrate the device, you can skip the classic shade guides for posterior restorations too. For front teeth, the golden standard remains – proper intraoral photographs provide the most valuable data on tooth color, structure and color map for the technician.
Working digitally, you may also choose to work with labs further away from your clinic, getting the restoration faster than you expect. Your dental laboratory of choice can get your digital impressions in an instant via online transfers, and can start working immediately while still providing that final human touch when characterizing the restorations.
Pre-op scans and surgery planning
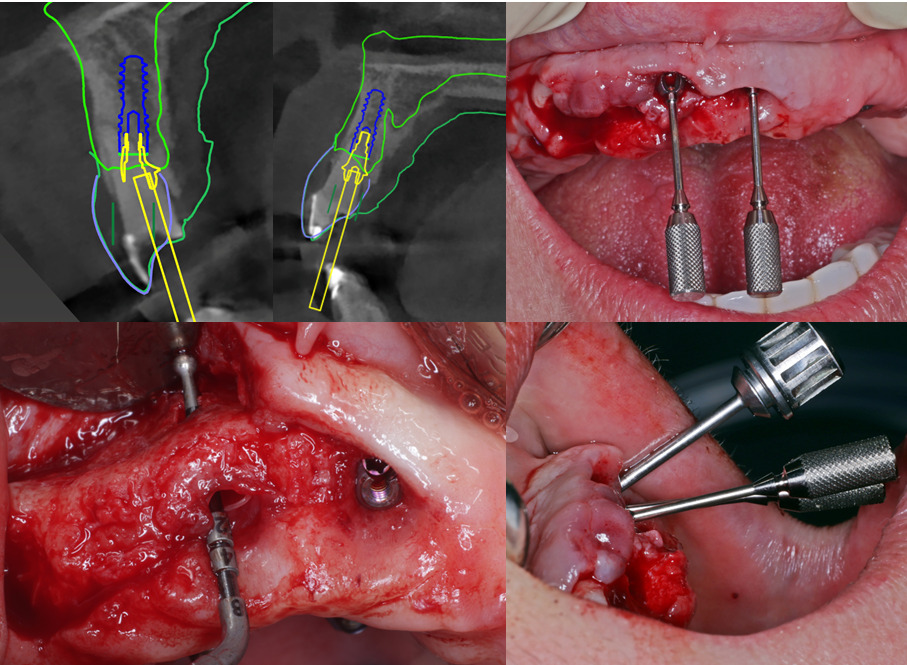
In our clinical practice the first big improvement after getting the IO scanner was being able to schedule guided surgeries on the following day. Of course, that was only possible because we already owned surgical planning software and worked with a lab nearby that was able to print the guides for us overnight. Nevertheless, the time necessary to start planning (waiting for the models to be poured and scanned) simply disappeared. In an instant, we were able to superimpose the digital impressions (IO scans) over the CBCT data in surgical planning software and look them over with the patient regarding any necessary grafting procedures (and a cost estimate of the treatment). Surgical planning software comes in very useful here. It allows us to plan the position of the implant and transfer it to the live situation by means of guided surgery. Proper surgical planning software will also allow you to choose the abutments before the surgery, including abutment height and angulation. This means your team knows exactly what to order and prepare for the surgery and you do not need to keep a wide variety of items in your clinical stock. Moreover, some softwares allow for angle measurement between planned implants or abutments. This means that before the surgery takes place, you already know you will achieve a passive fit for the restoration and know where exactly the screw channels will be. You can also deliver an implant impression to your technician before you even touch the patient. Sounds convincing? Stay tuned for another article on the guided surgery itself.
Scanbodies – digital implant impression transfers
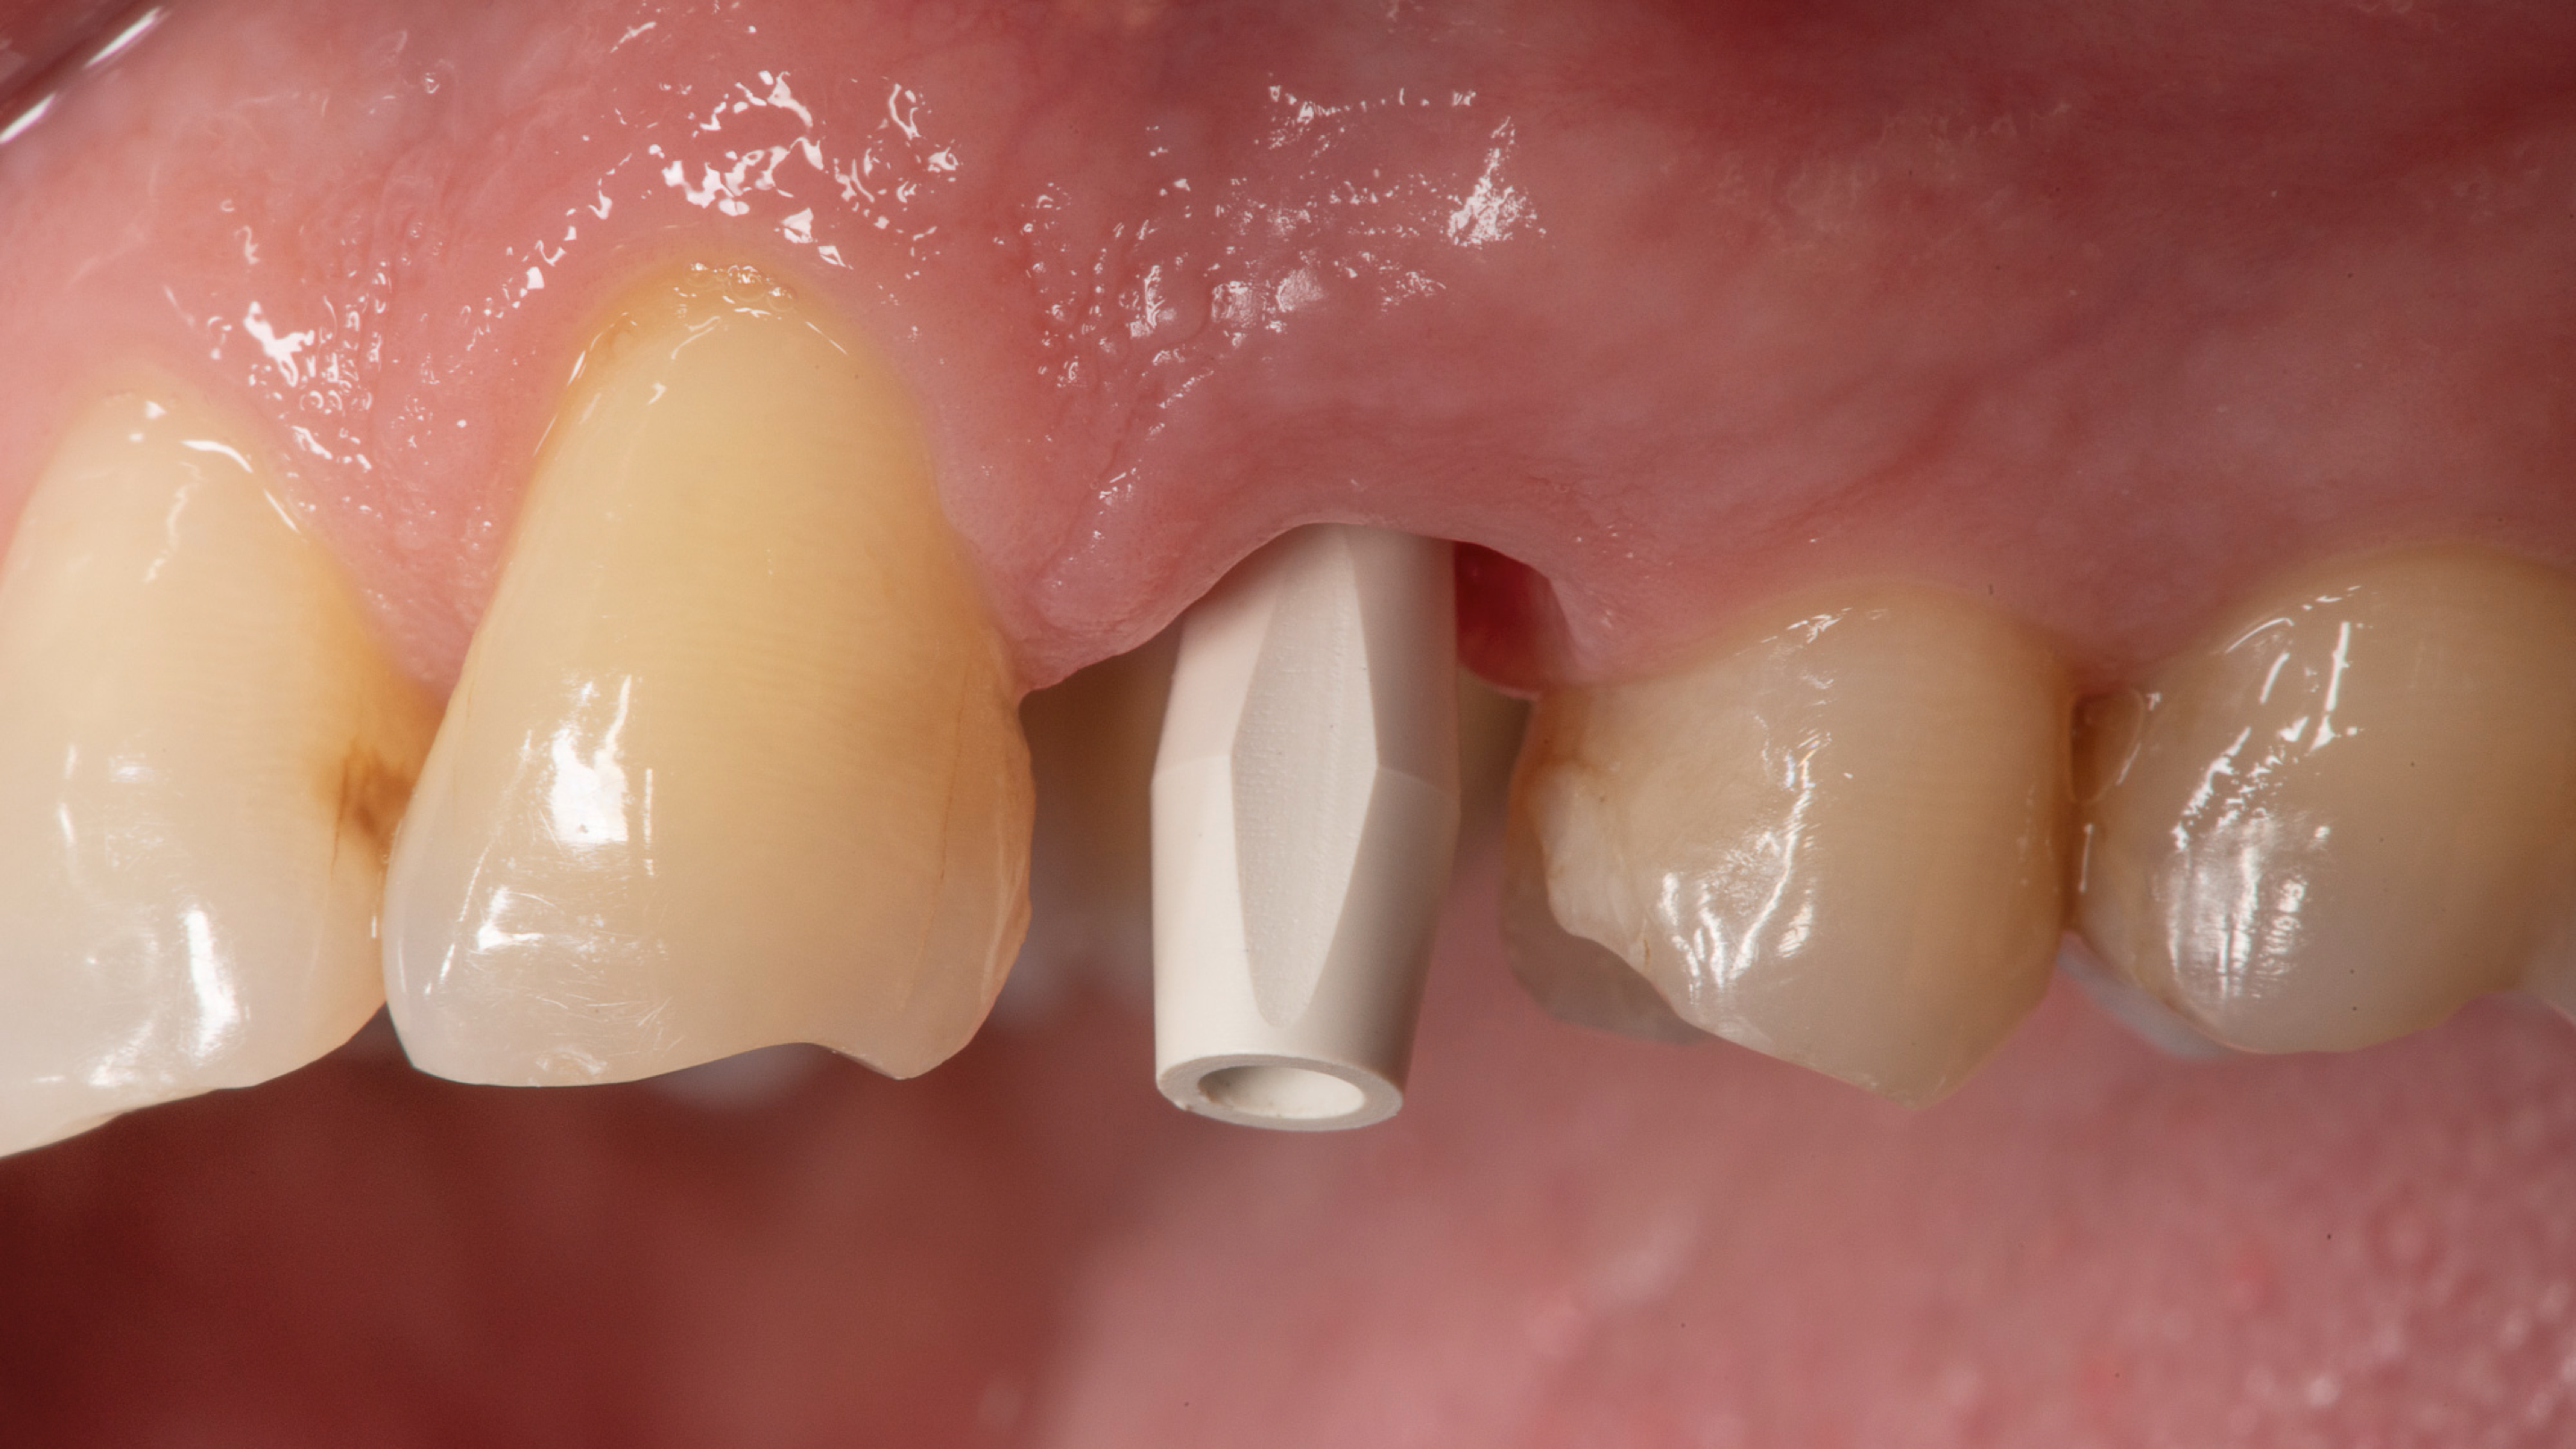
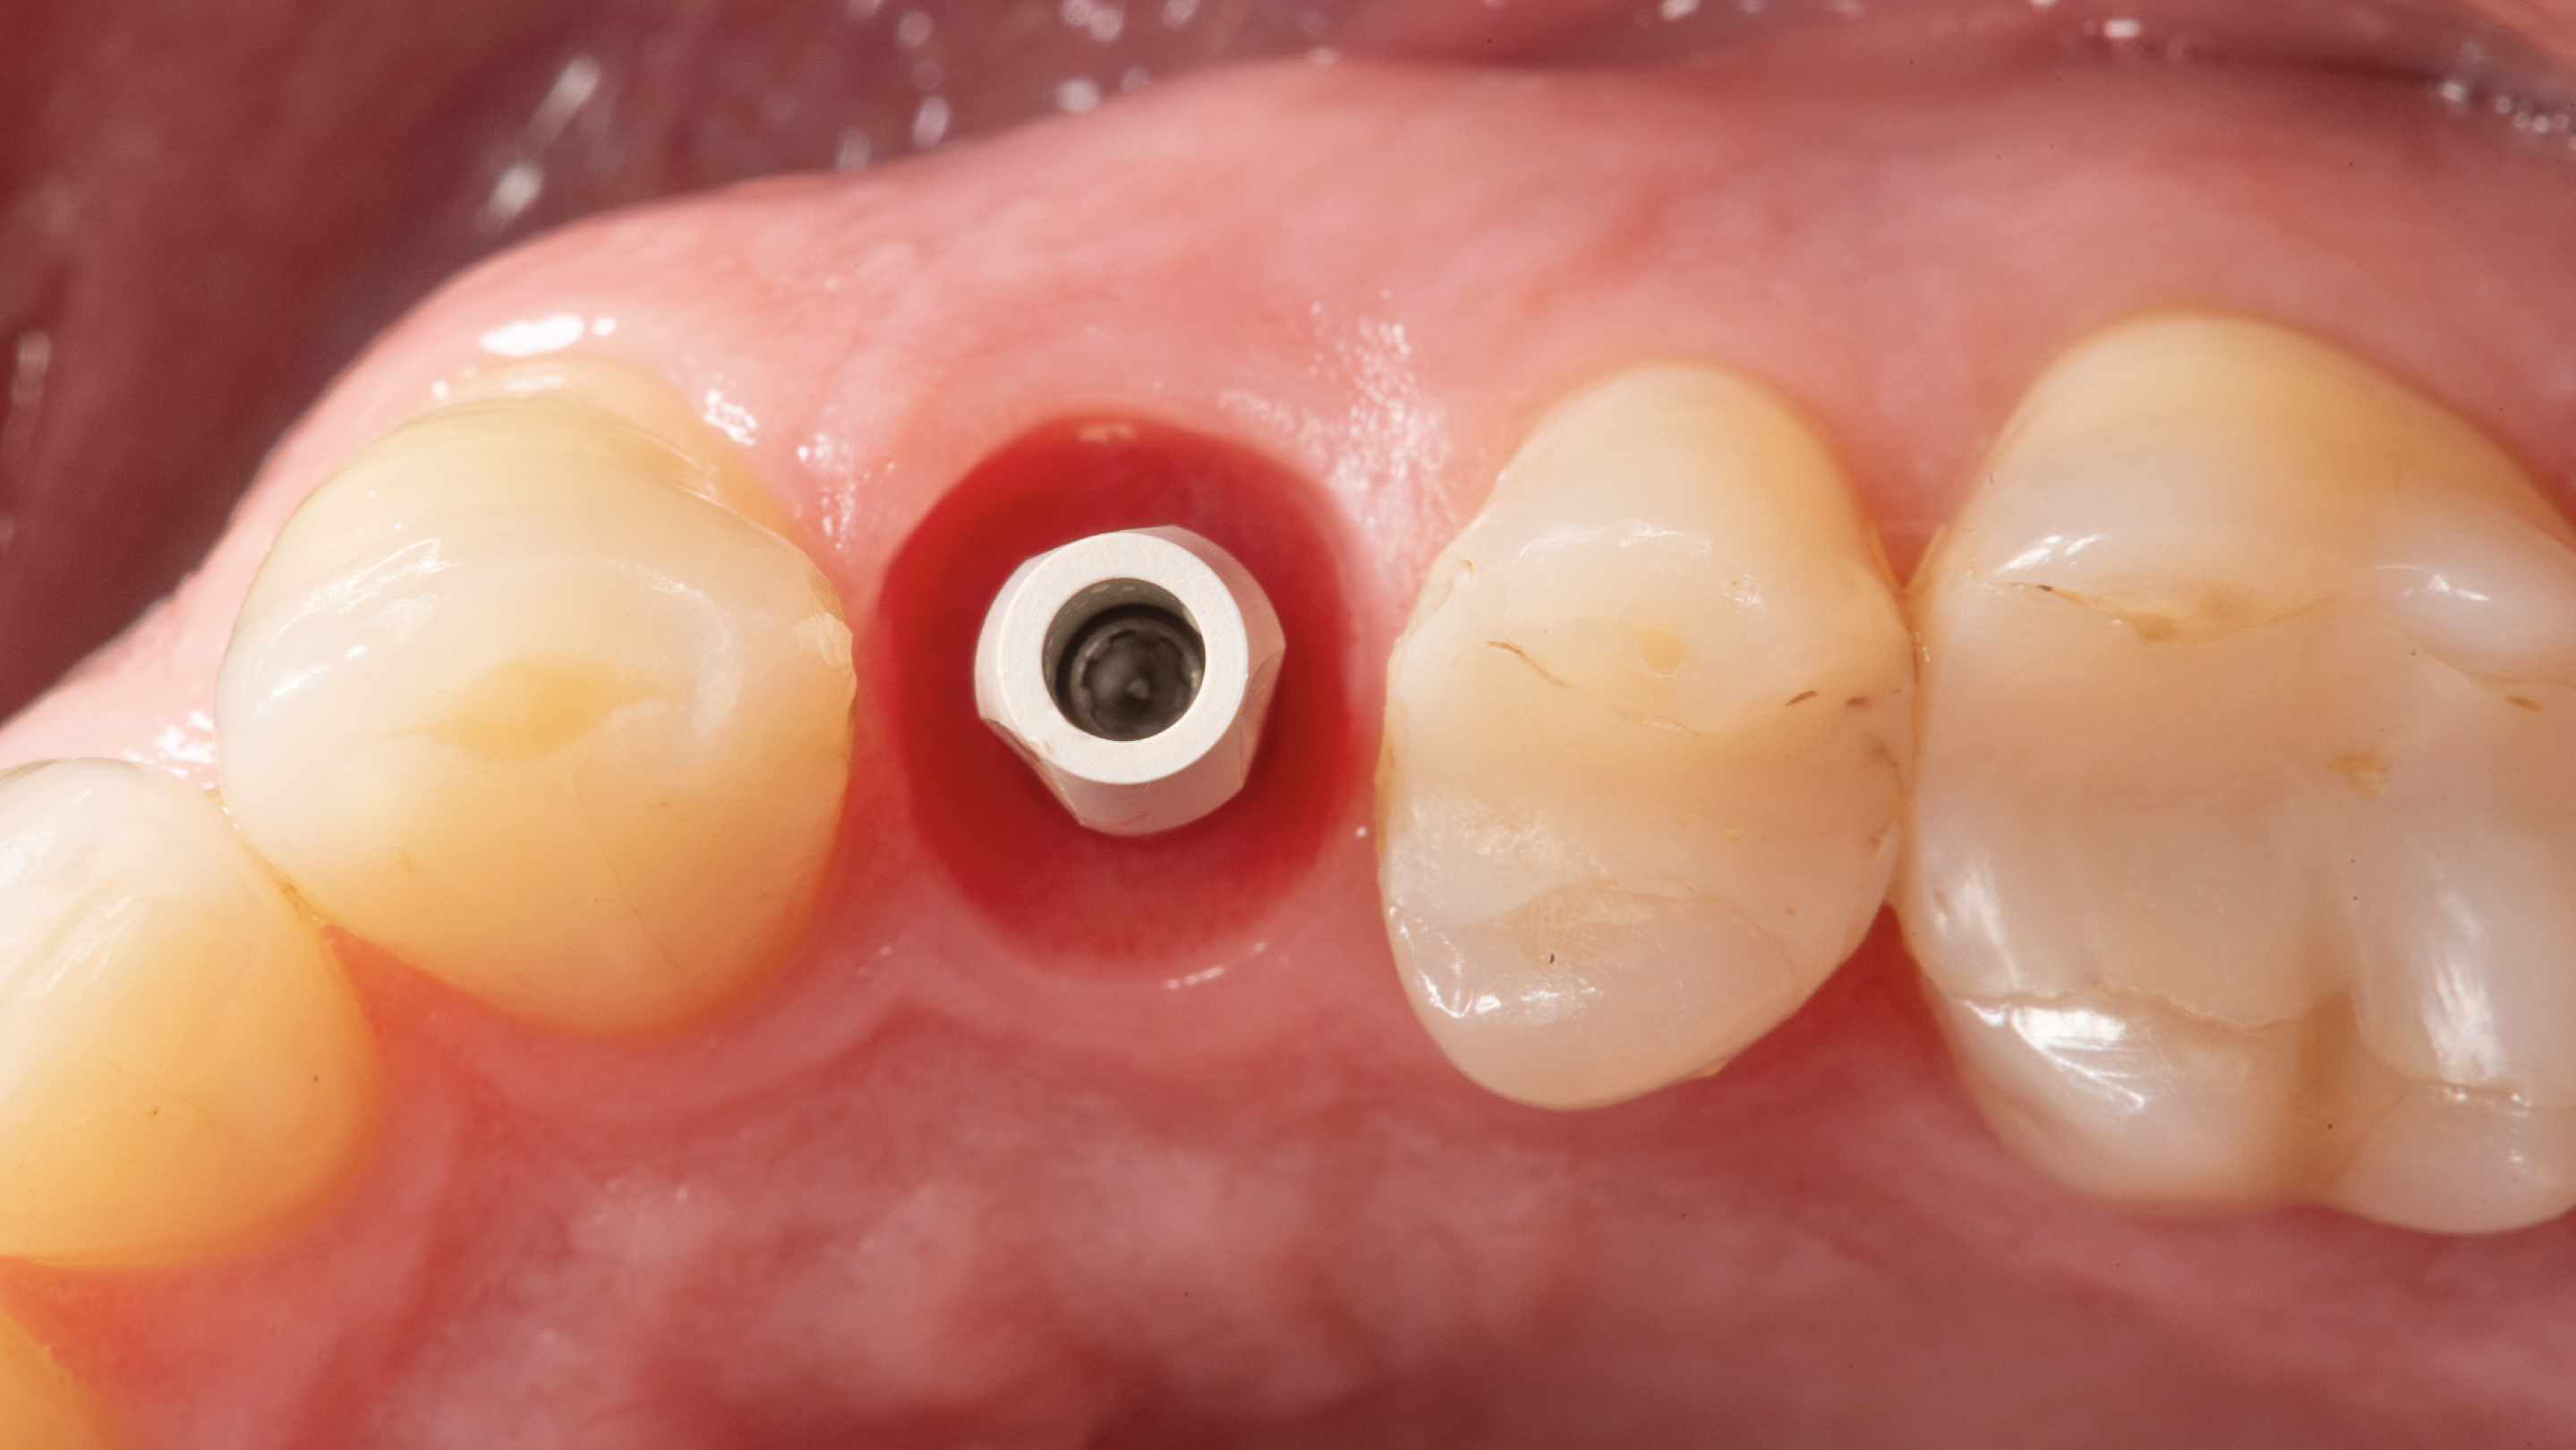
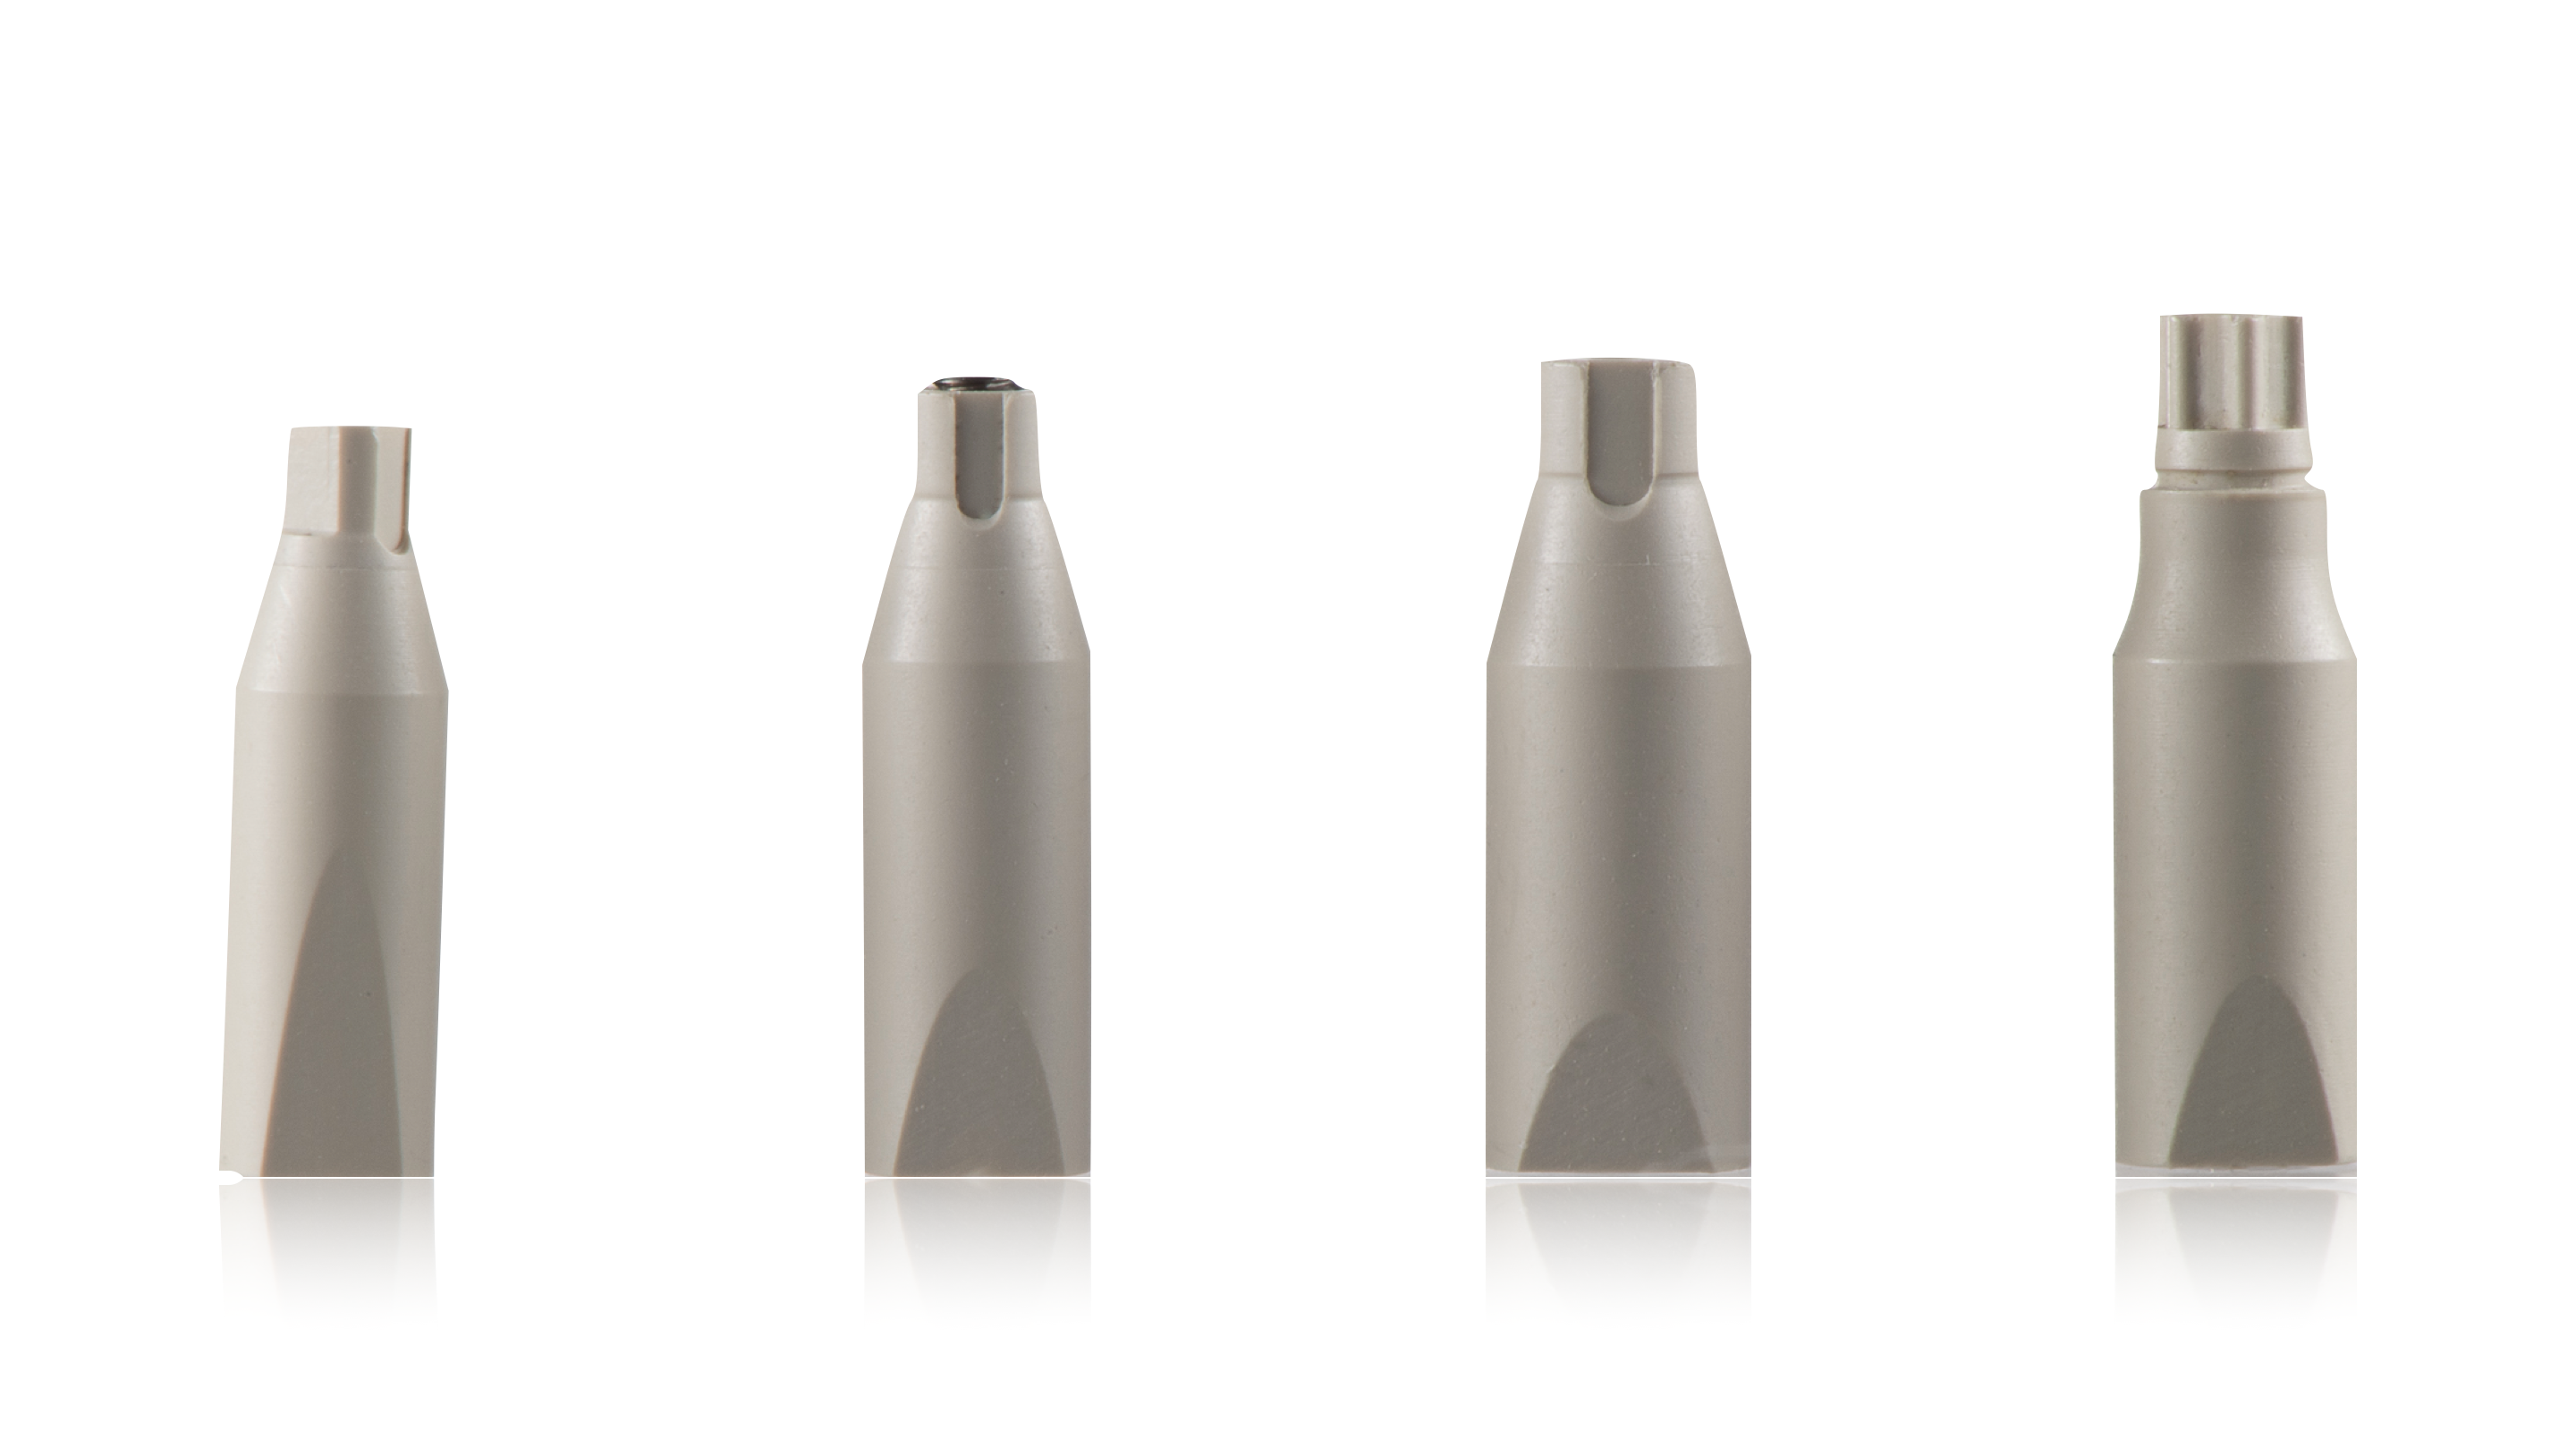
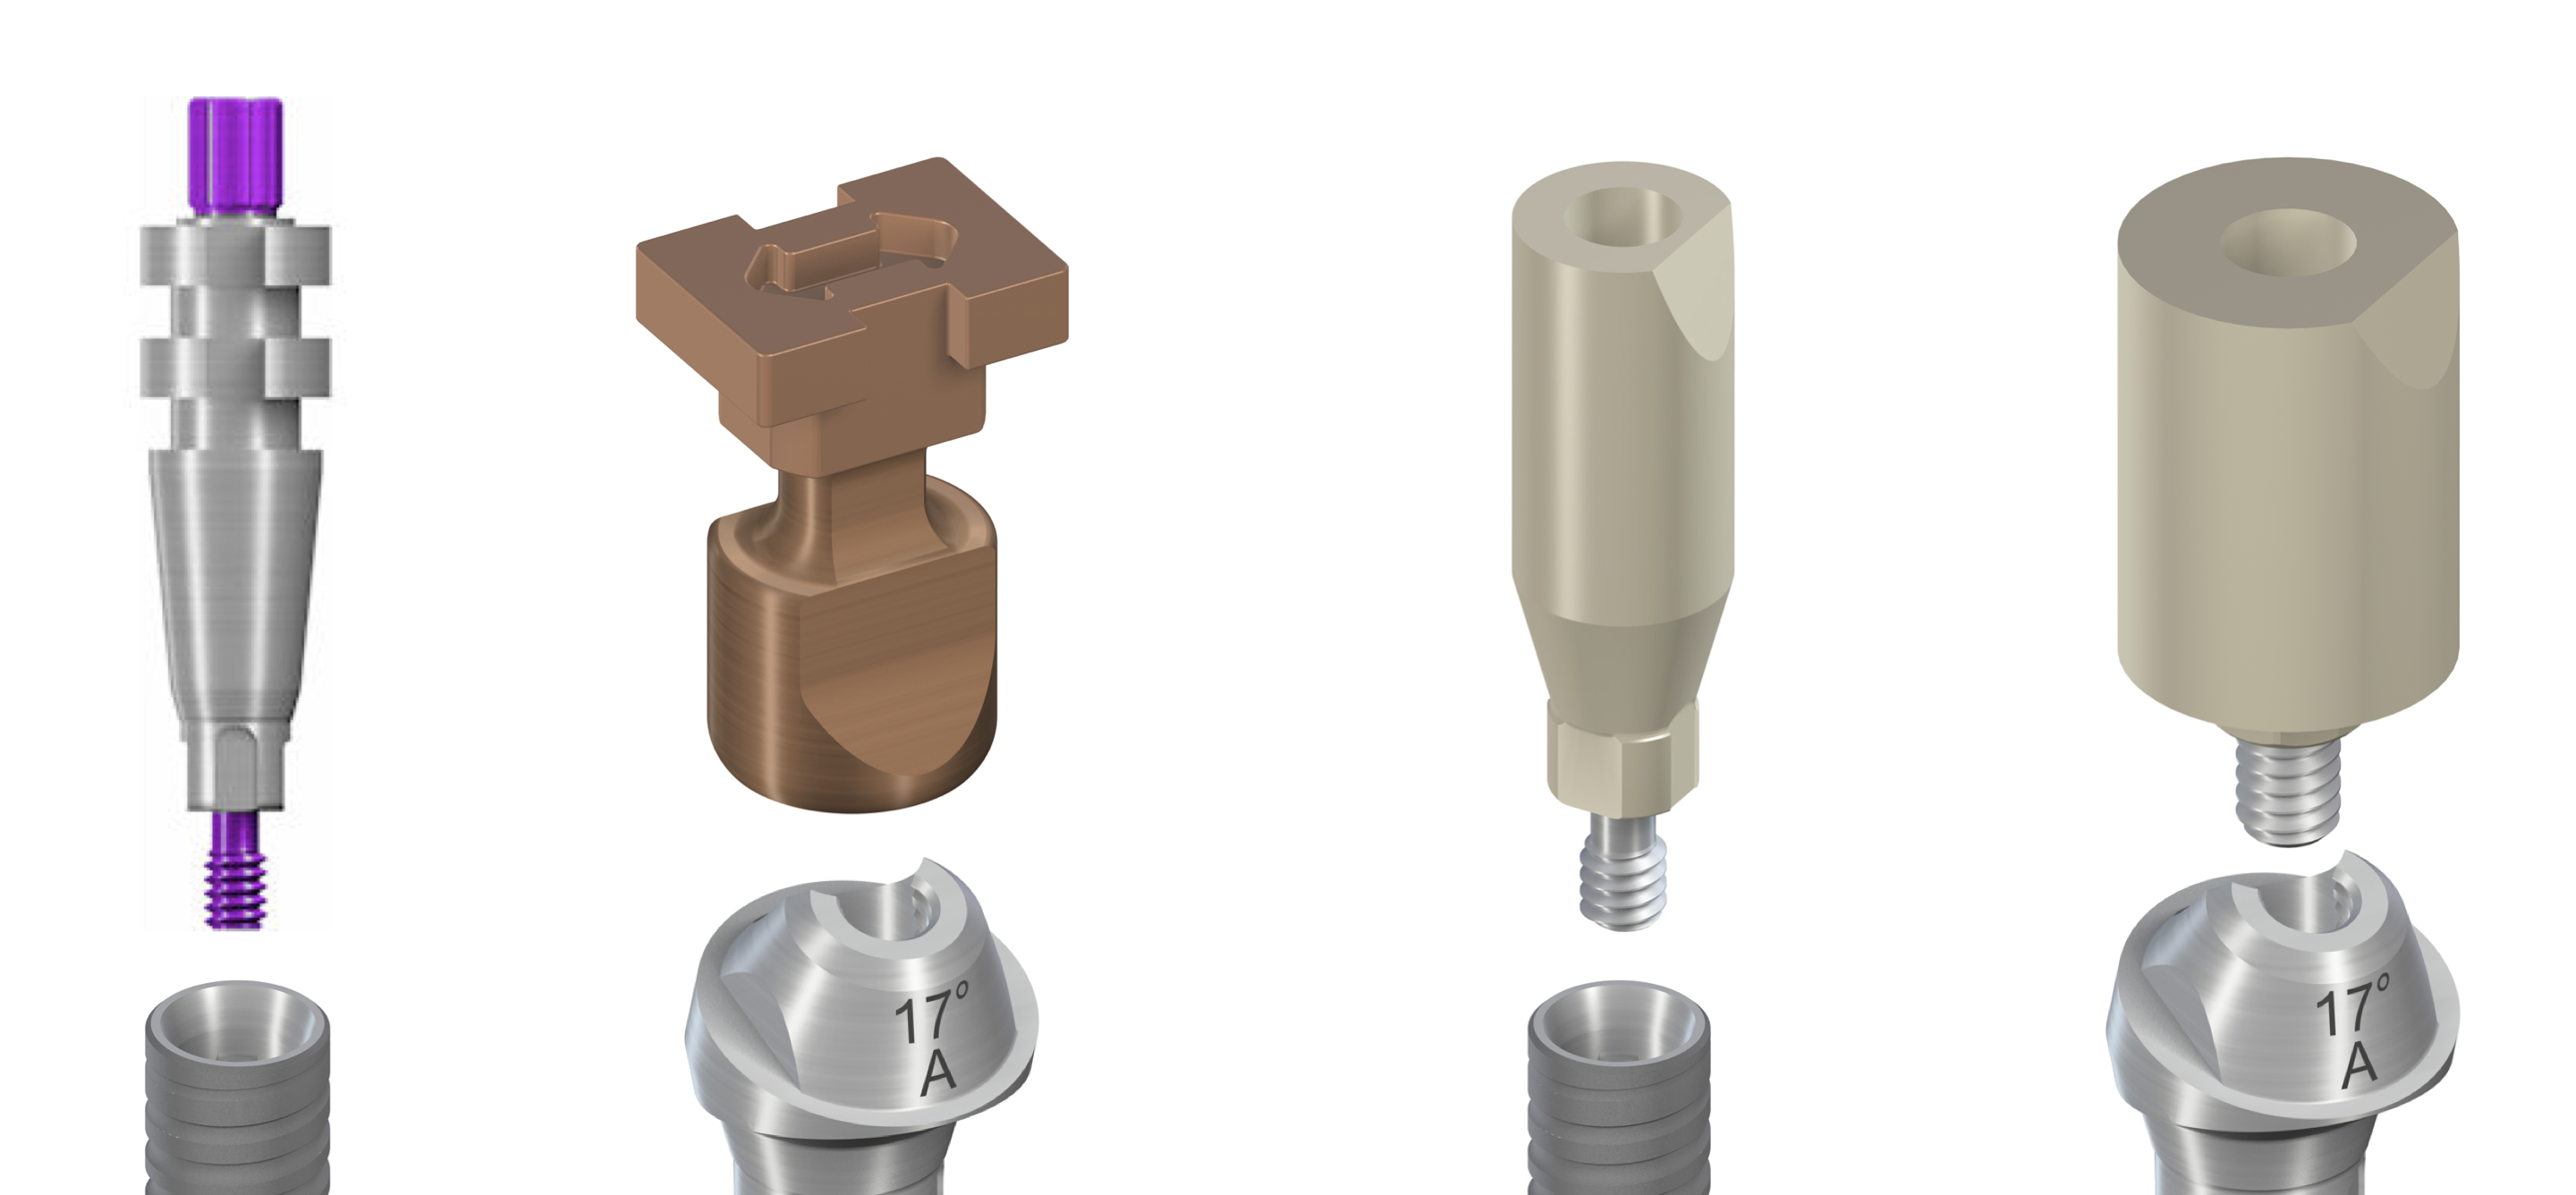
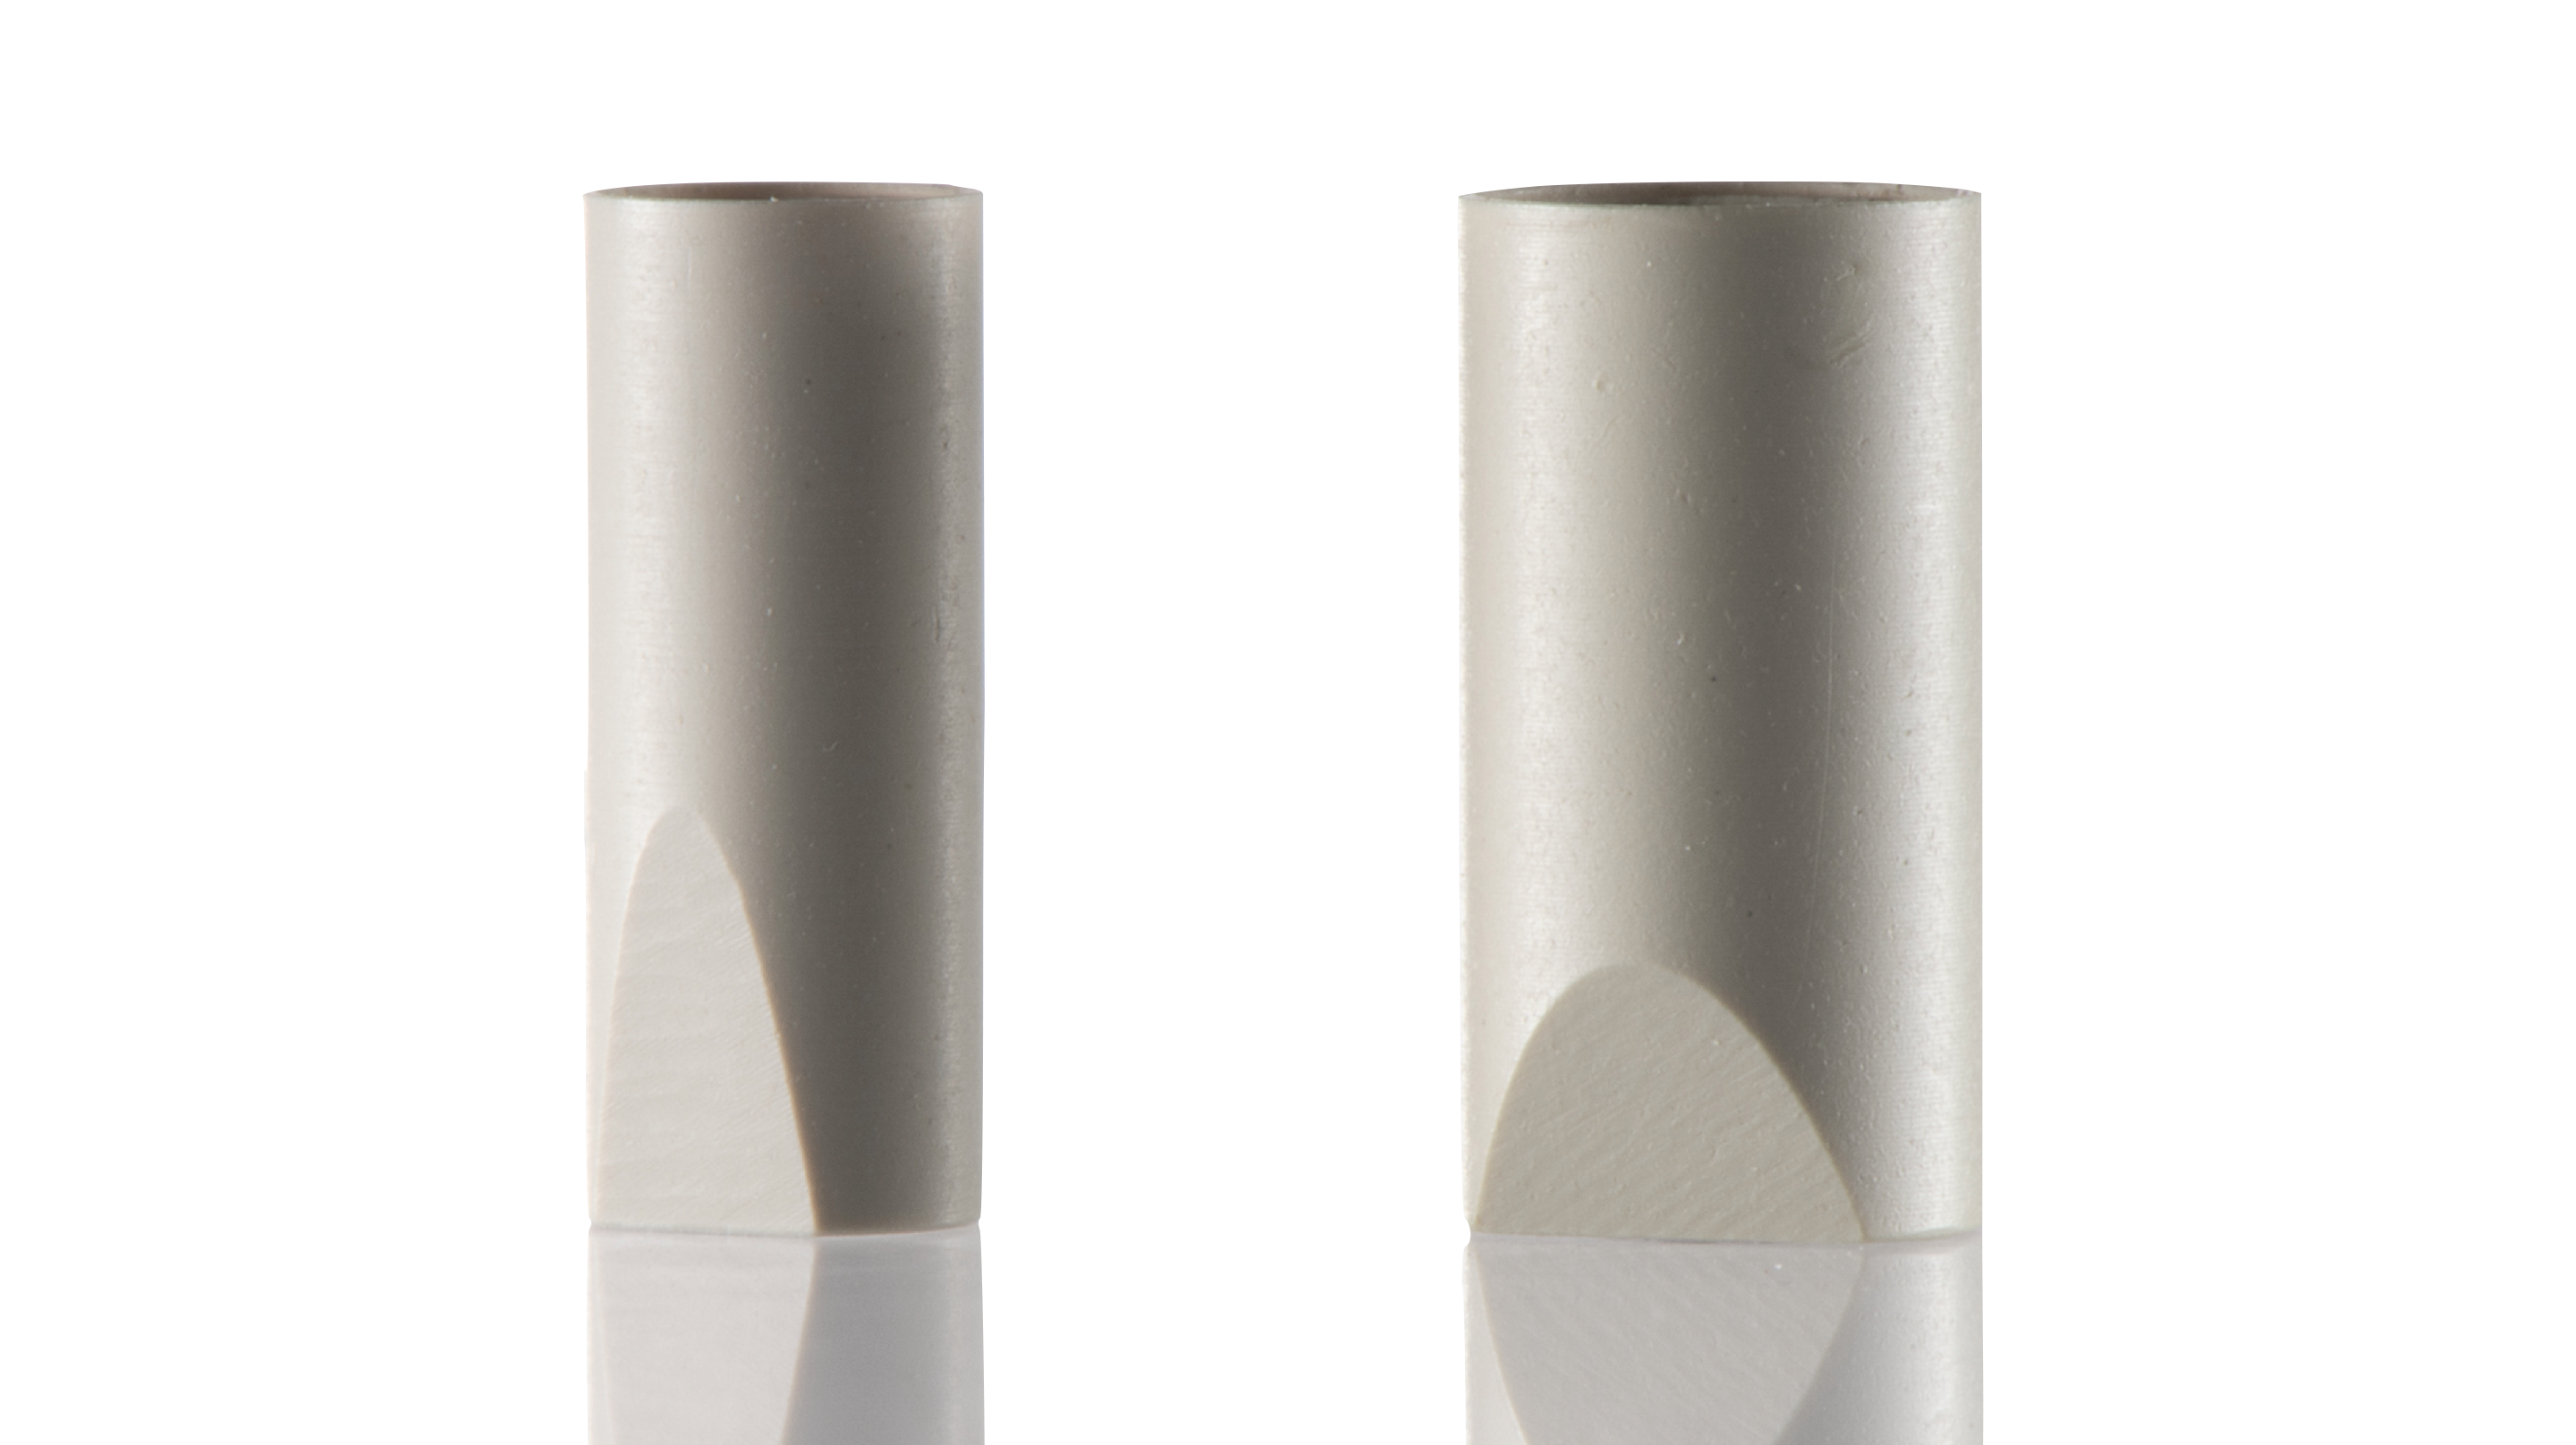
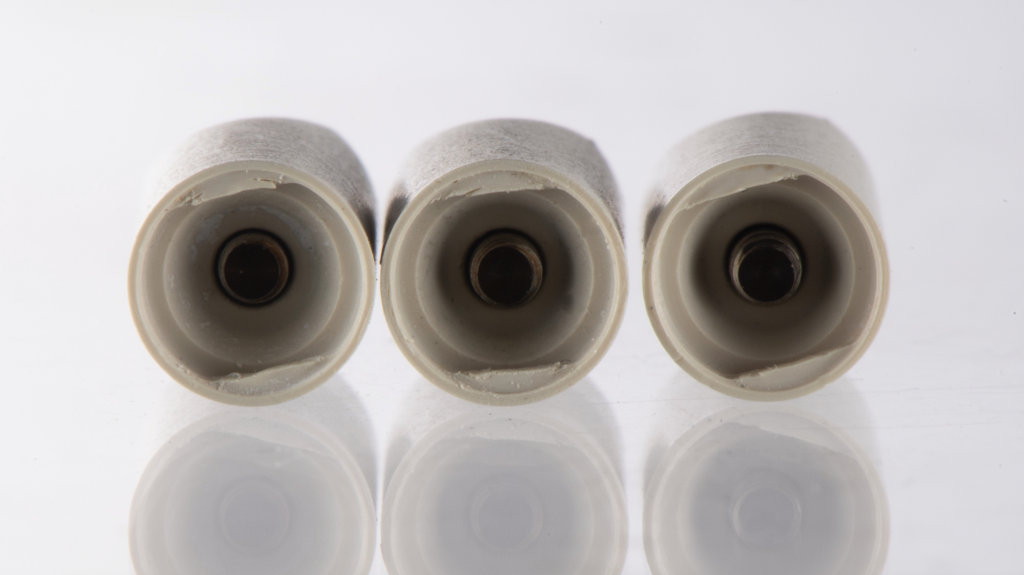
With the development of digital protocols, implant impressions became much faster and less uncomfortable for our patients. The reason for this is not just the IO scanner, but also the digital implant impression transfer – scanbodies. Scanbodies are made of different materials and come in different shapes and sizes (see pictures below). Their common trait will be the implant index indicator (for implant-level scanbodies) and a positioning marker on the upper part of the scanbody. It may be a flat wall or any specific shape that is strictly correlated with the position of the implant index and recognized in CAD/CAM software in the dental laboratory. If the scanbody has just one beveled/flat surface on the body, it is important to position it towards the vestibular or palatal side, not to the interproximal areas. In this way we ensure the highest possible amount of information about the implant index position, as the whole beveled/flat area will be easily captured by the IO scanner.
Abutment level scanbodies are available too. They’ll provide an accurate transfer of the abutment platform, yet, depending on the producer/manufacturer, they can be engaging or non-engaging. In general, we can say that implant-level and abutment-level impression transfers have corresponding implant-level and abutment-level scanbodies.
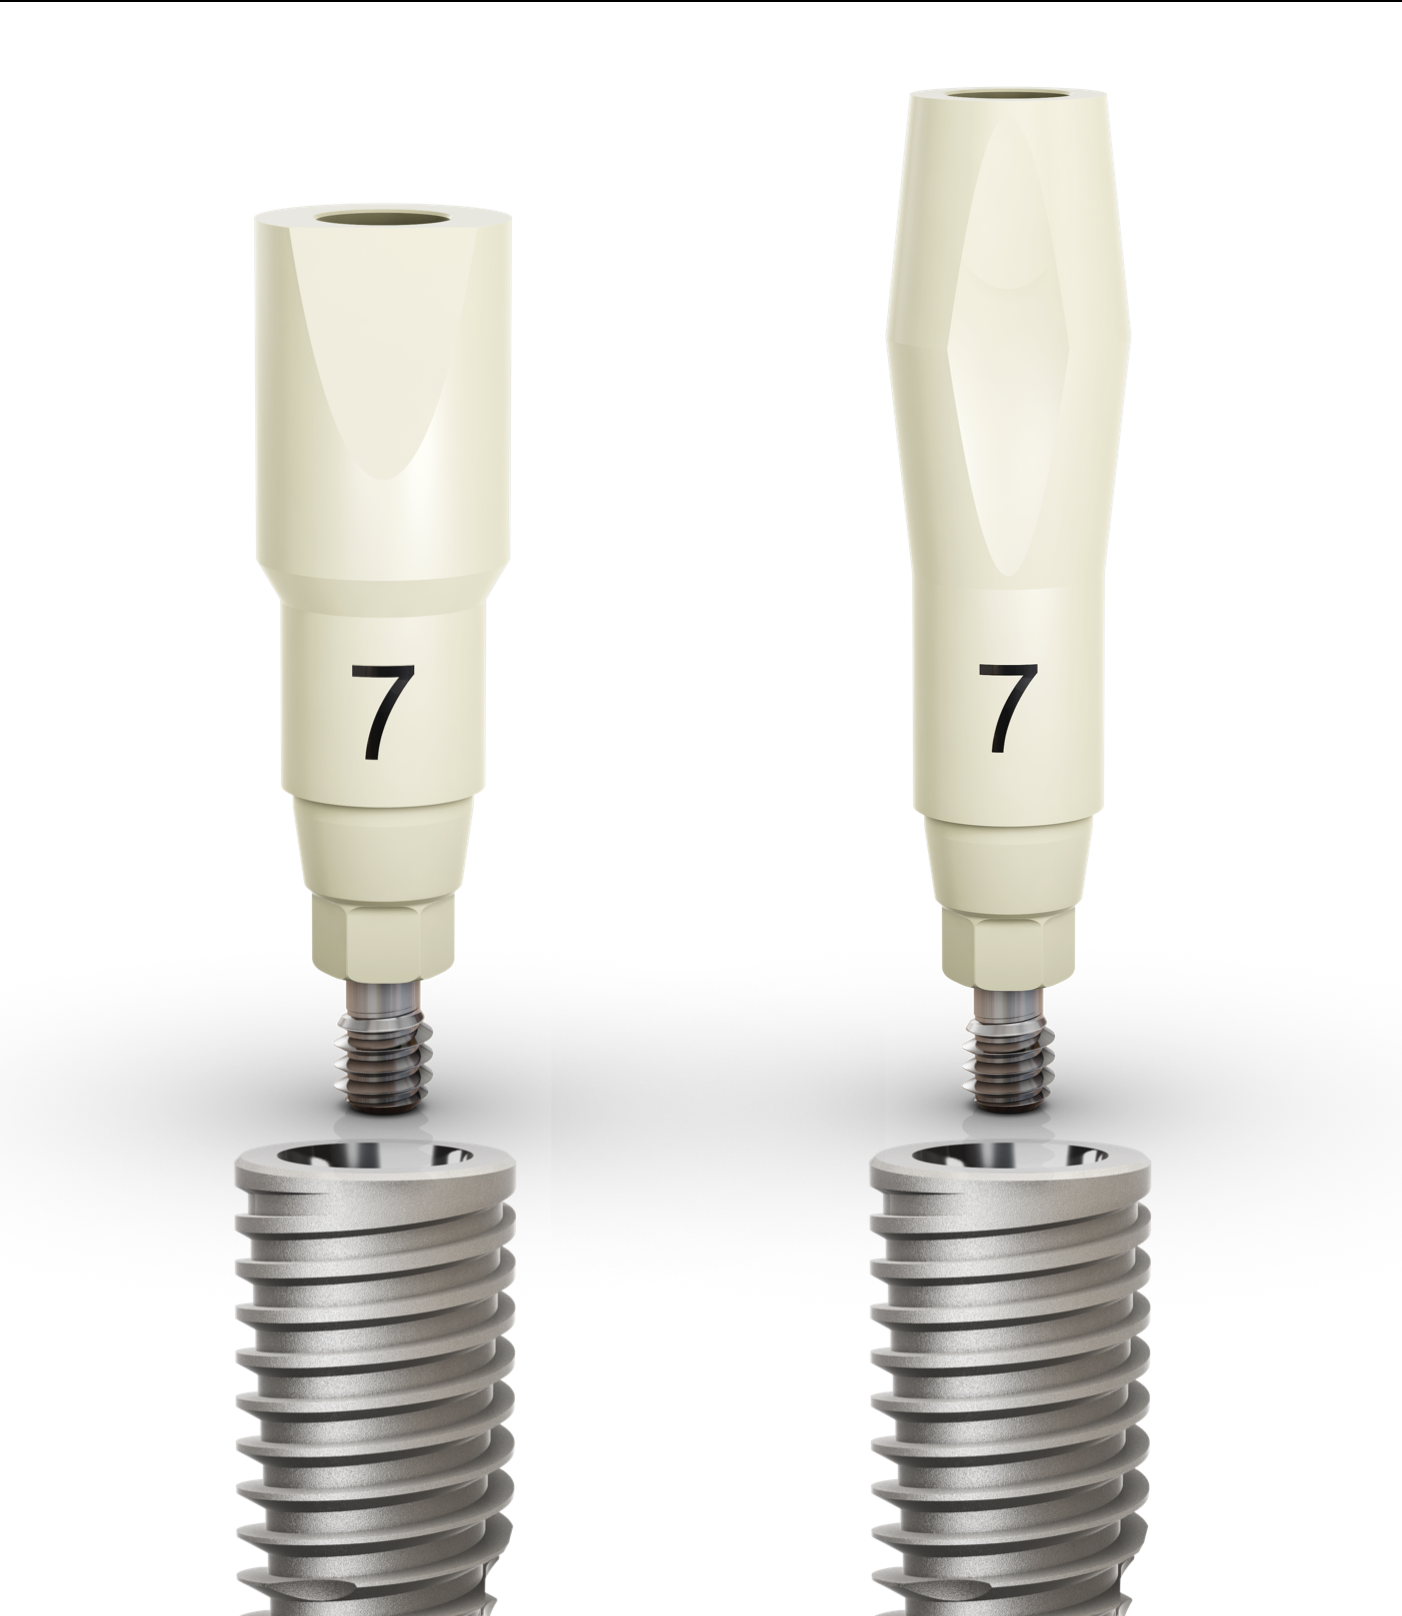
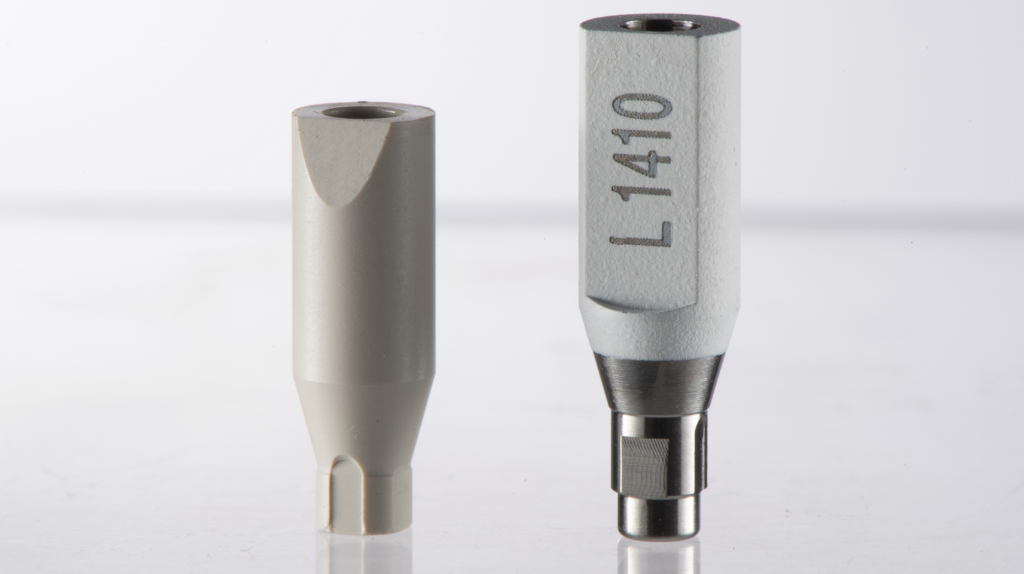
As for the materials, the rule of thumb is that the scanbody surface cannot be too reflective and needs to be scannable without the use of scanning spray, as in both cases distortions arising while scanning may compromise the final restoration quality. Therefore, typically we’ll find scanbodies made of materials like PEEK, or metal scanbodies with a powdered/painted surface, allowing for accurate scanning of the metal. The material selected will also influence the life of such parts. PEEK scanbodies are recommended for single use by the manufacturers, but they’ll also be cheaper. Metal parts come as more expensive, yet are more durable.
Many clinicians choose to sterilize and reuse scanbodies, even if they are made of PEEK. There is no reason not to do so as long as the scanbody is not damaged. Under no circumstances should the scanbody rotate in the implant or on the abutment, in the case of engaging abutment-level scanbodies. Some of most common reasons for such index damage is screwing down the scanbodies with the wrong degree of force or in the wrong position. To avoid such mistakes, it is necessary to position the scanbody in the implant index/on the abutment index and make sure it fits without rotation, then screw it down using the force recommended by the scanbody manufacturer. Do not tighten the screw if you’re not sure about the position, as you might crush the plastic surfaces of the scanbody. Similarly, do not exceed the force recommended by the provider as the index might get crushed and decalibrate. Using scanbodies with a damaged index may result in restoration mistakes similar to mistakes caused by implant transfer mobility in the impression masses. Our final crown may be rotated or tilted, even if it fits in the position.
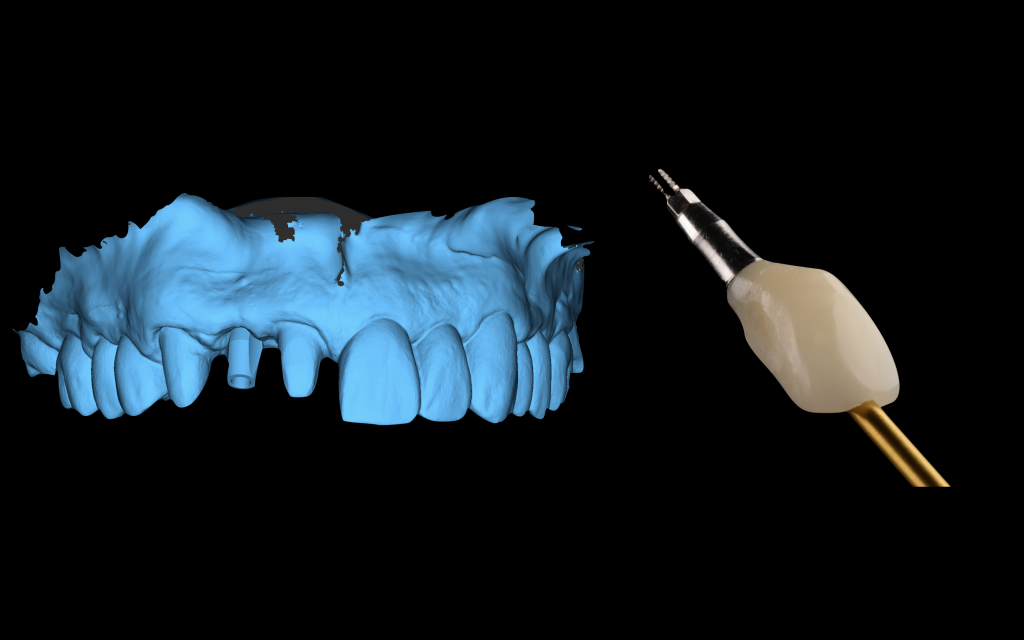
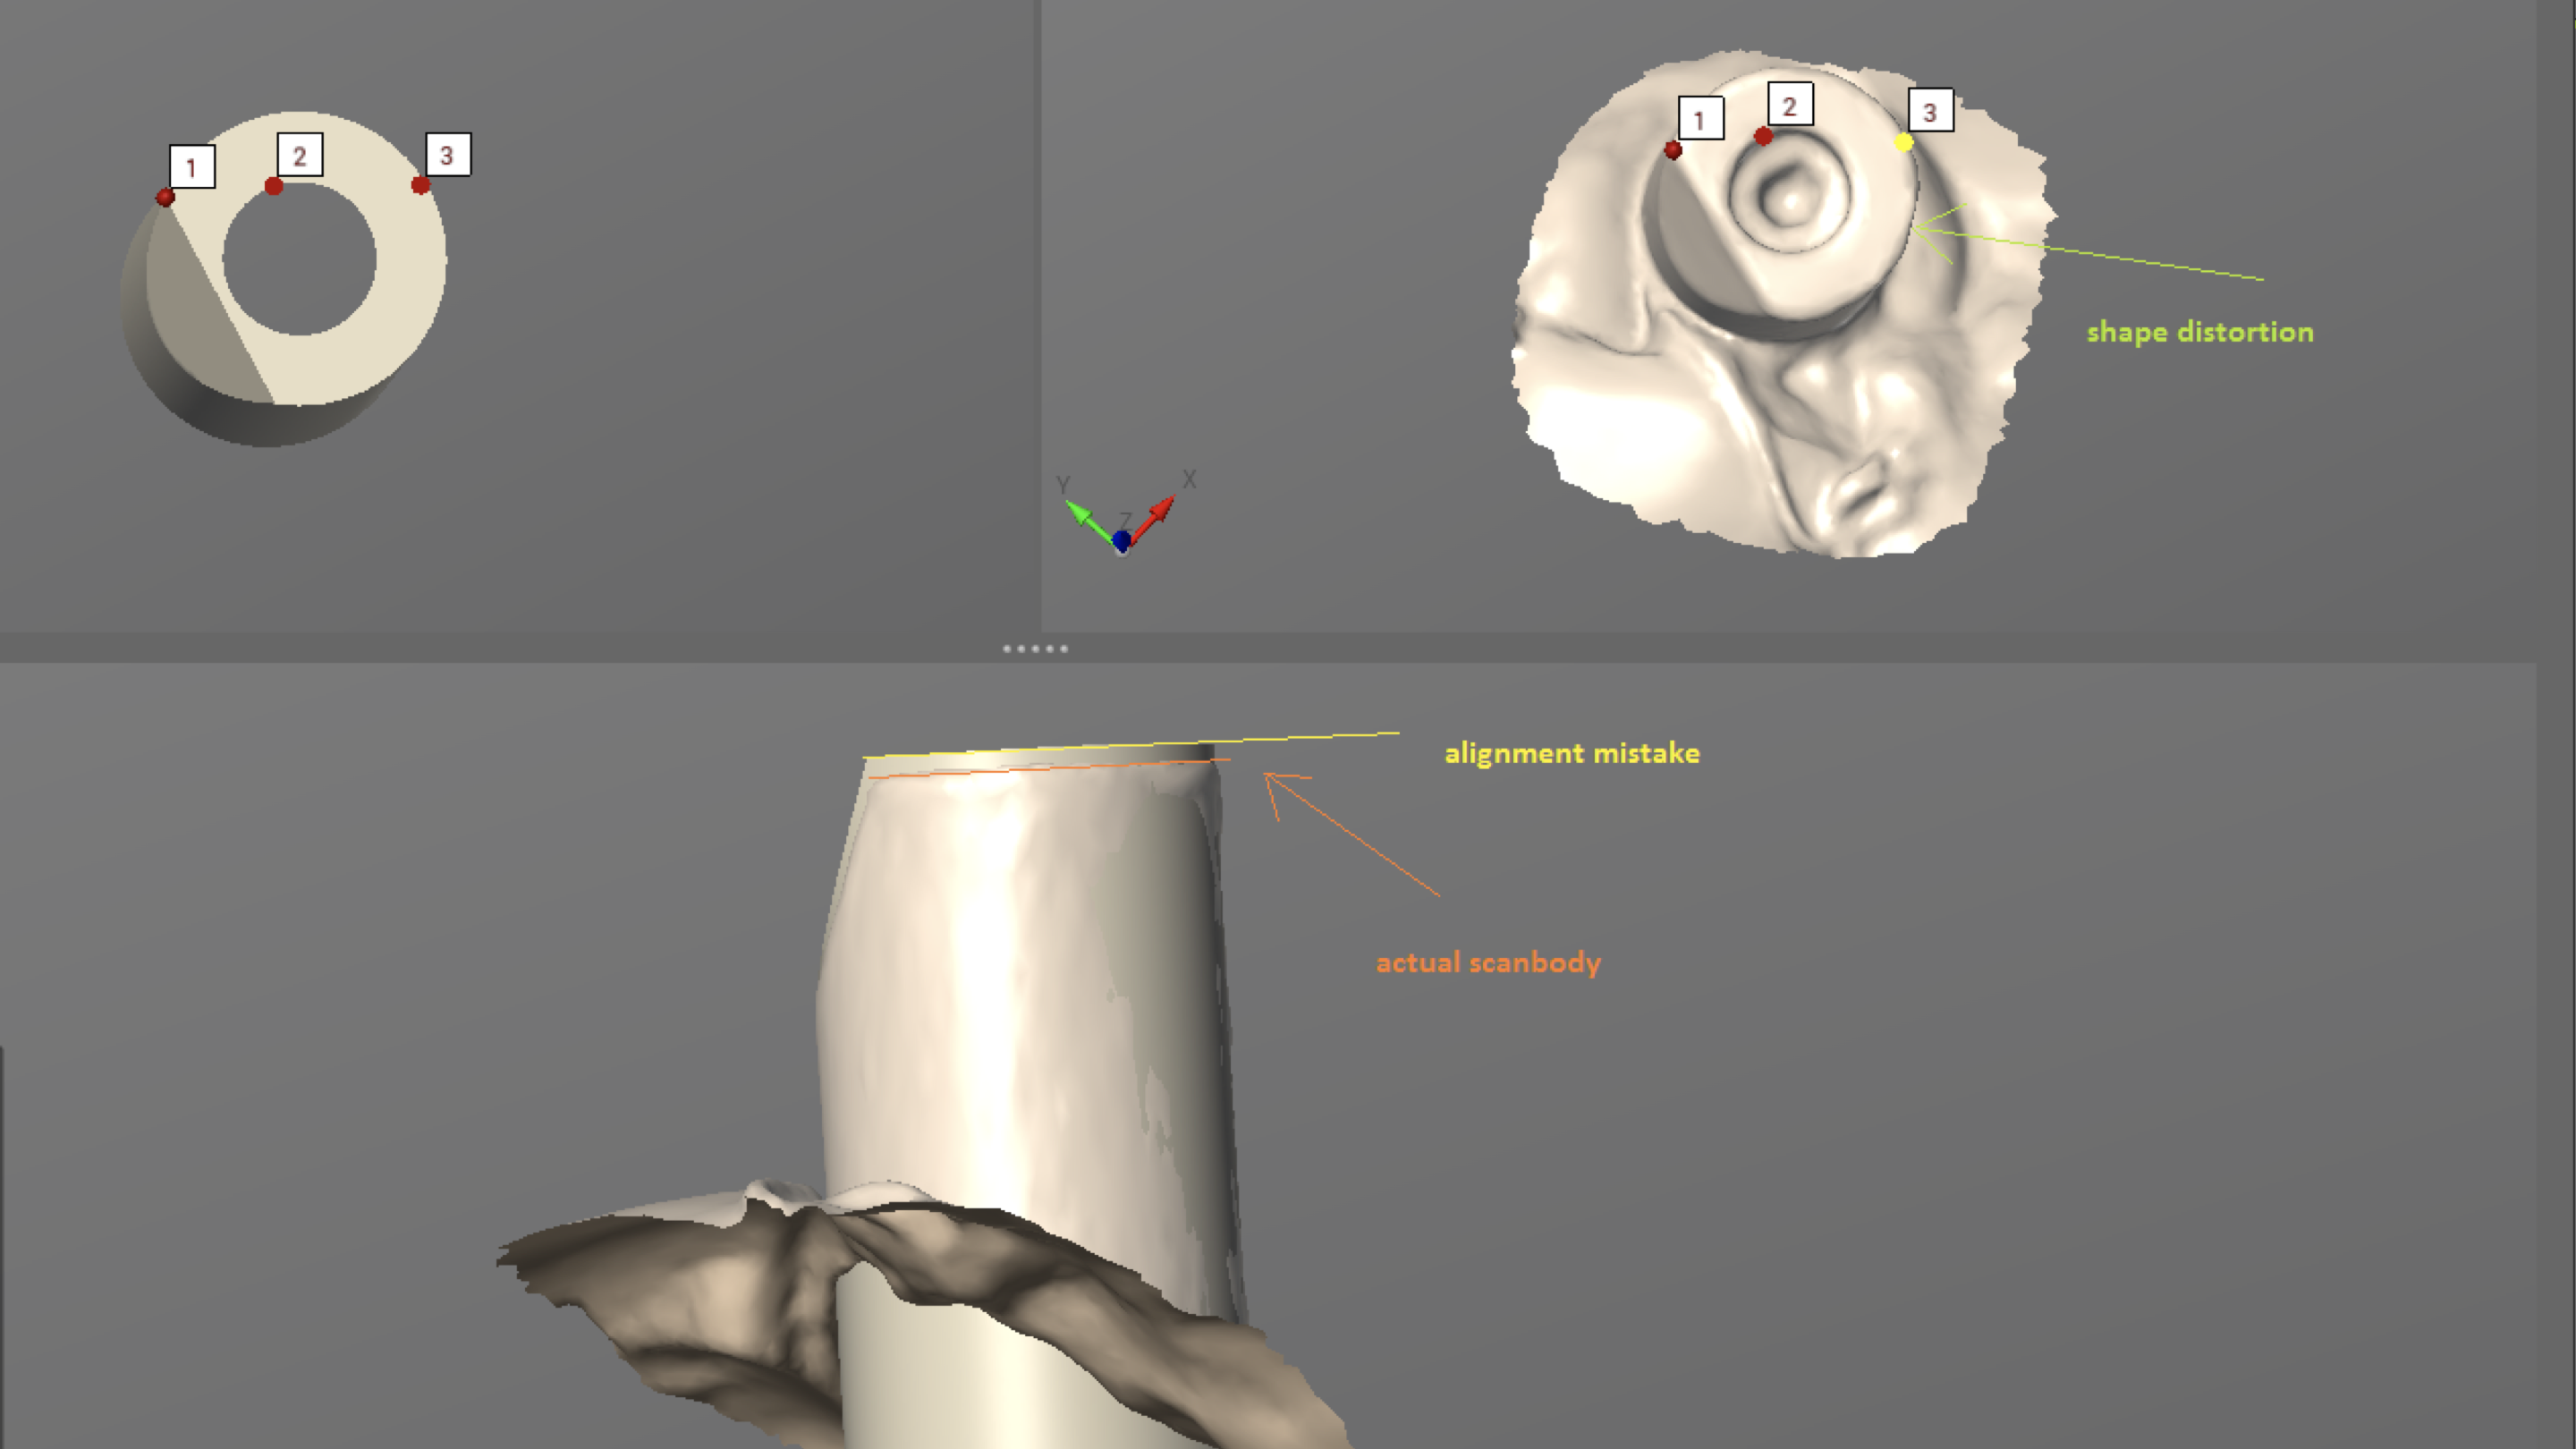
We also need to keep in mind that the upper part of the scanbody should not be deformed or scratched, as the CAD/CAM software in the lab may not recognize the part, and restoration quality may be impaired or restoration made impossible without repeating the digital impressions. Following our scans, the technicians superimpose virtual library files of scanbodies, containing information about the distance to implant platform and implant index position, on the scan we have performed. If the scanbodies are distorted, the matching process may be affected. Similarly, if our scanbodies are in perfect shape, yet our intraoral scans are deformed inn the scanbody area, typically due to an incorrect scanning path, the geometry of the scanbody on our digital impression may be distorted and the alignment process impaired. As mentioned before, IO scanners are great tools, but just tools. The scanning path influences the scan quality and incorrect scanning techniques cause additional distortions on the digital impressions – in the same way as air bubbles pull traditional impression masses.

Summary
Intra oral scanners open new doors to control our implant-prosthetics. The digital protocols are supposed to make our restorations more precise, predictable and allow for faster delivery of our works. Scanbodies are big help to replace traditional implant impressions, bringing new learning opportunities. Stay tuned for another article on how to choose your scanbodies and scanning tips & tricks 🙂
Related article: