Provisional prostheses play an essential role in testing prosthodontic parameters before the construction of definitive restorations. These parameters include soft tissue shaping for an optimal emergence profile, the occlusal scheme, and esthetics.
The fabrication of such transitional prostheses is not mandatory for every patient, but some of the factors that influence my decision to make a provisional or not are:
- implant location, in the esthetic zone, I would make a provisional every single time, but for posterior implants, sometimes we can skip this phase. David Furze and coworkers showed that the esthetic outcomes are better when fabricating provisional restorations versus not having one (Furze et al. 2016).
- implant number, multiple implants, and especially in fixed reconstructions of edentulous arches.
- need to shape the tissue, even in posterior sites that have thick tissue.
- need for occlusal support; sometimes we need to stage the treatment, and building occlusal support is essential before moving to other phases.
- Patients’ wishes, some of our patients want to have a tooth as soon as possible for different reasons, and that can be a factor, especially when you don’t have a local laboratory technician or it is a long turnaround time for the final restoration. This can actually improve your delivery with fewer interproximal and occlusal adjustments because the provisional restoration will help to maintain contact points and prevent tooth movement.
These transitional restorations can be fabricated for screw or cement retention, but my personal preference is for screw-retained provisionals even when access is less than ideal.
Screw-retained provisionals allow the restoration to be pulled through the tissue, and it is more advantageous for multiple reasons, including retrievability, tissue shaping, tissue health, no risk for remaining cement, and ease of modification (Morton et al. 2014; Buser et al. 2004)
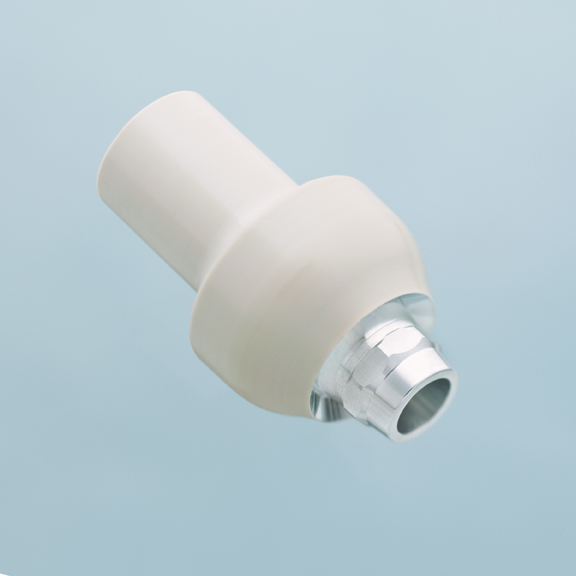
There are many materials and components that can be used for fabrication. The provisional abutments can be made of PEEK, titanium, or PMMA, or a definitive zirconia abutment can be used as well. Most of my clinical experience is with titanium abutments; they are easy to modify but it can sometimes be hard to conceal the gray color. PEEK abutments can be a great alternative because of the favorable color, but they may need more shape modifications and unique techniques for bonding the veneer material. That brings us to the veneer or core material used, which can be an acrylic base like PMMA, chemically cured composite like Bis-GMA, light-cured composite resin, 3D printed resin or milled resin.
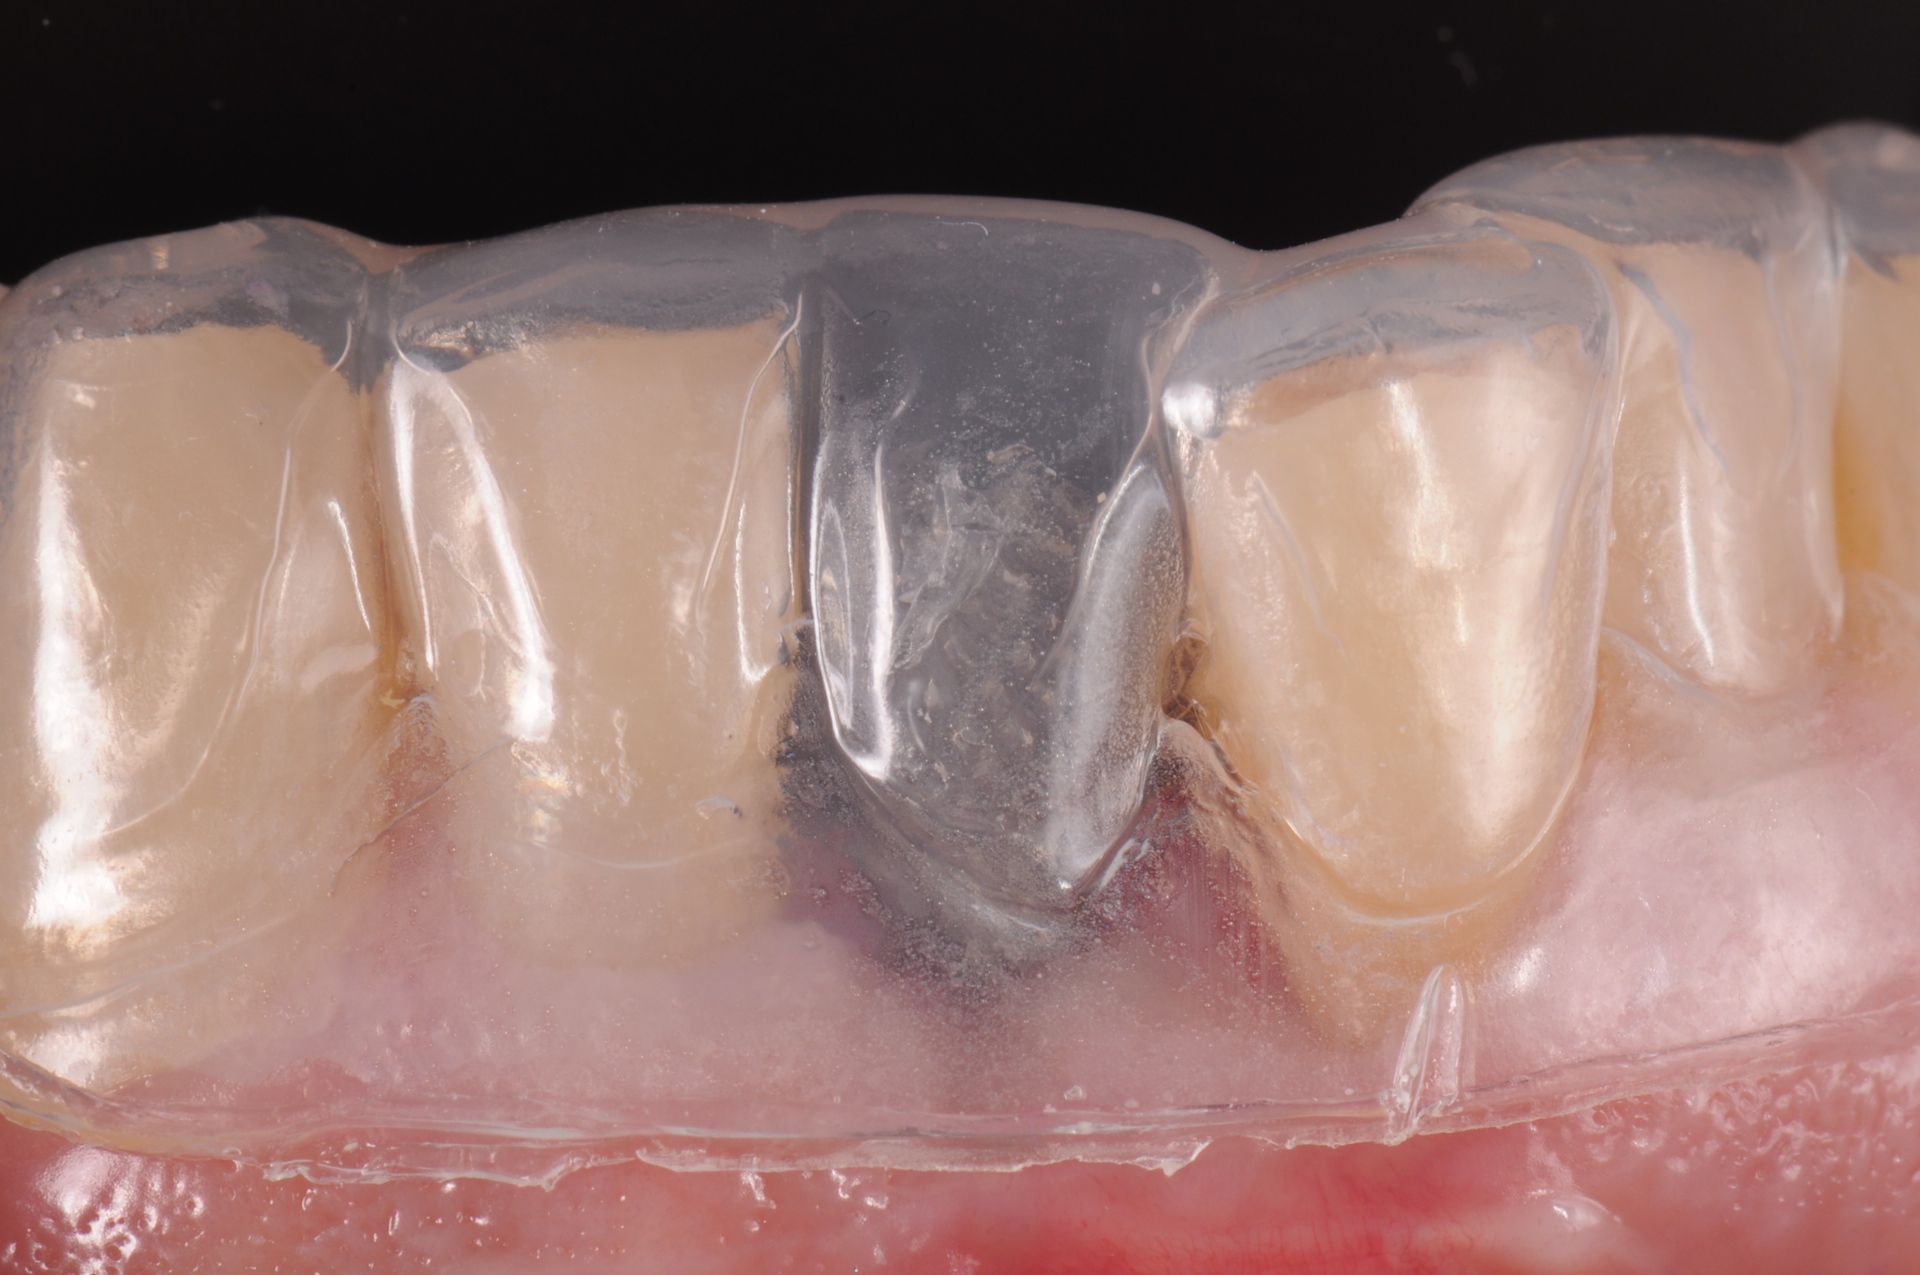
The most frequently used core materials in our practice currently are PMMA or Bis-GMA, and most of our provisionals are made intraorally, but we are seeing a shift to digitally designed and milled or 3D printed provisionals. When fabricating this restoration directly in the mouth or on a model, you will need a matrix that transfers the shape from the tooth set-up or wax-up. This matrix can be made of a clear PVS material or a thermoplastic vacuum-formed tray.
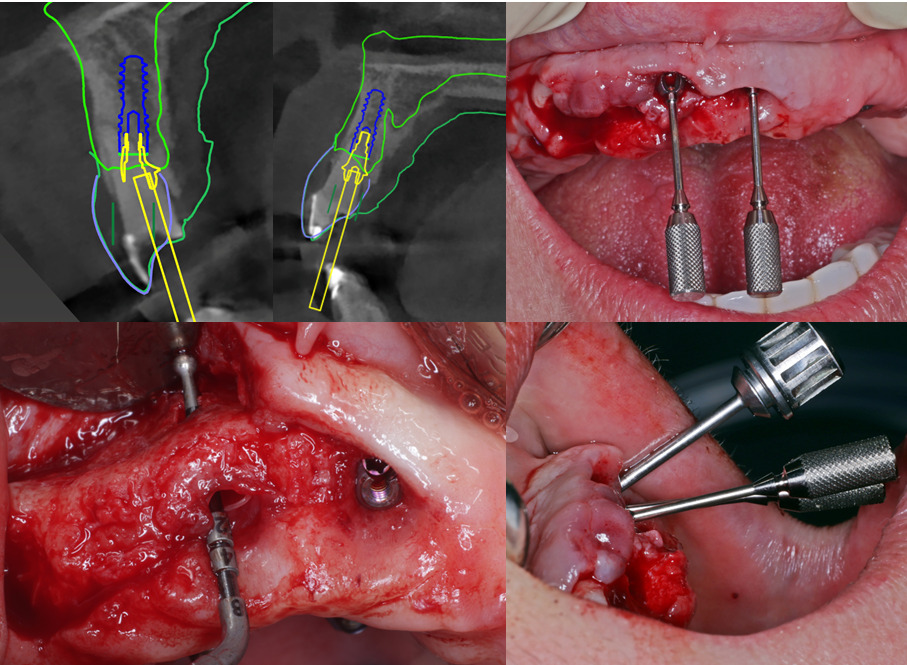
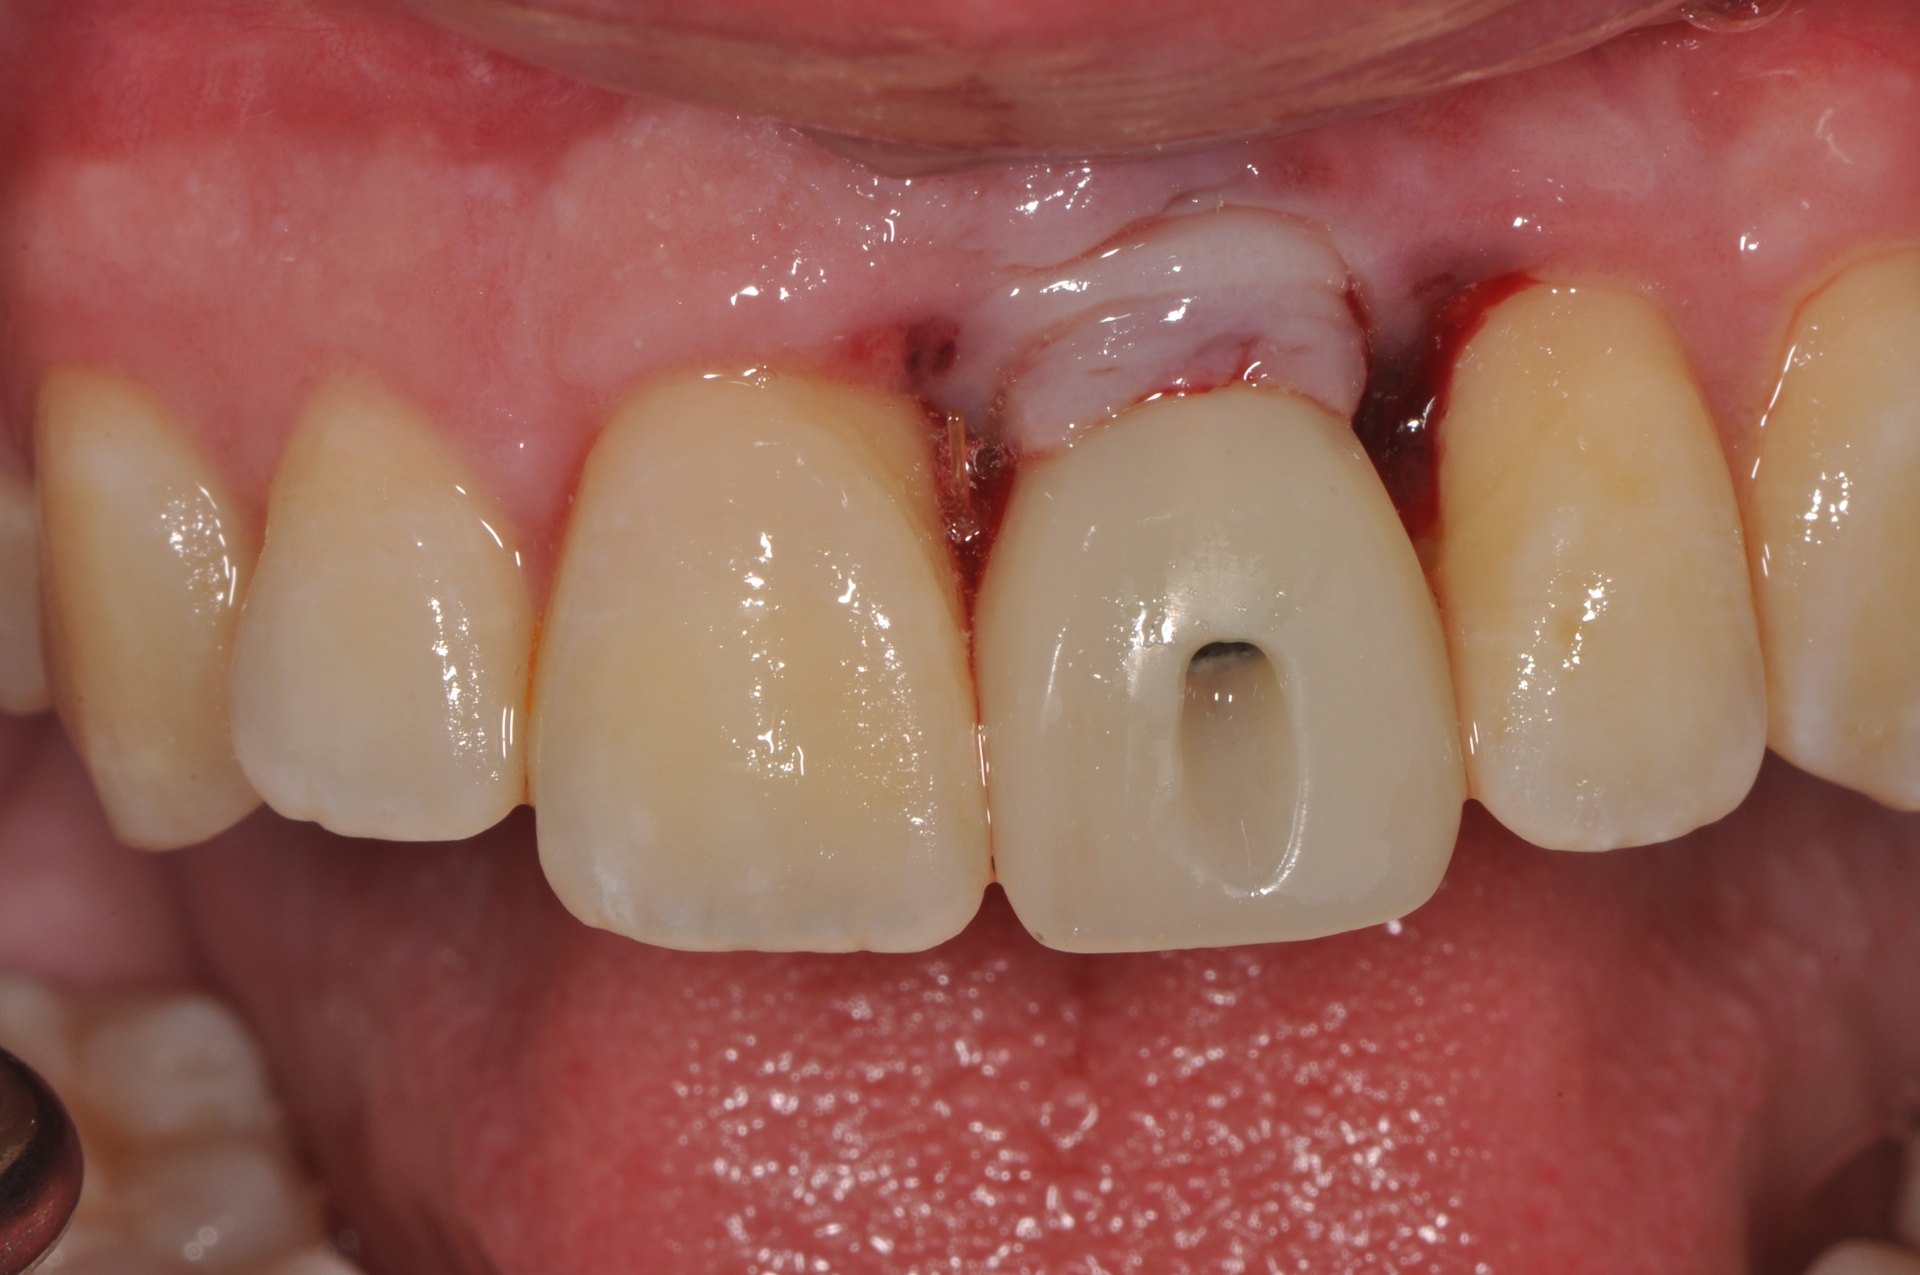
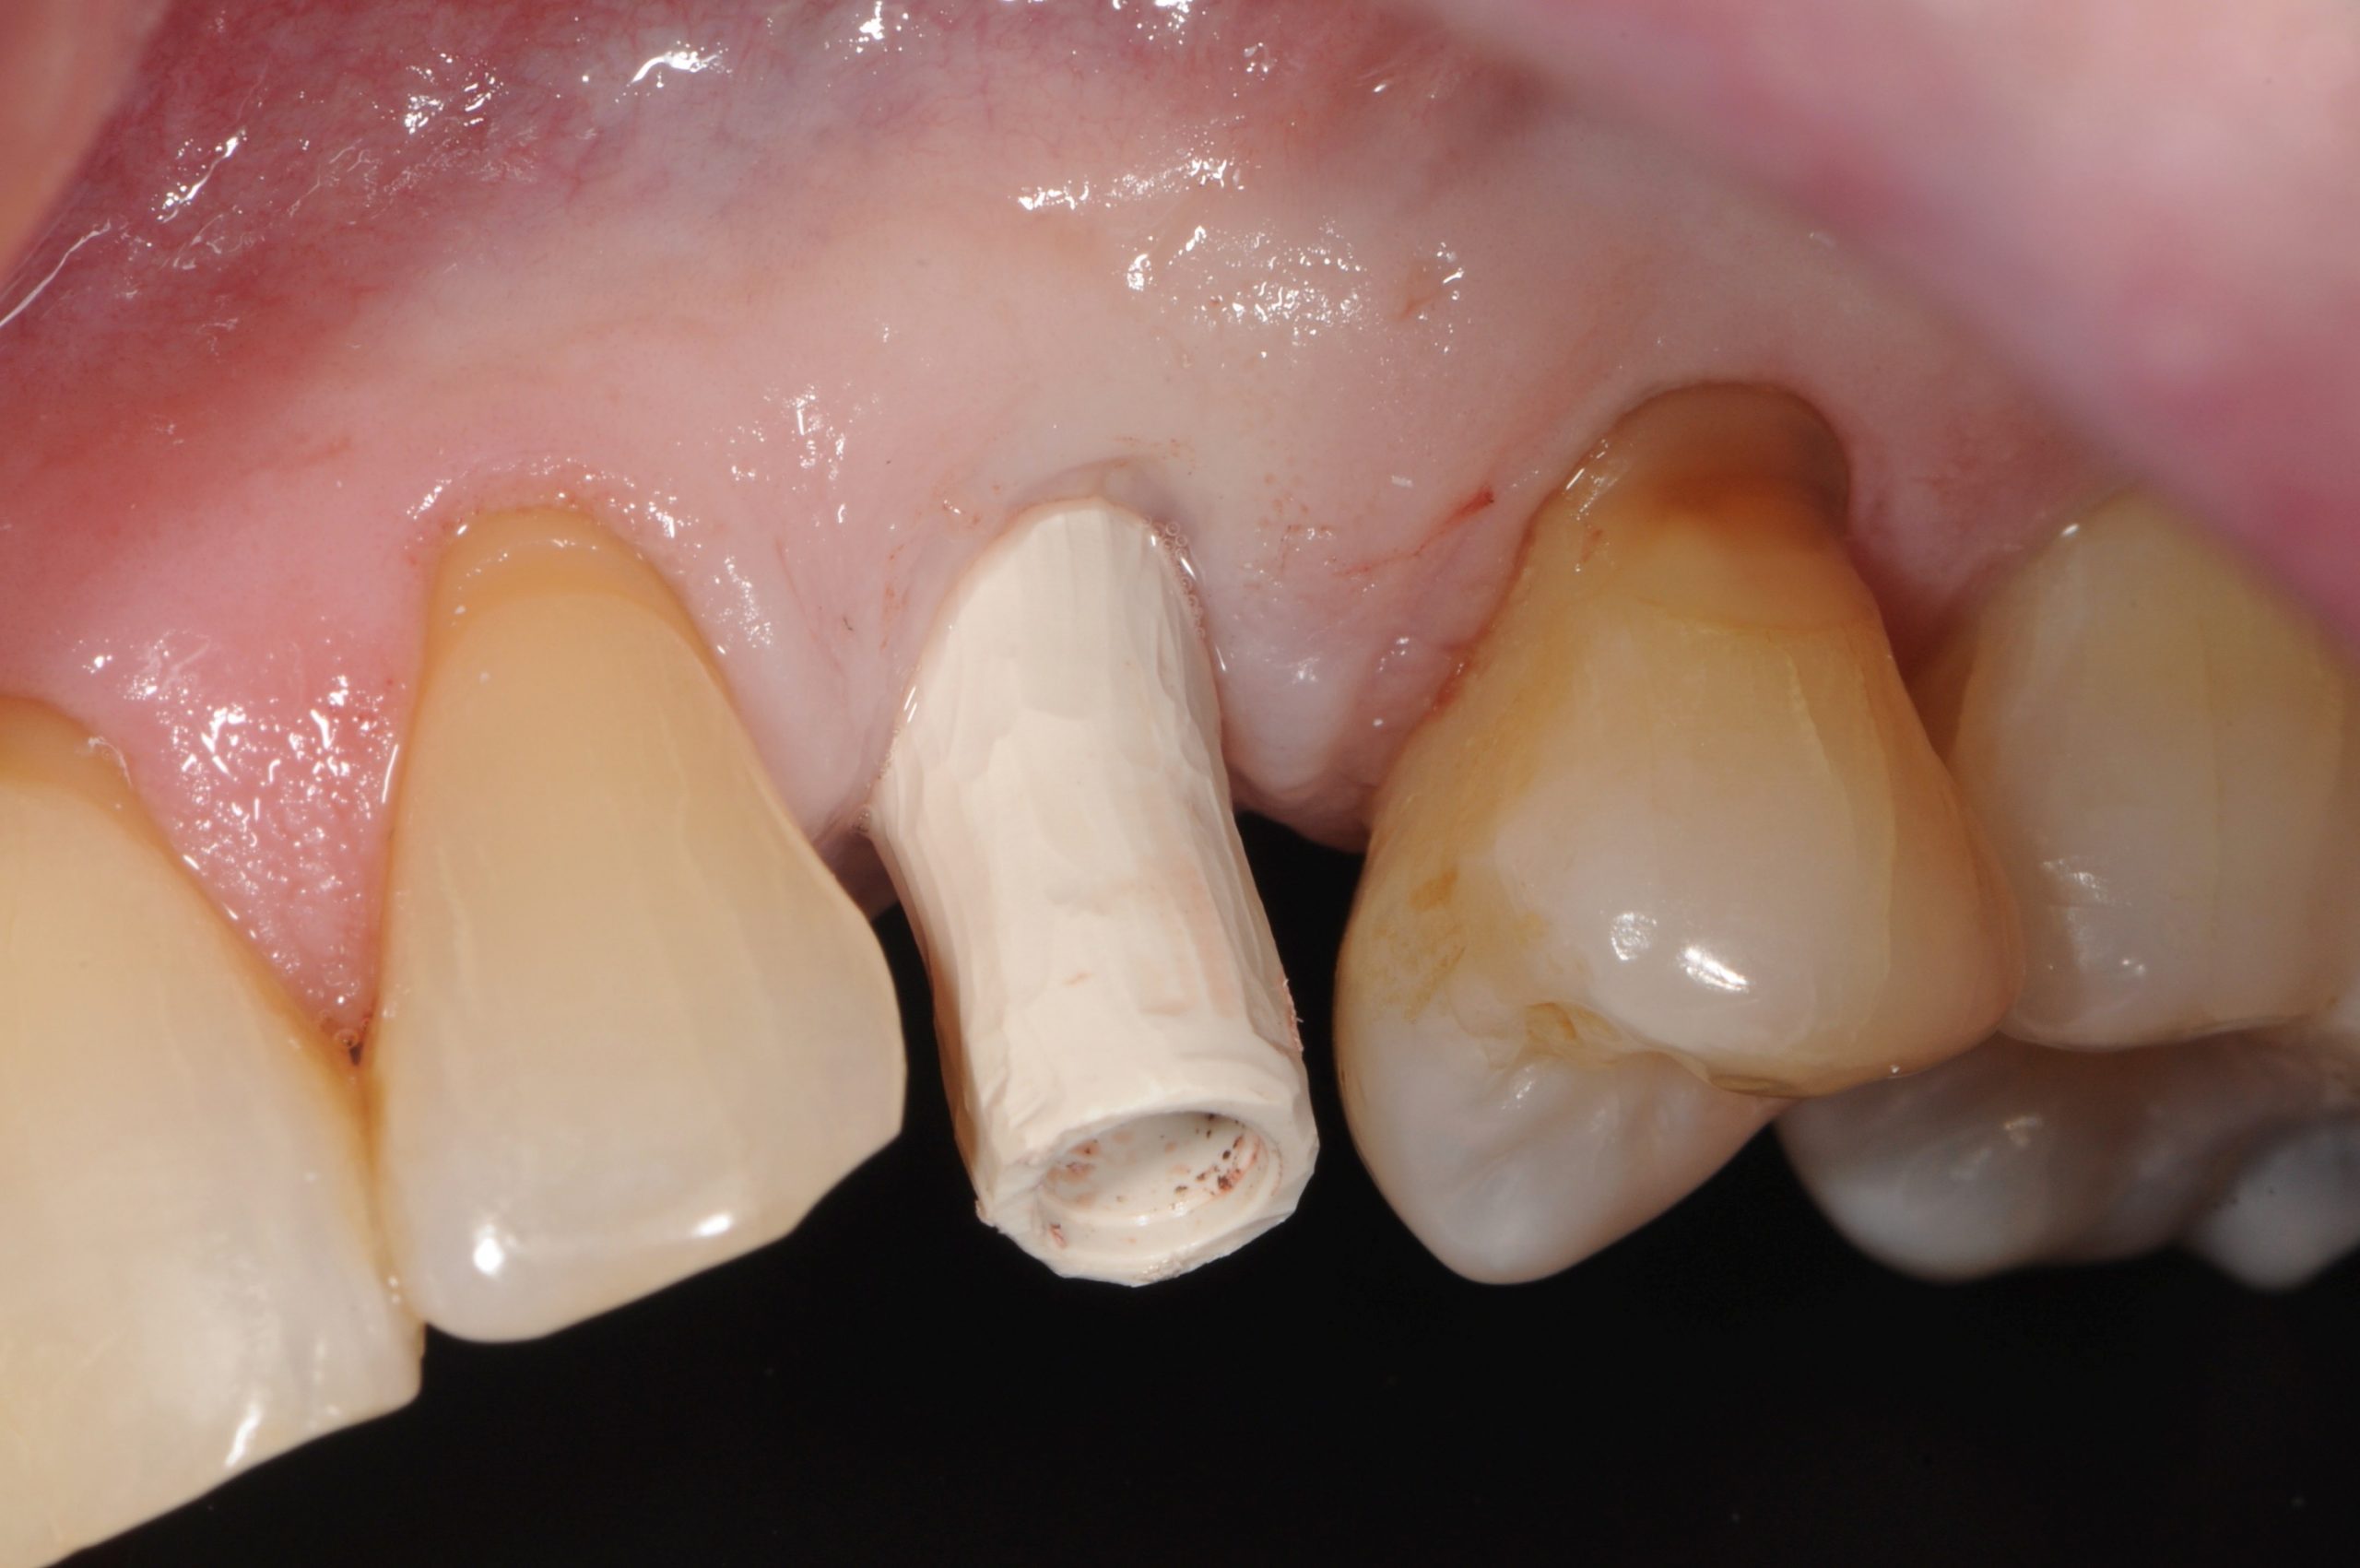
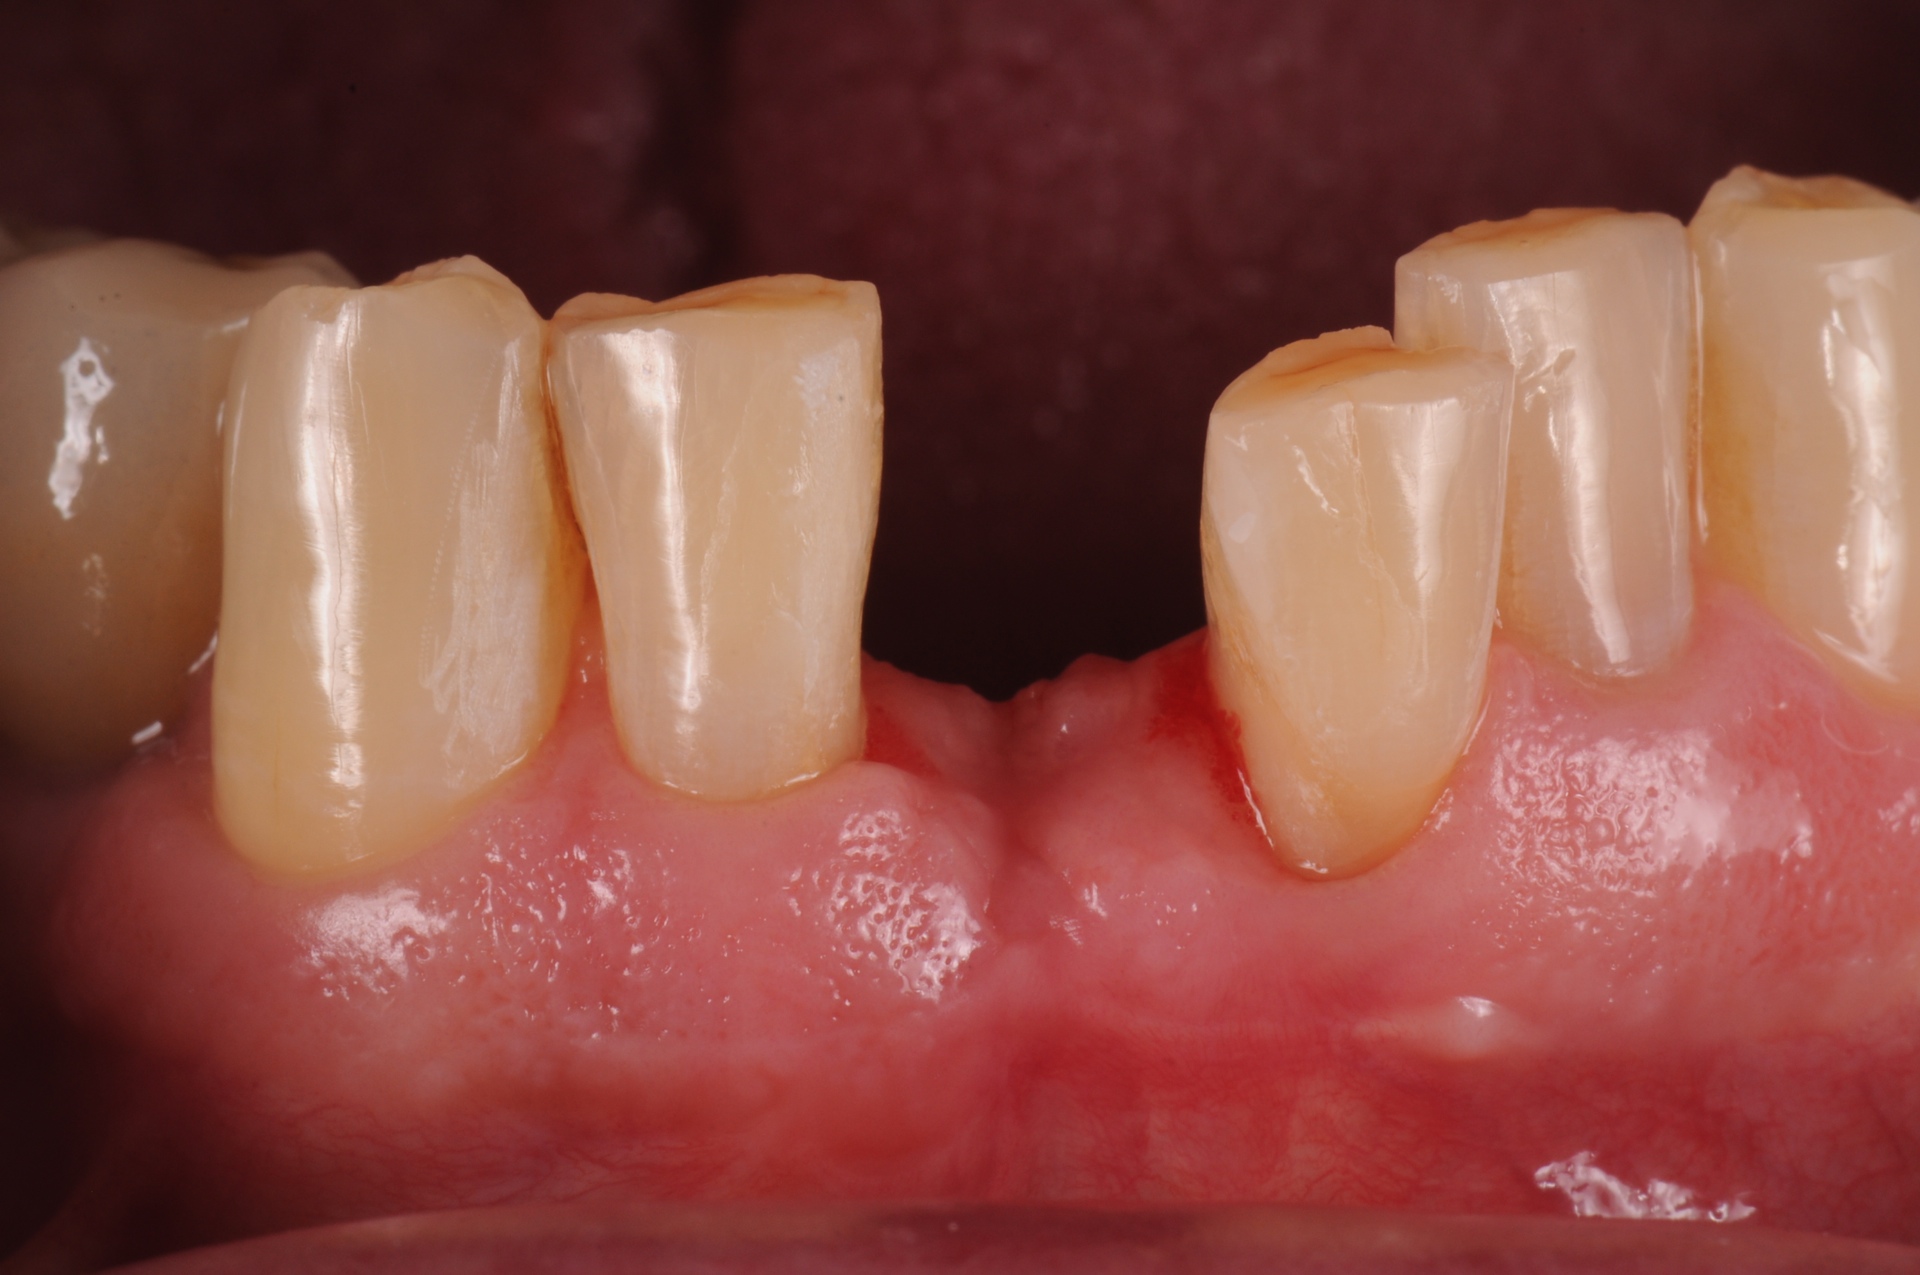
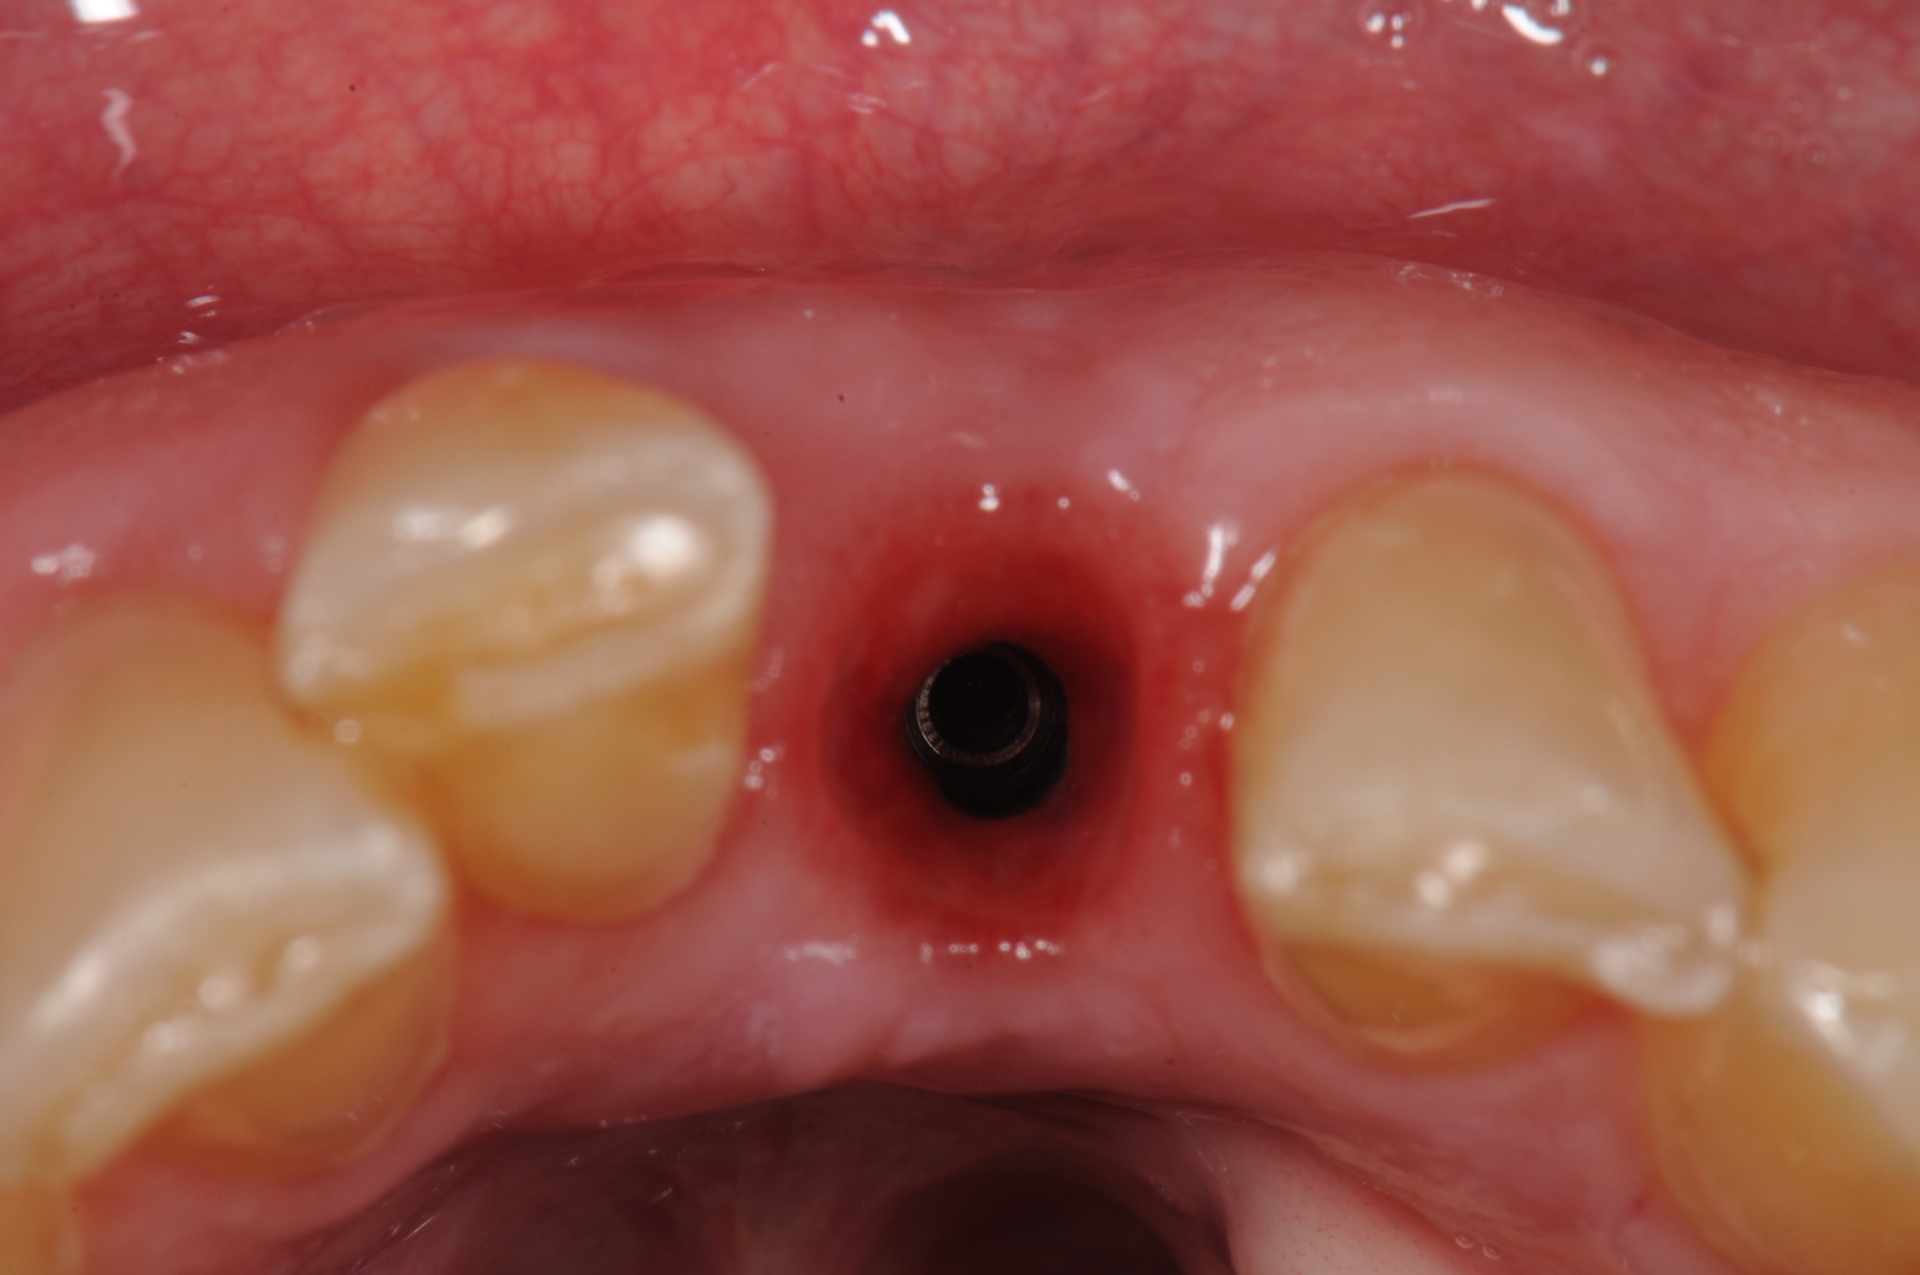
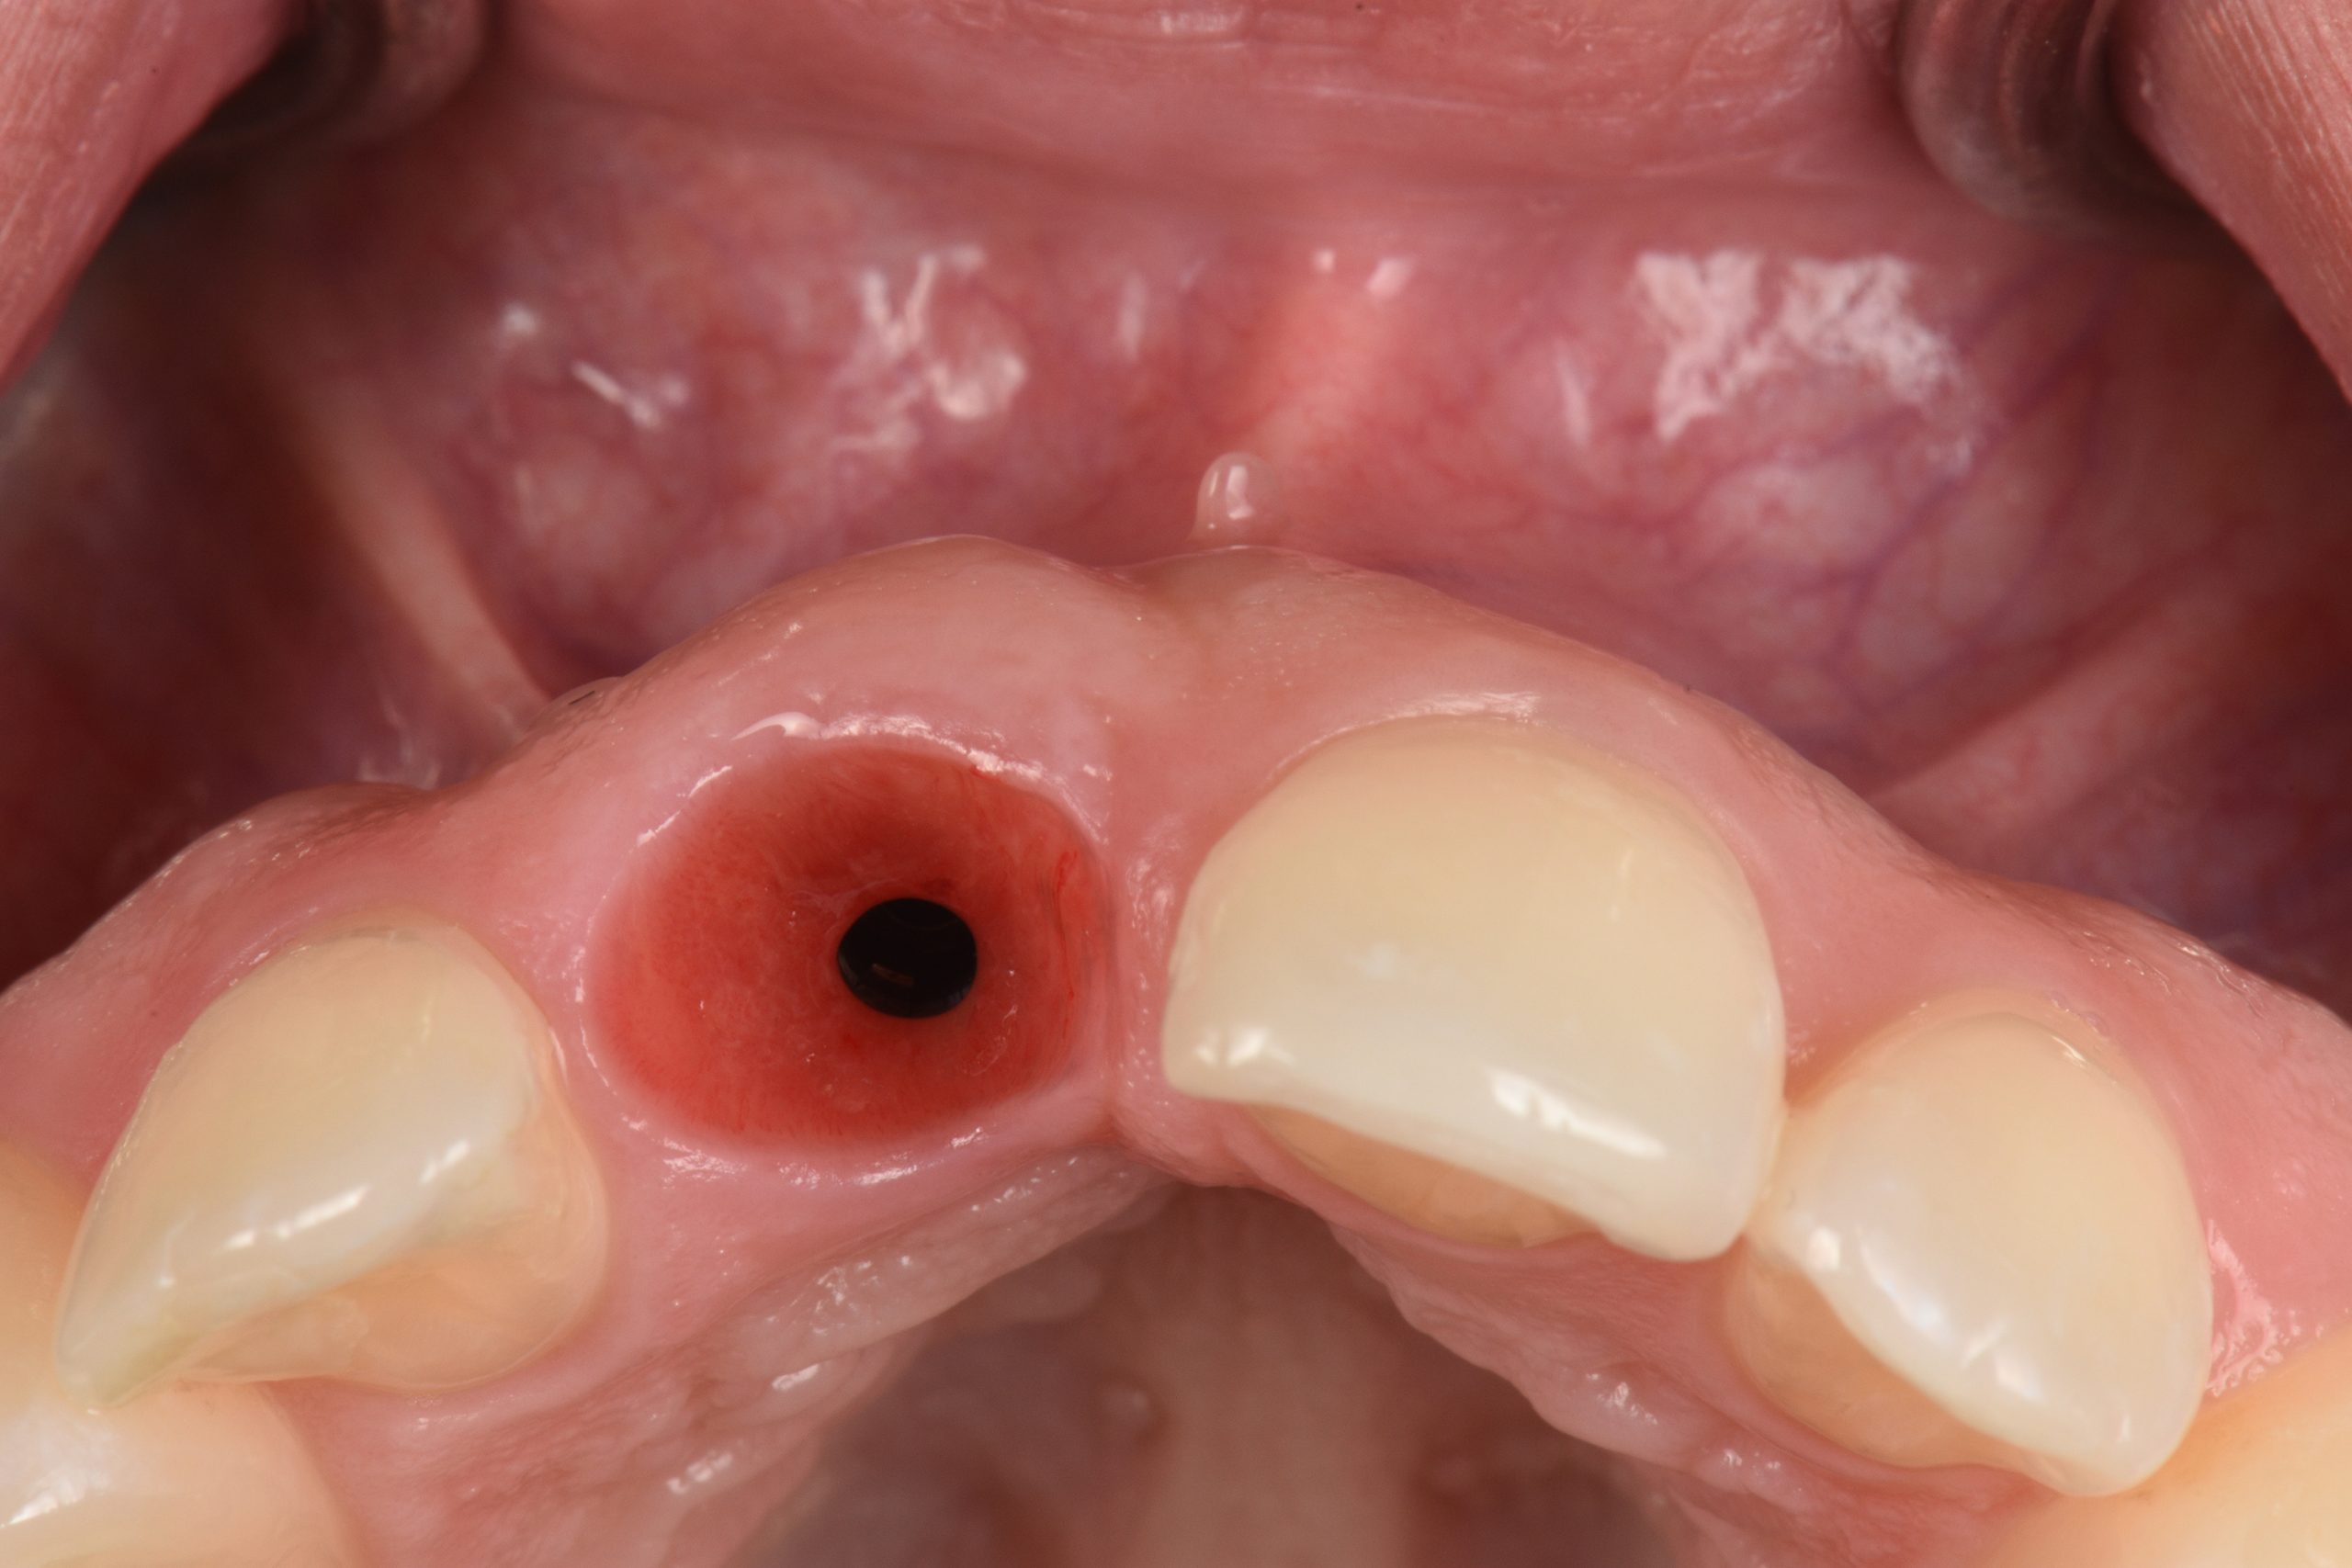
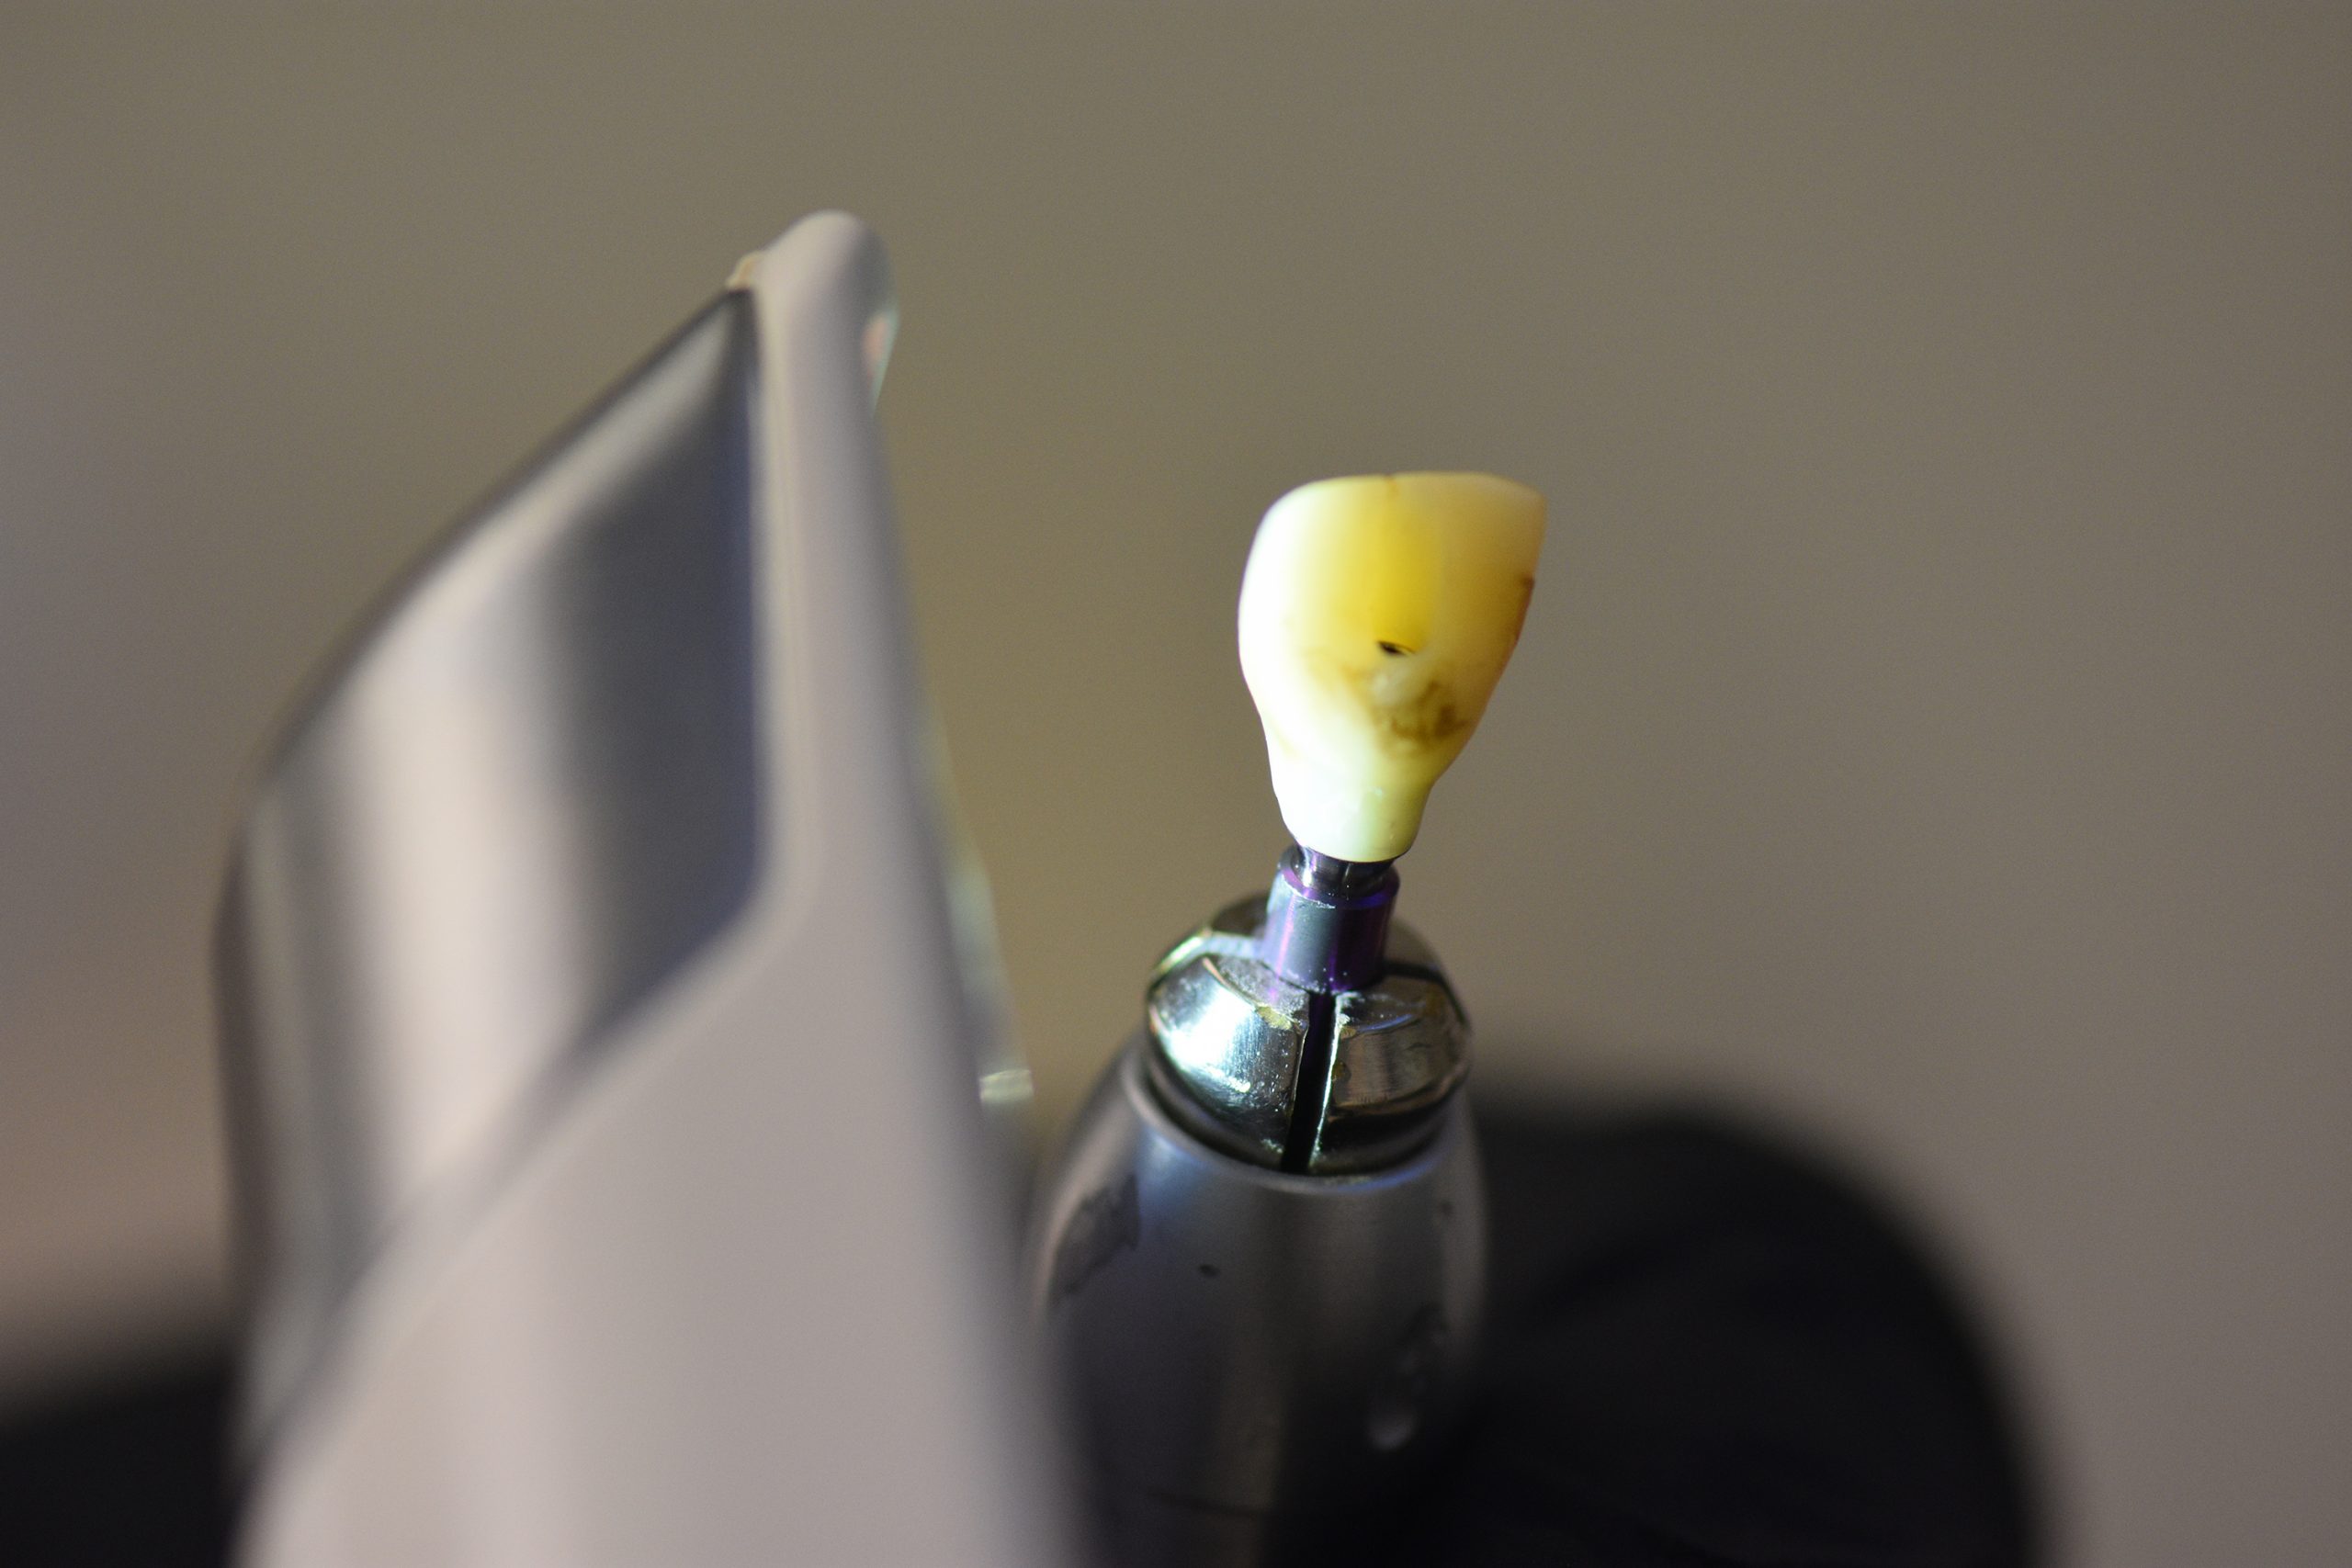
This patient treatment illustrates the direct fabrication of an implant restoration of a maxillary canine 10 weeks after immediate implant placement (Fig. 2).
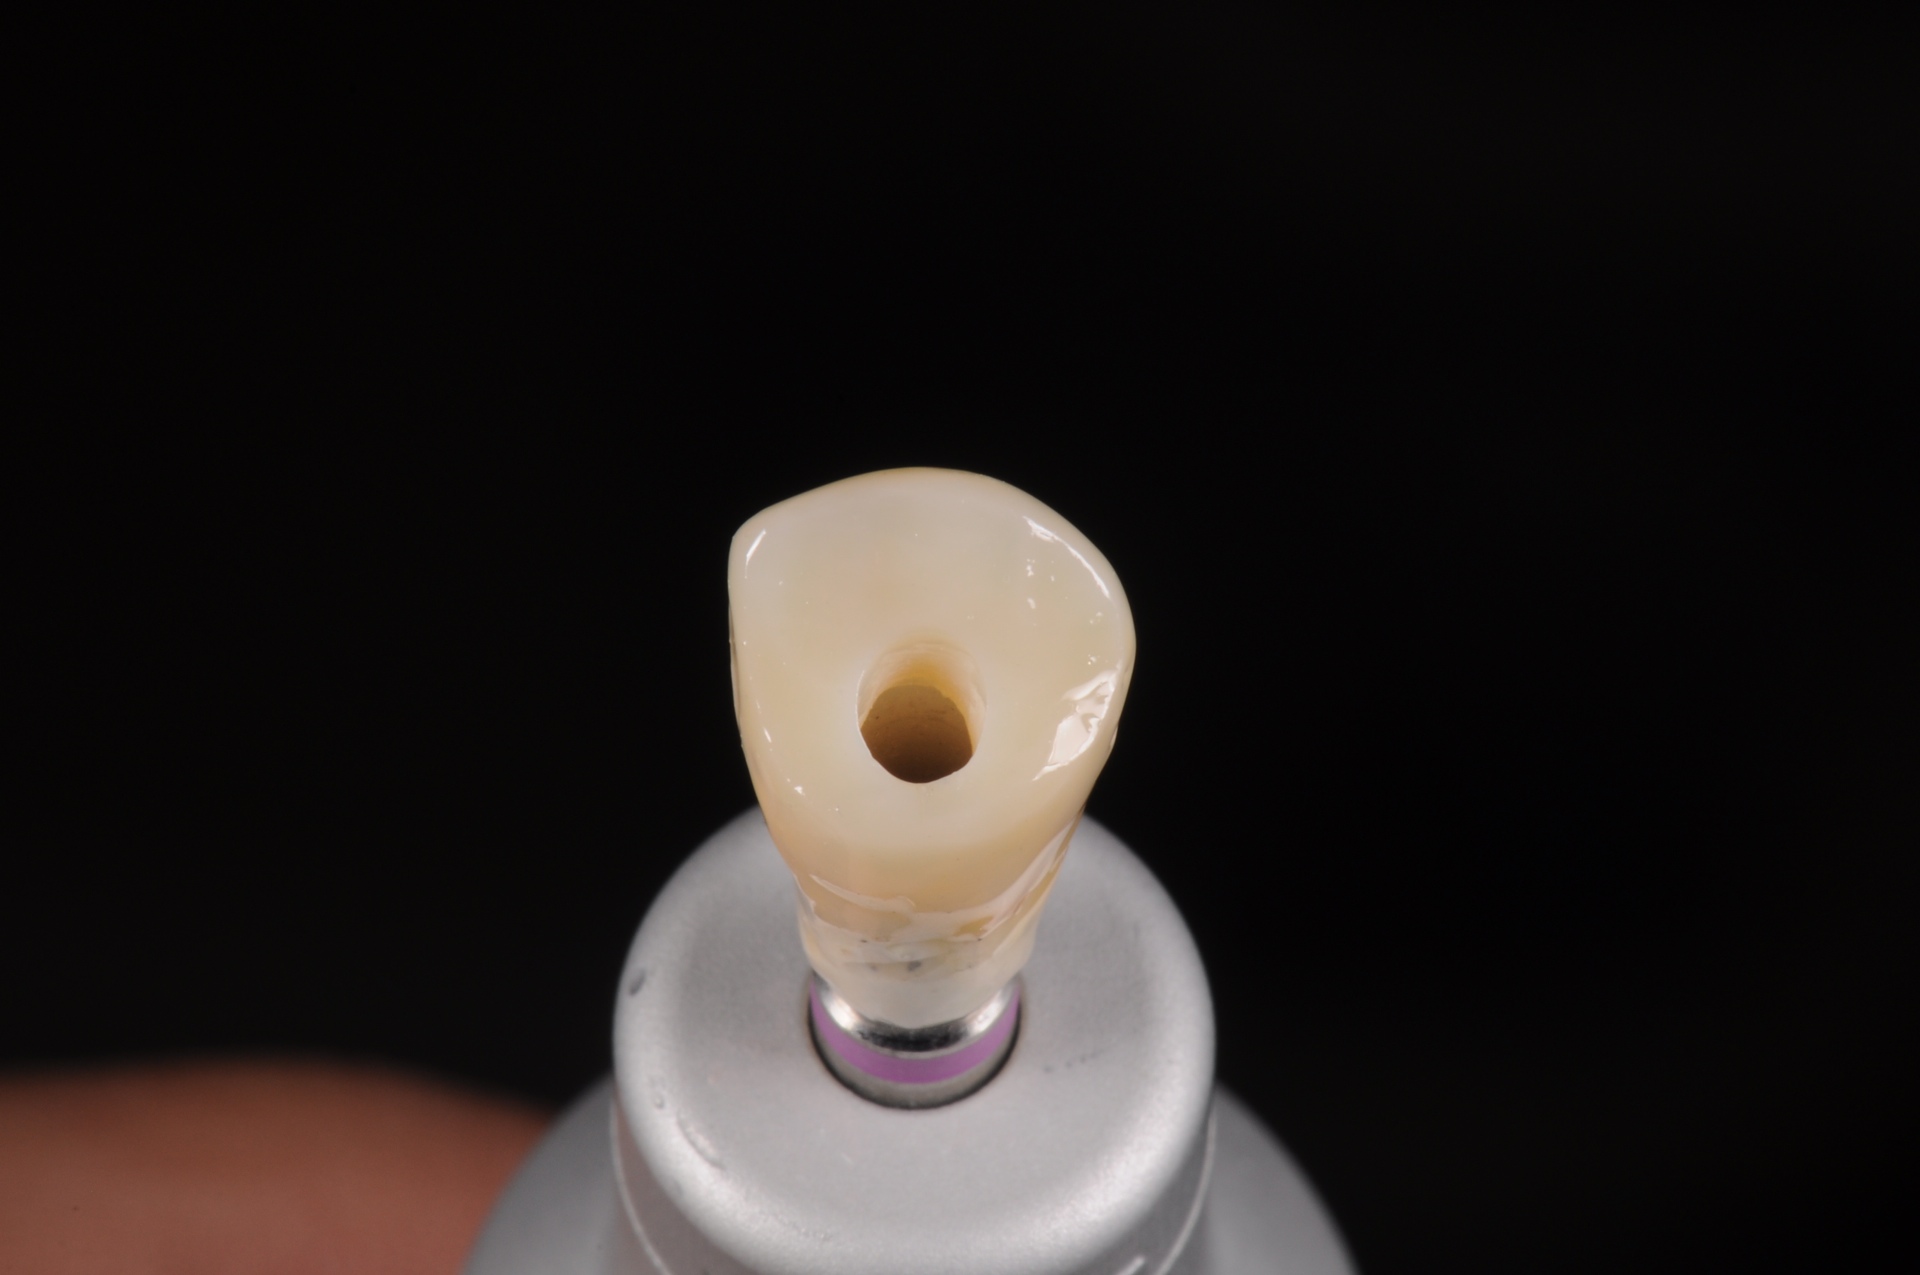
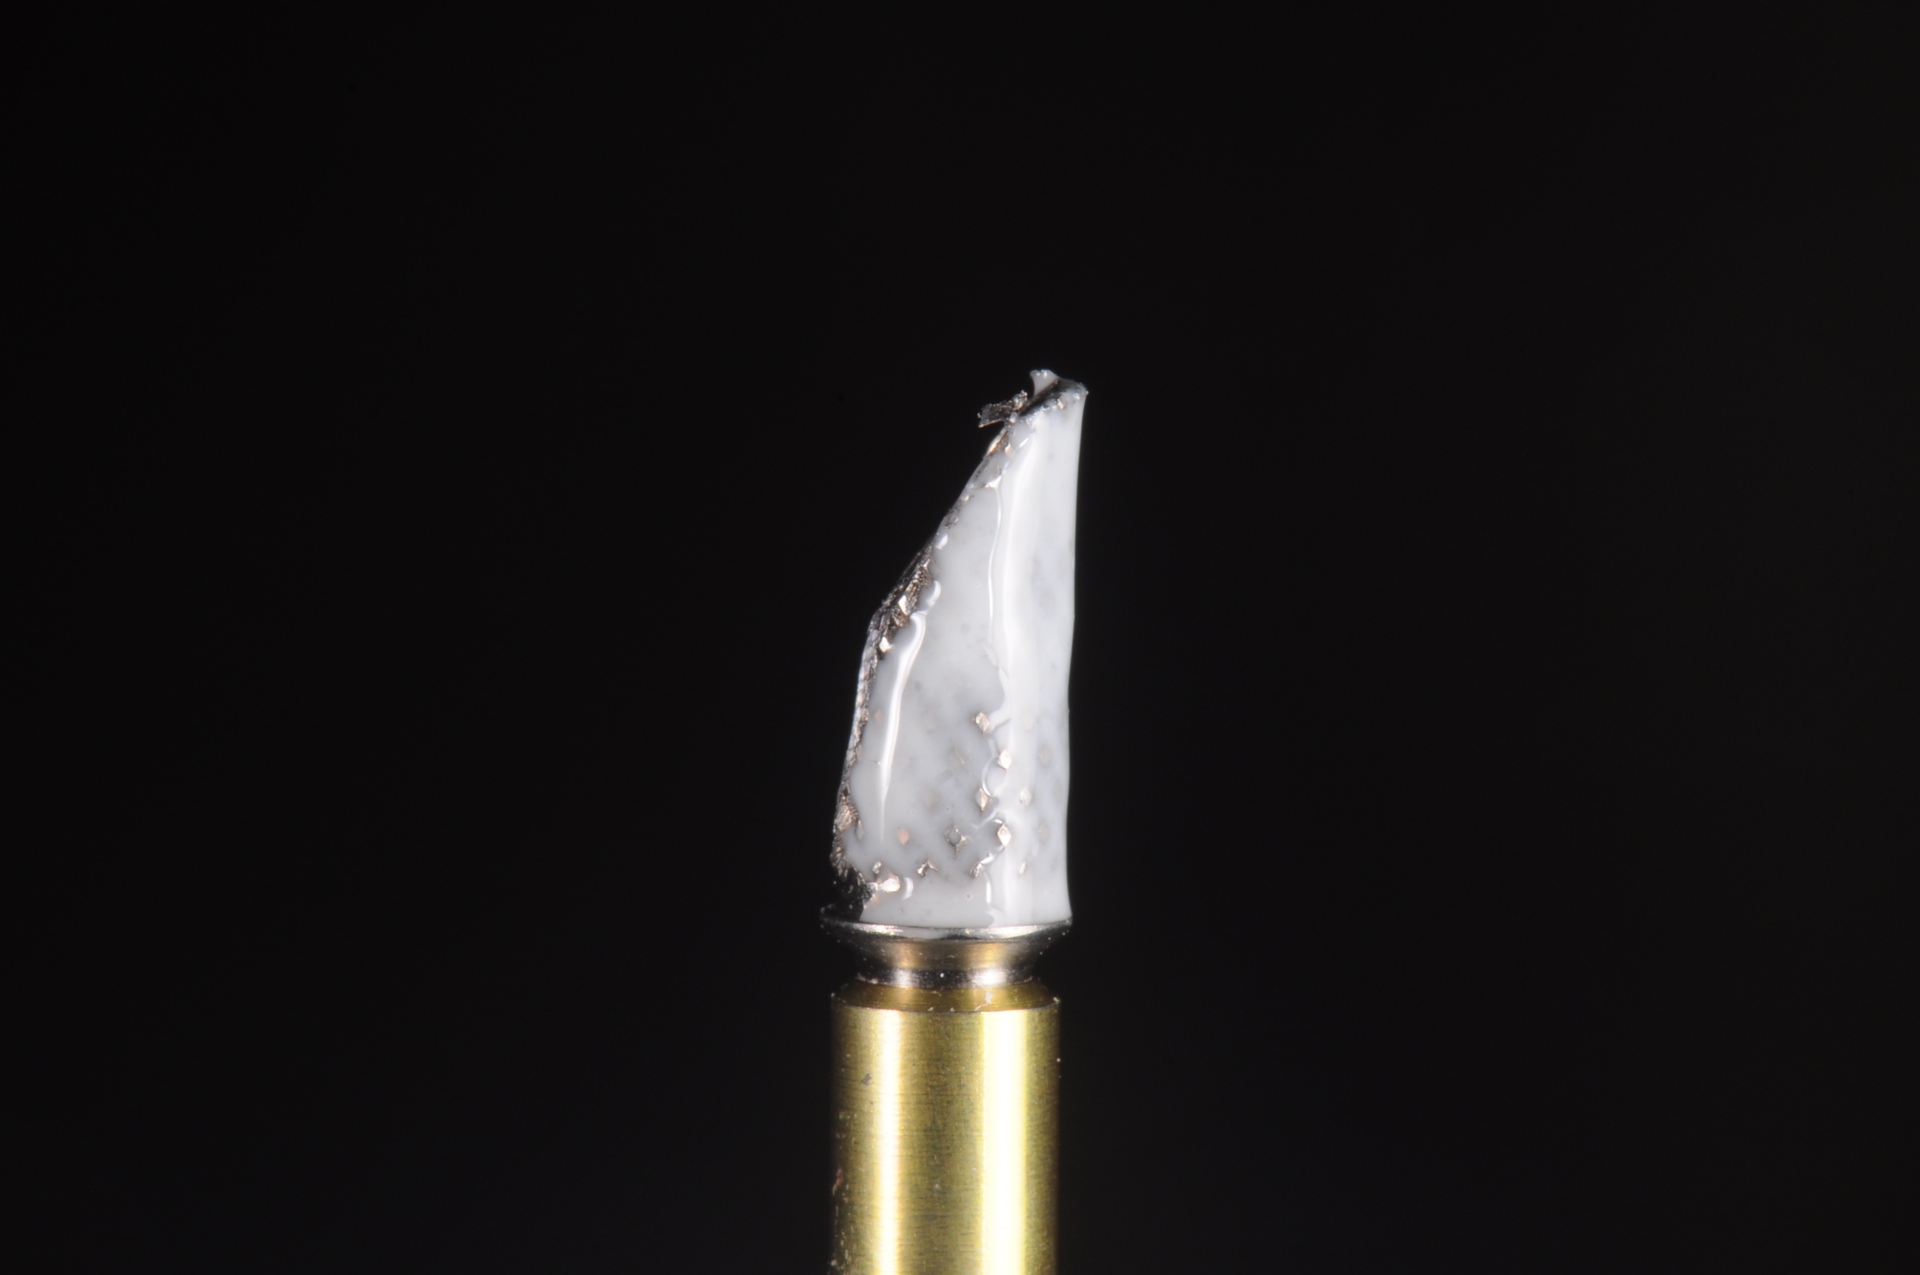
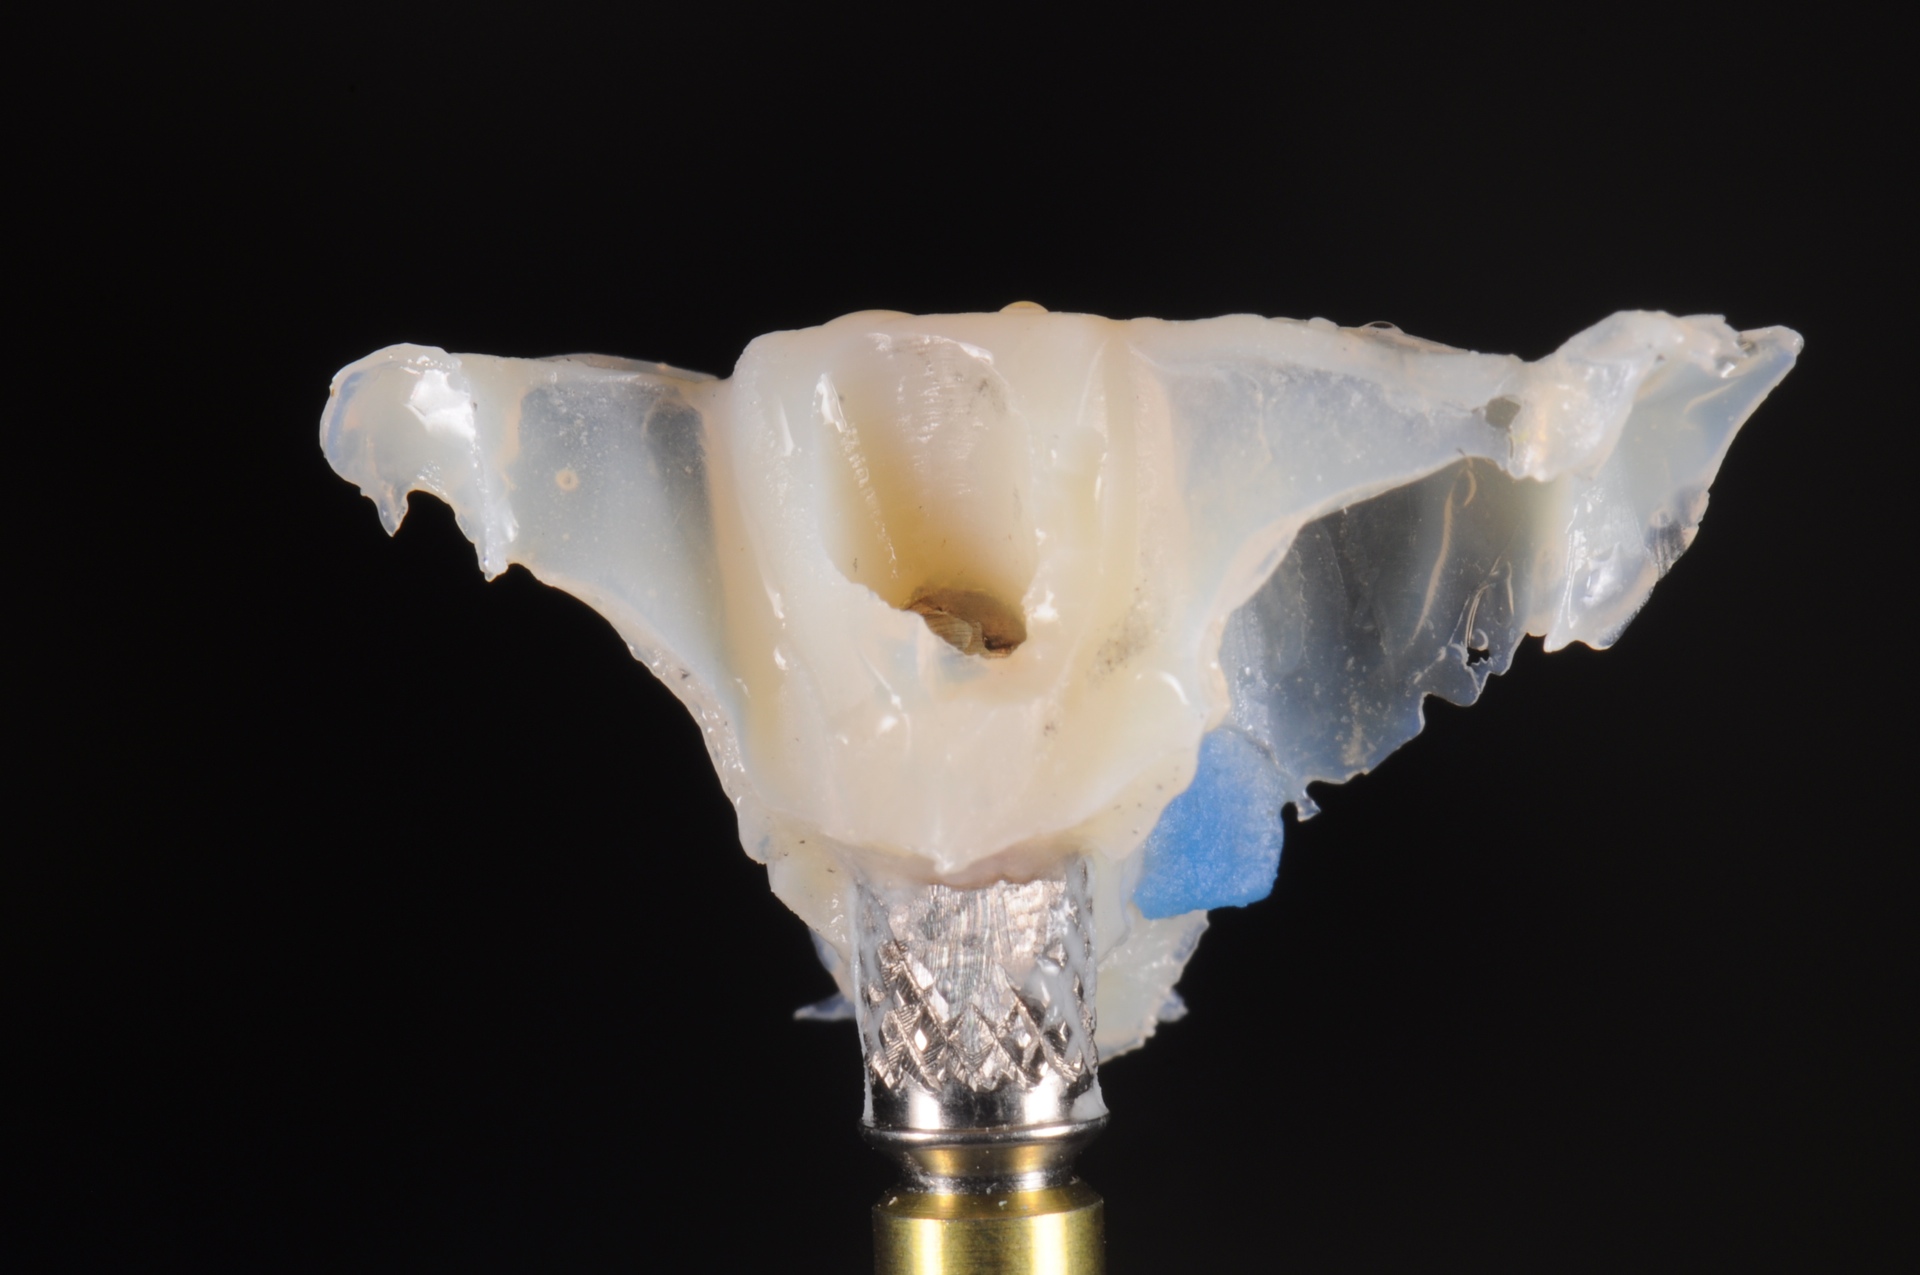
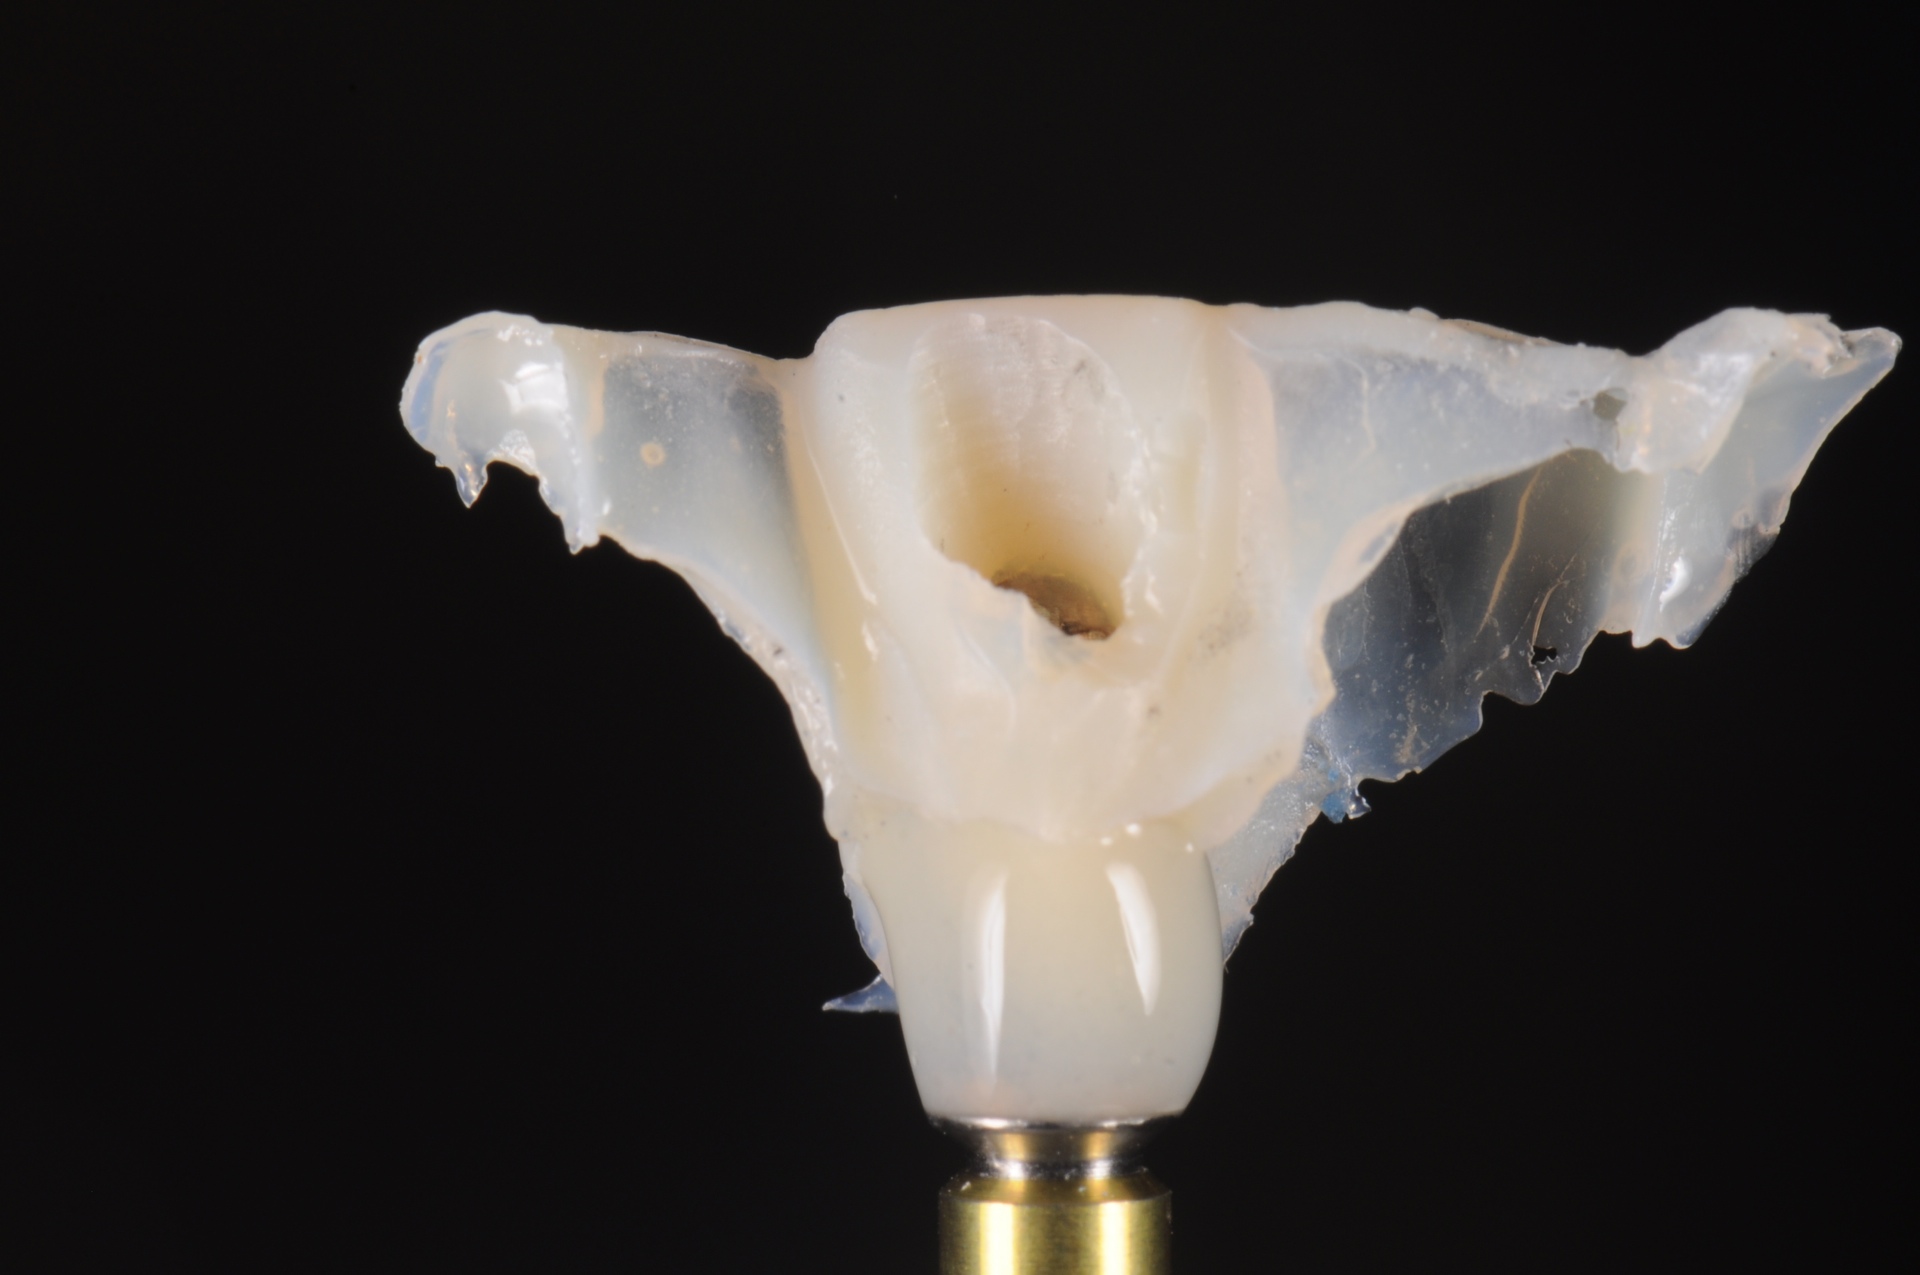
The PEEK abutment was reduced accordingly, and mechanical retention was created for the veneer material, in this case, auto-cured Bis-GMA. It is very important to block out inter-proximal undercut areas and protect the screw access with Teflon tape. The vacuum-formed matrix is loaded with the Bis-GMA material and fully seated over the teeth.
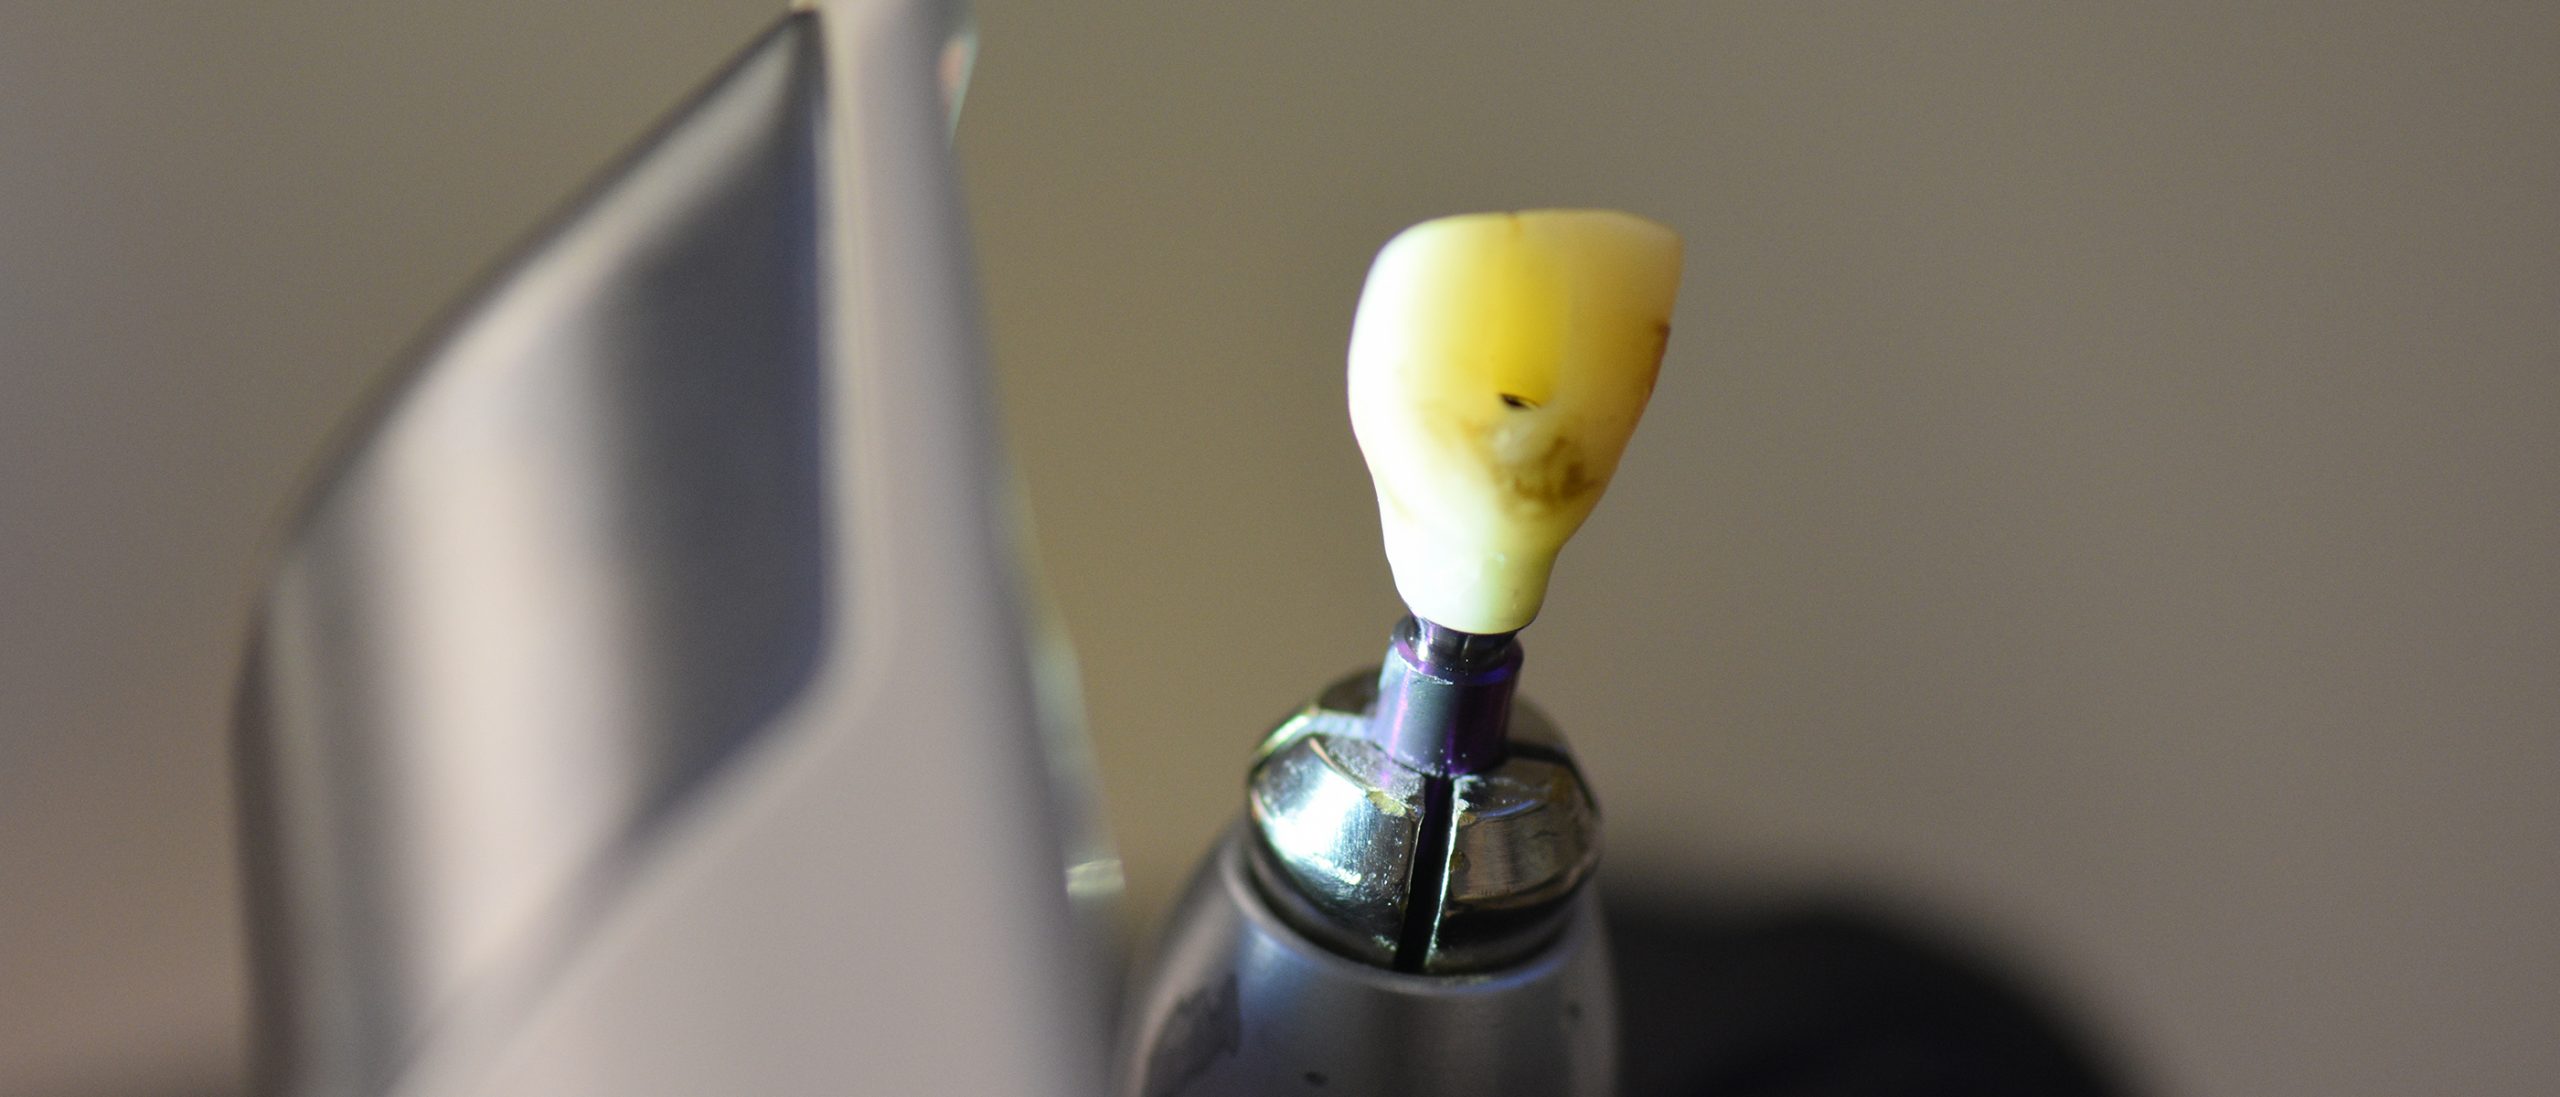
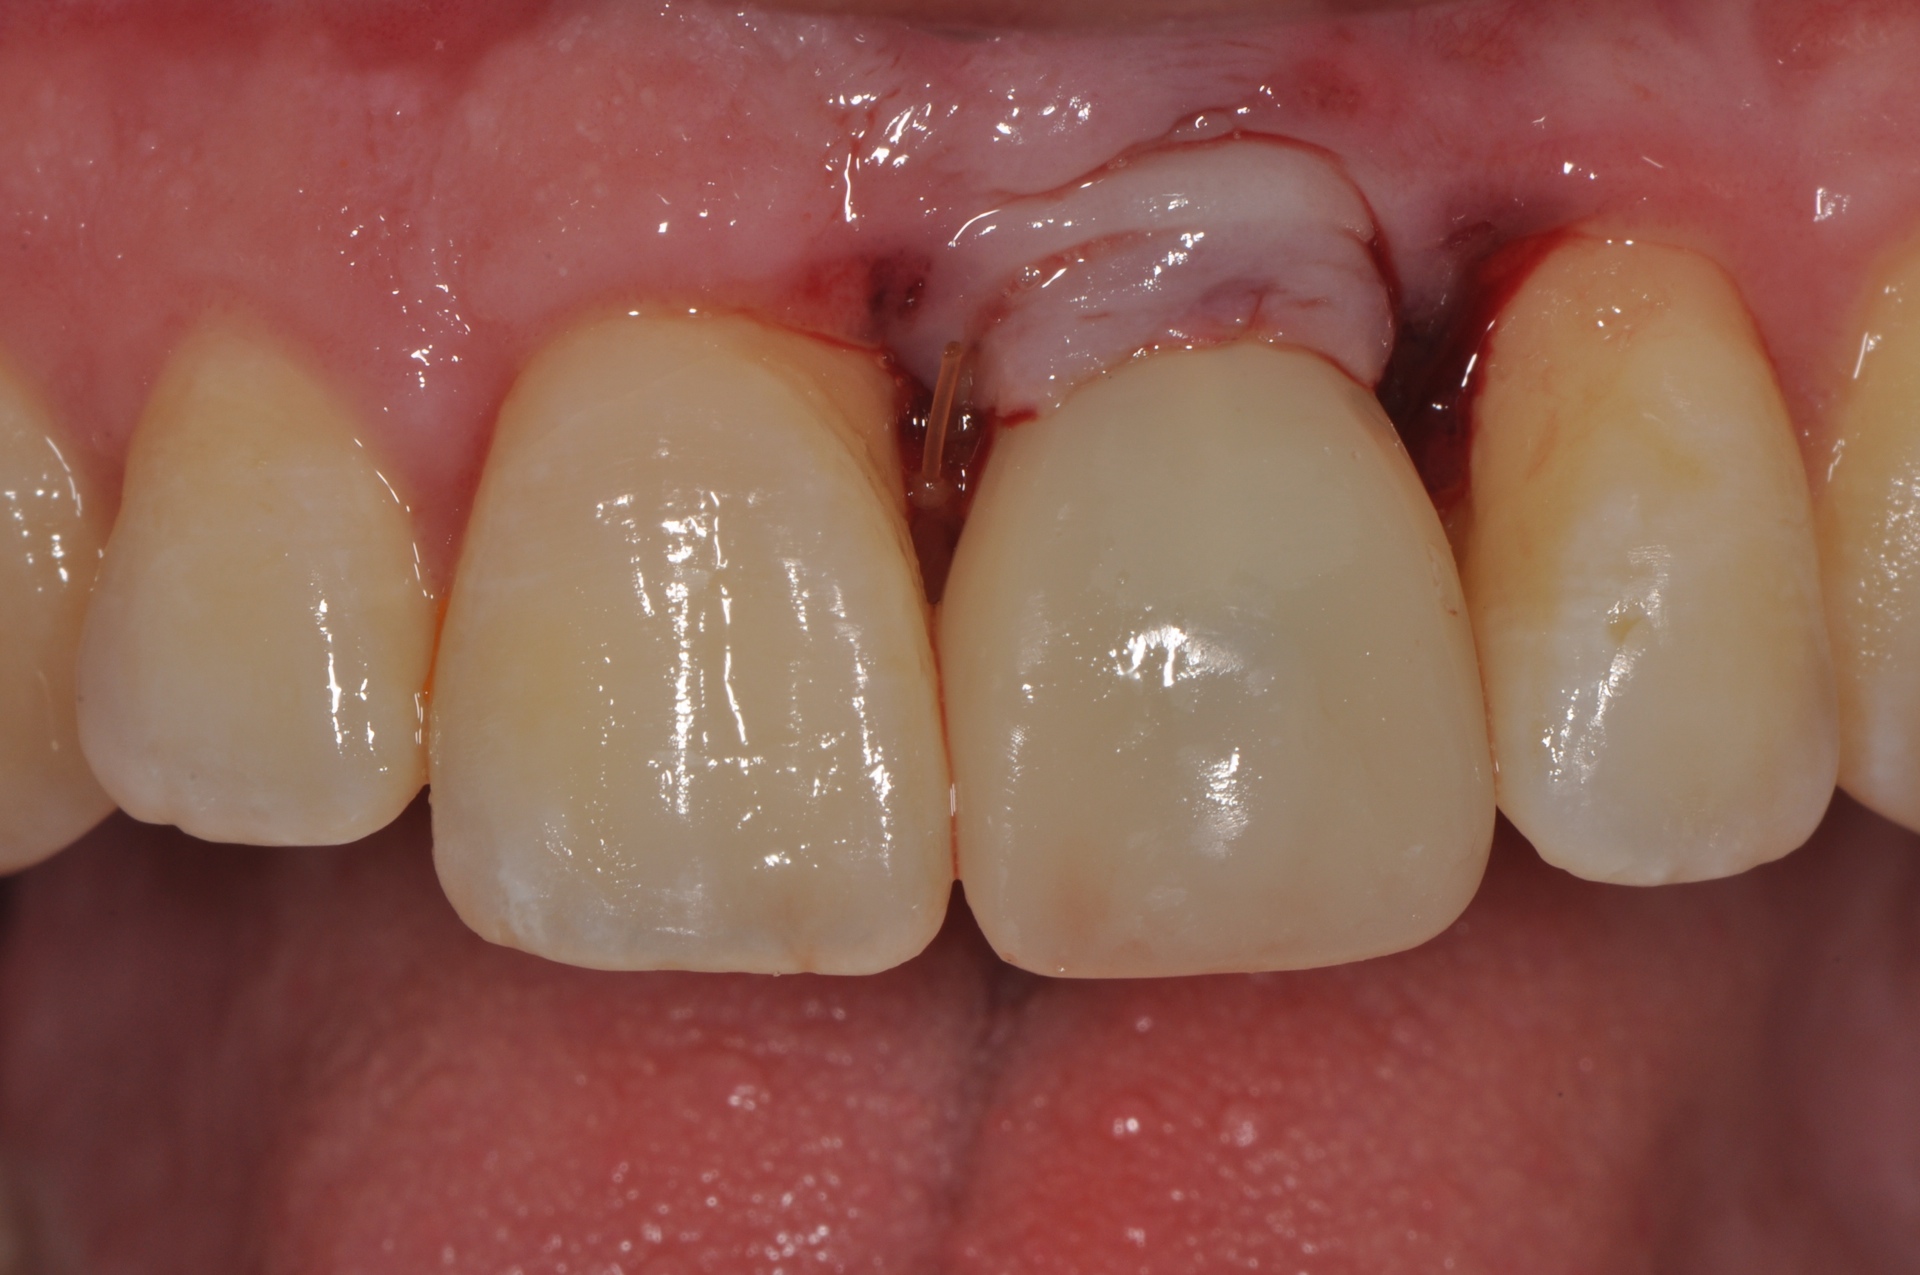
After polymerization, screw access is created using a diamond tapered shoulder high-speed bur.
The same approach can be used when selecting a titanium abutment. The 1.0 x 1.25 mm vacuum-formed matrix is used to verify the required amount of reduction.

The titanium abutment is then reduced extra-orally to avoid overheating and titanium particles. The gray color is overcome with a thin layer of opaque resin. The abutment is screwed in place, and the undercut areas are blocked out. Screw access is closed with Teflon tape.


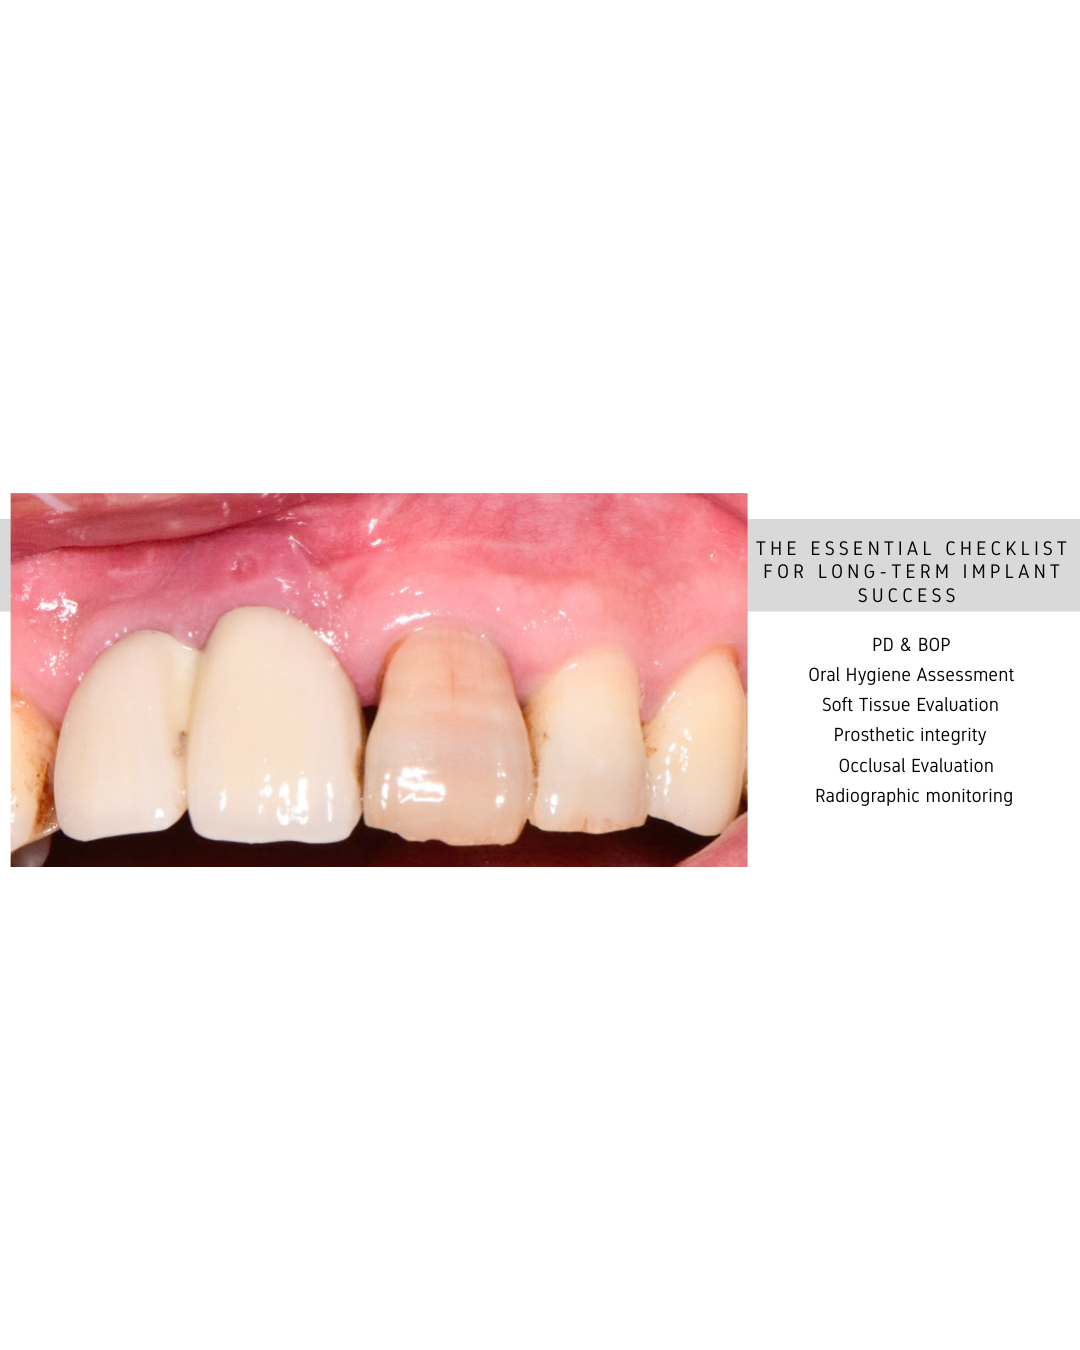
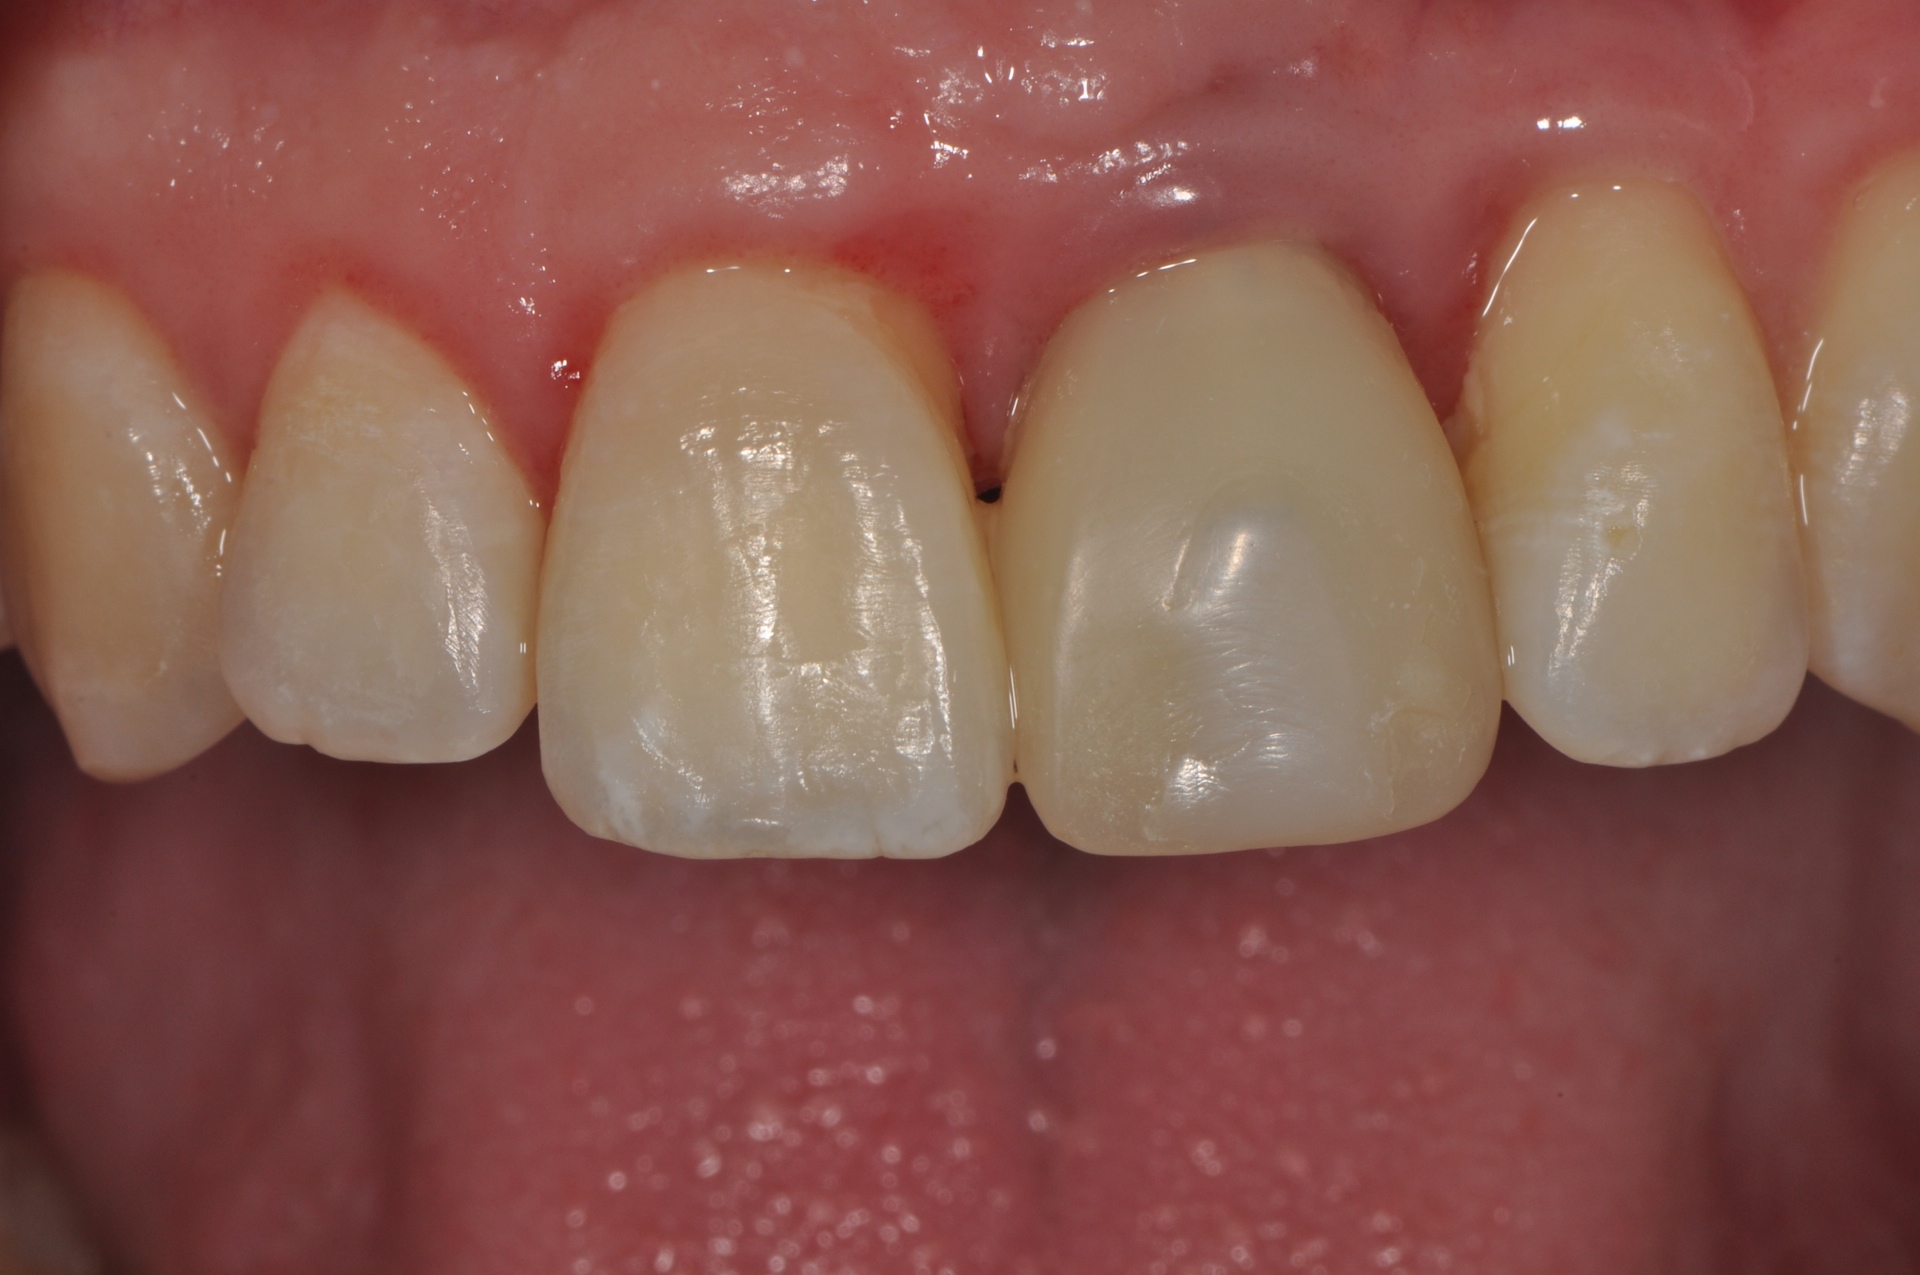
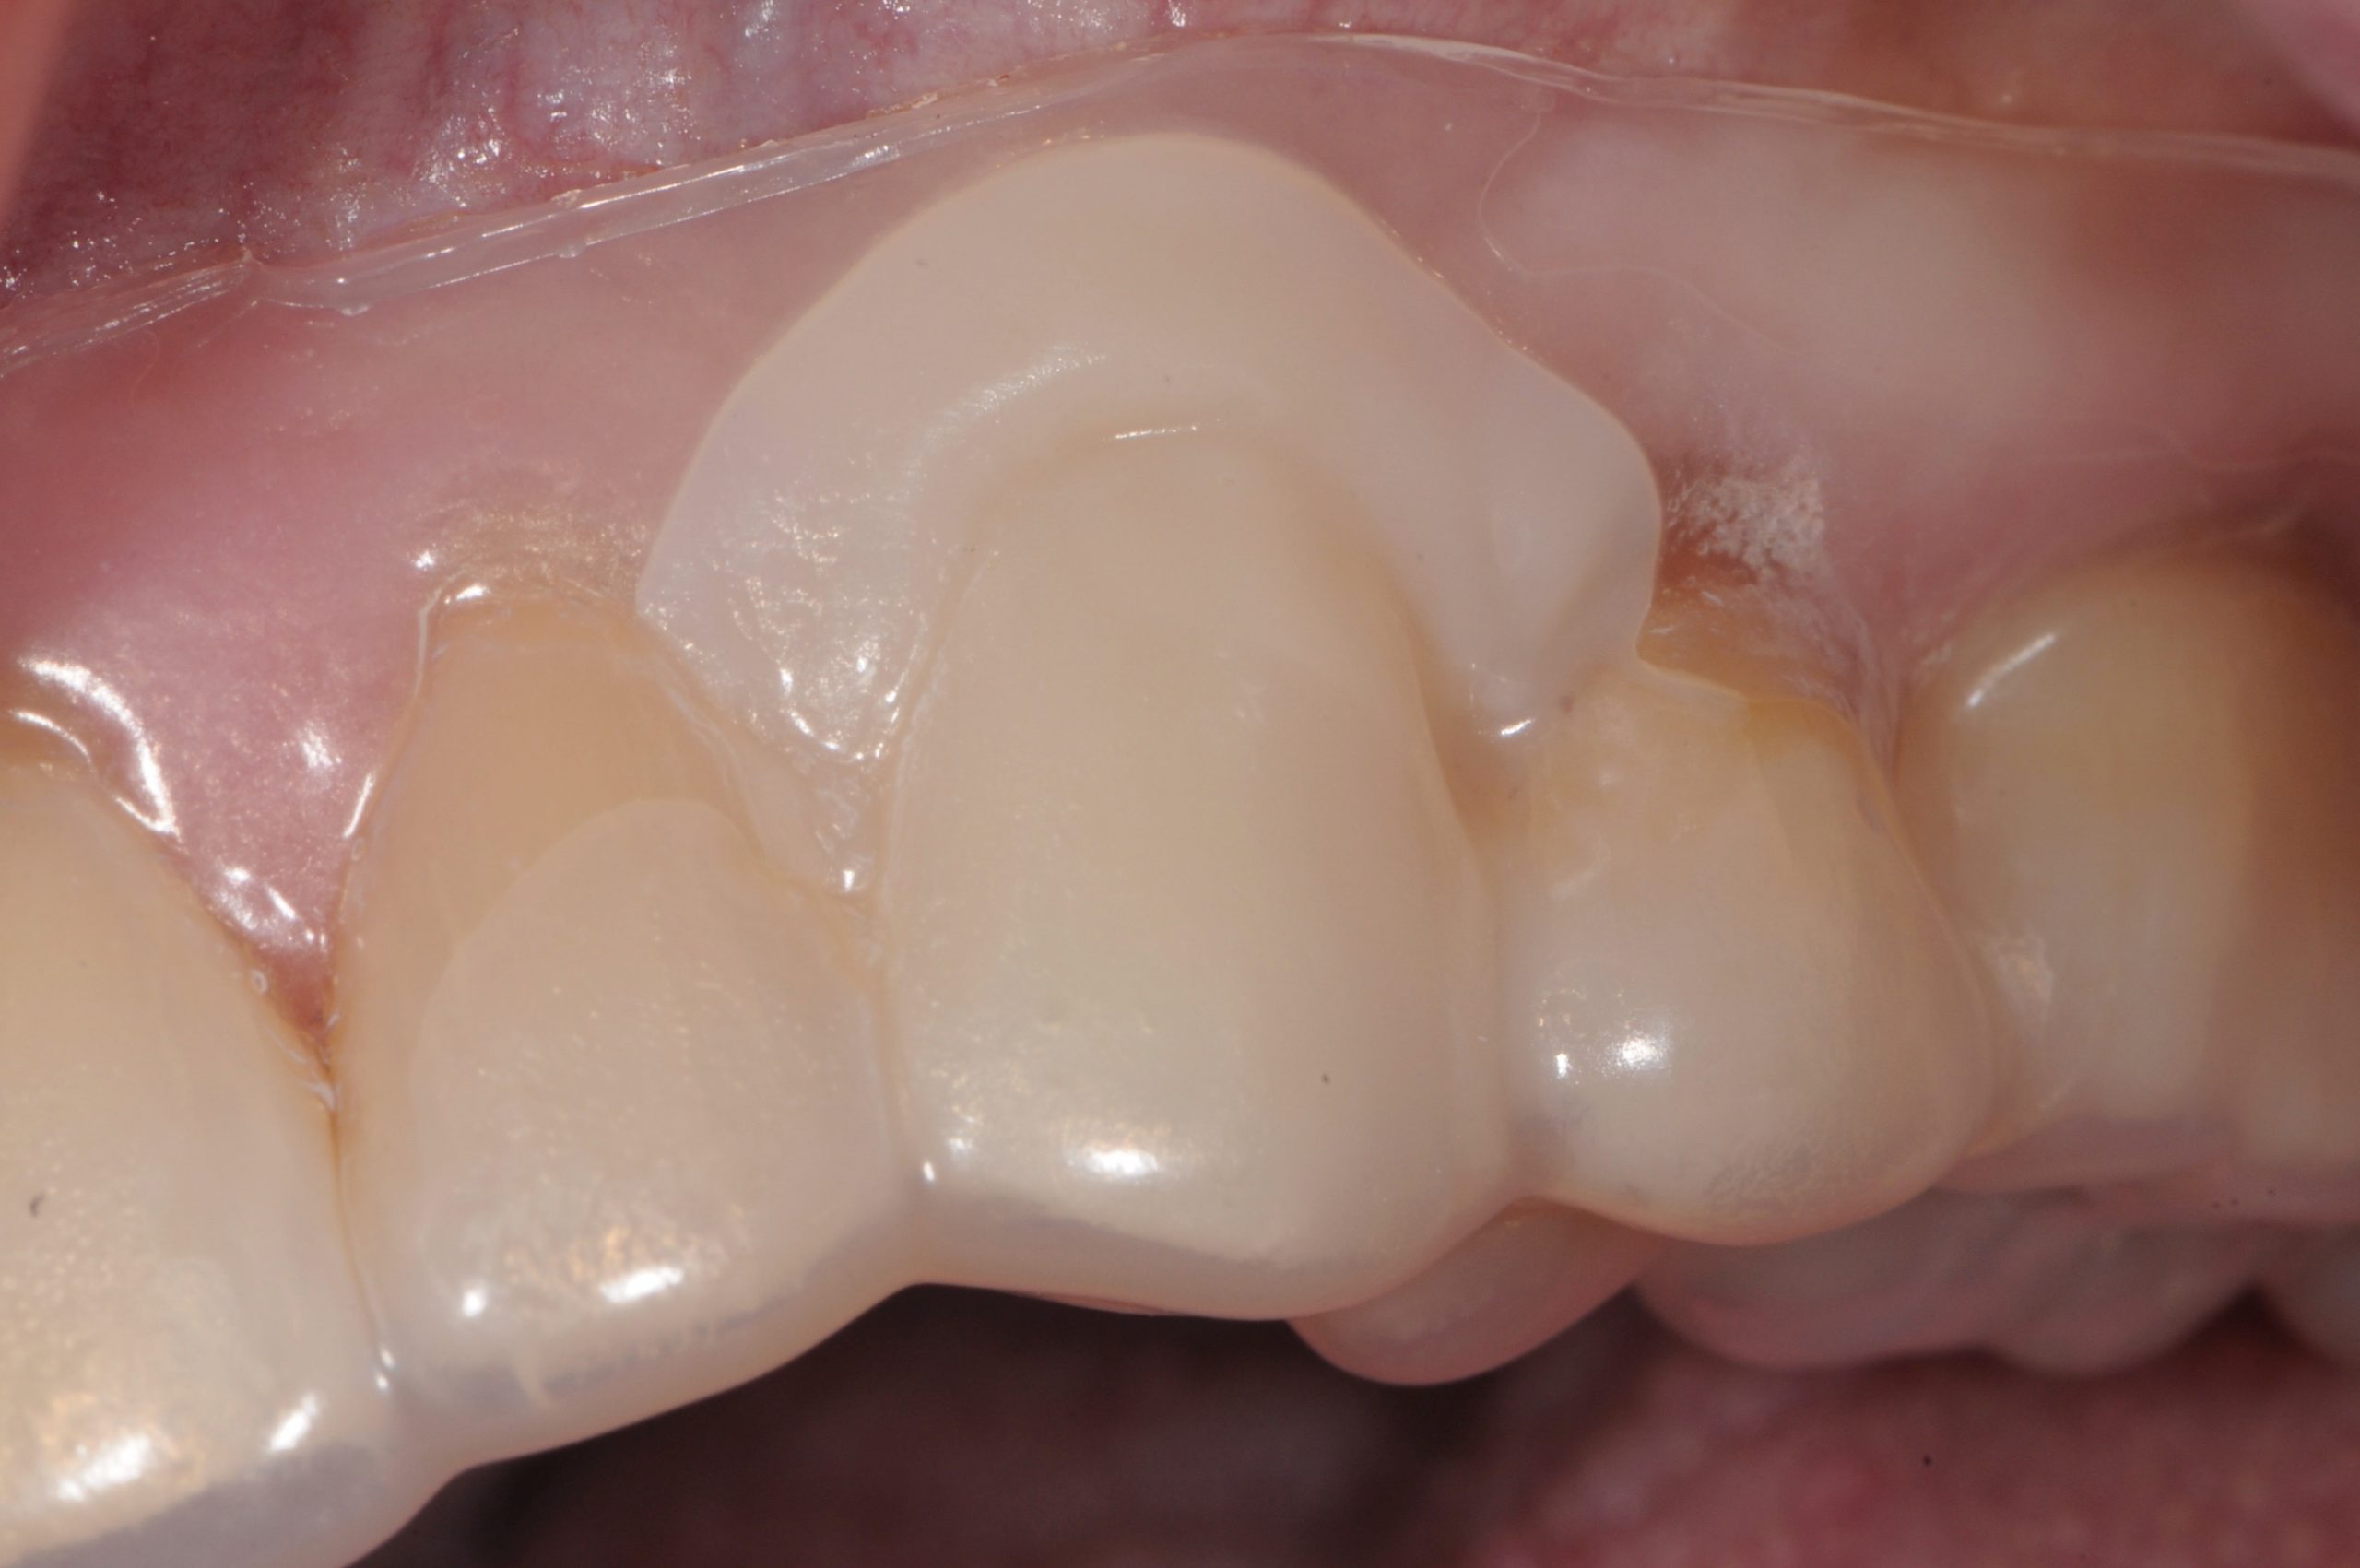
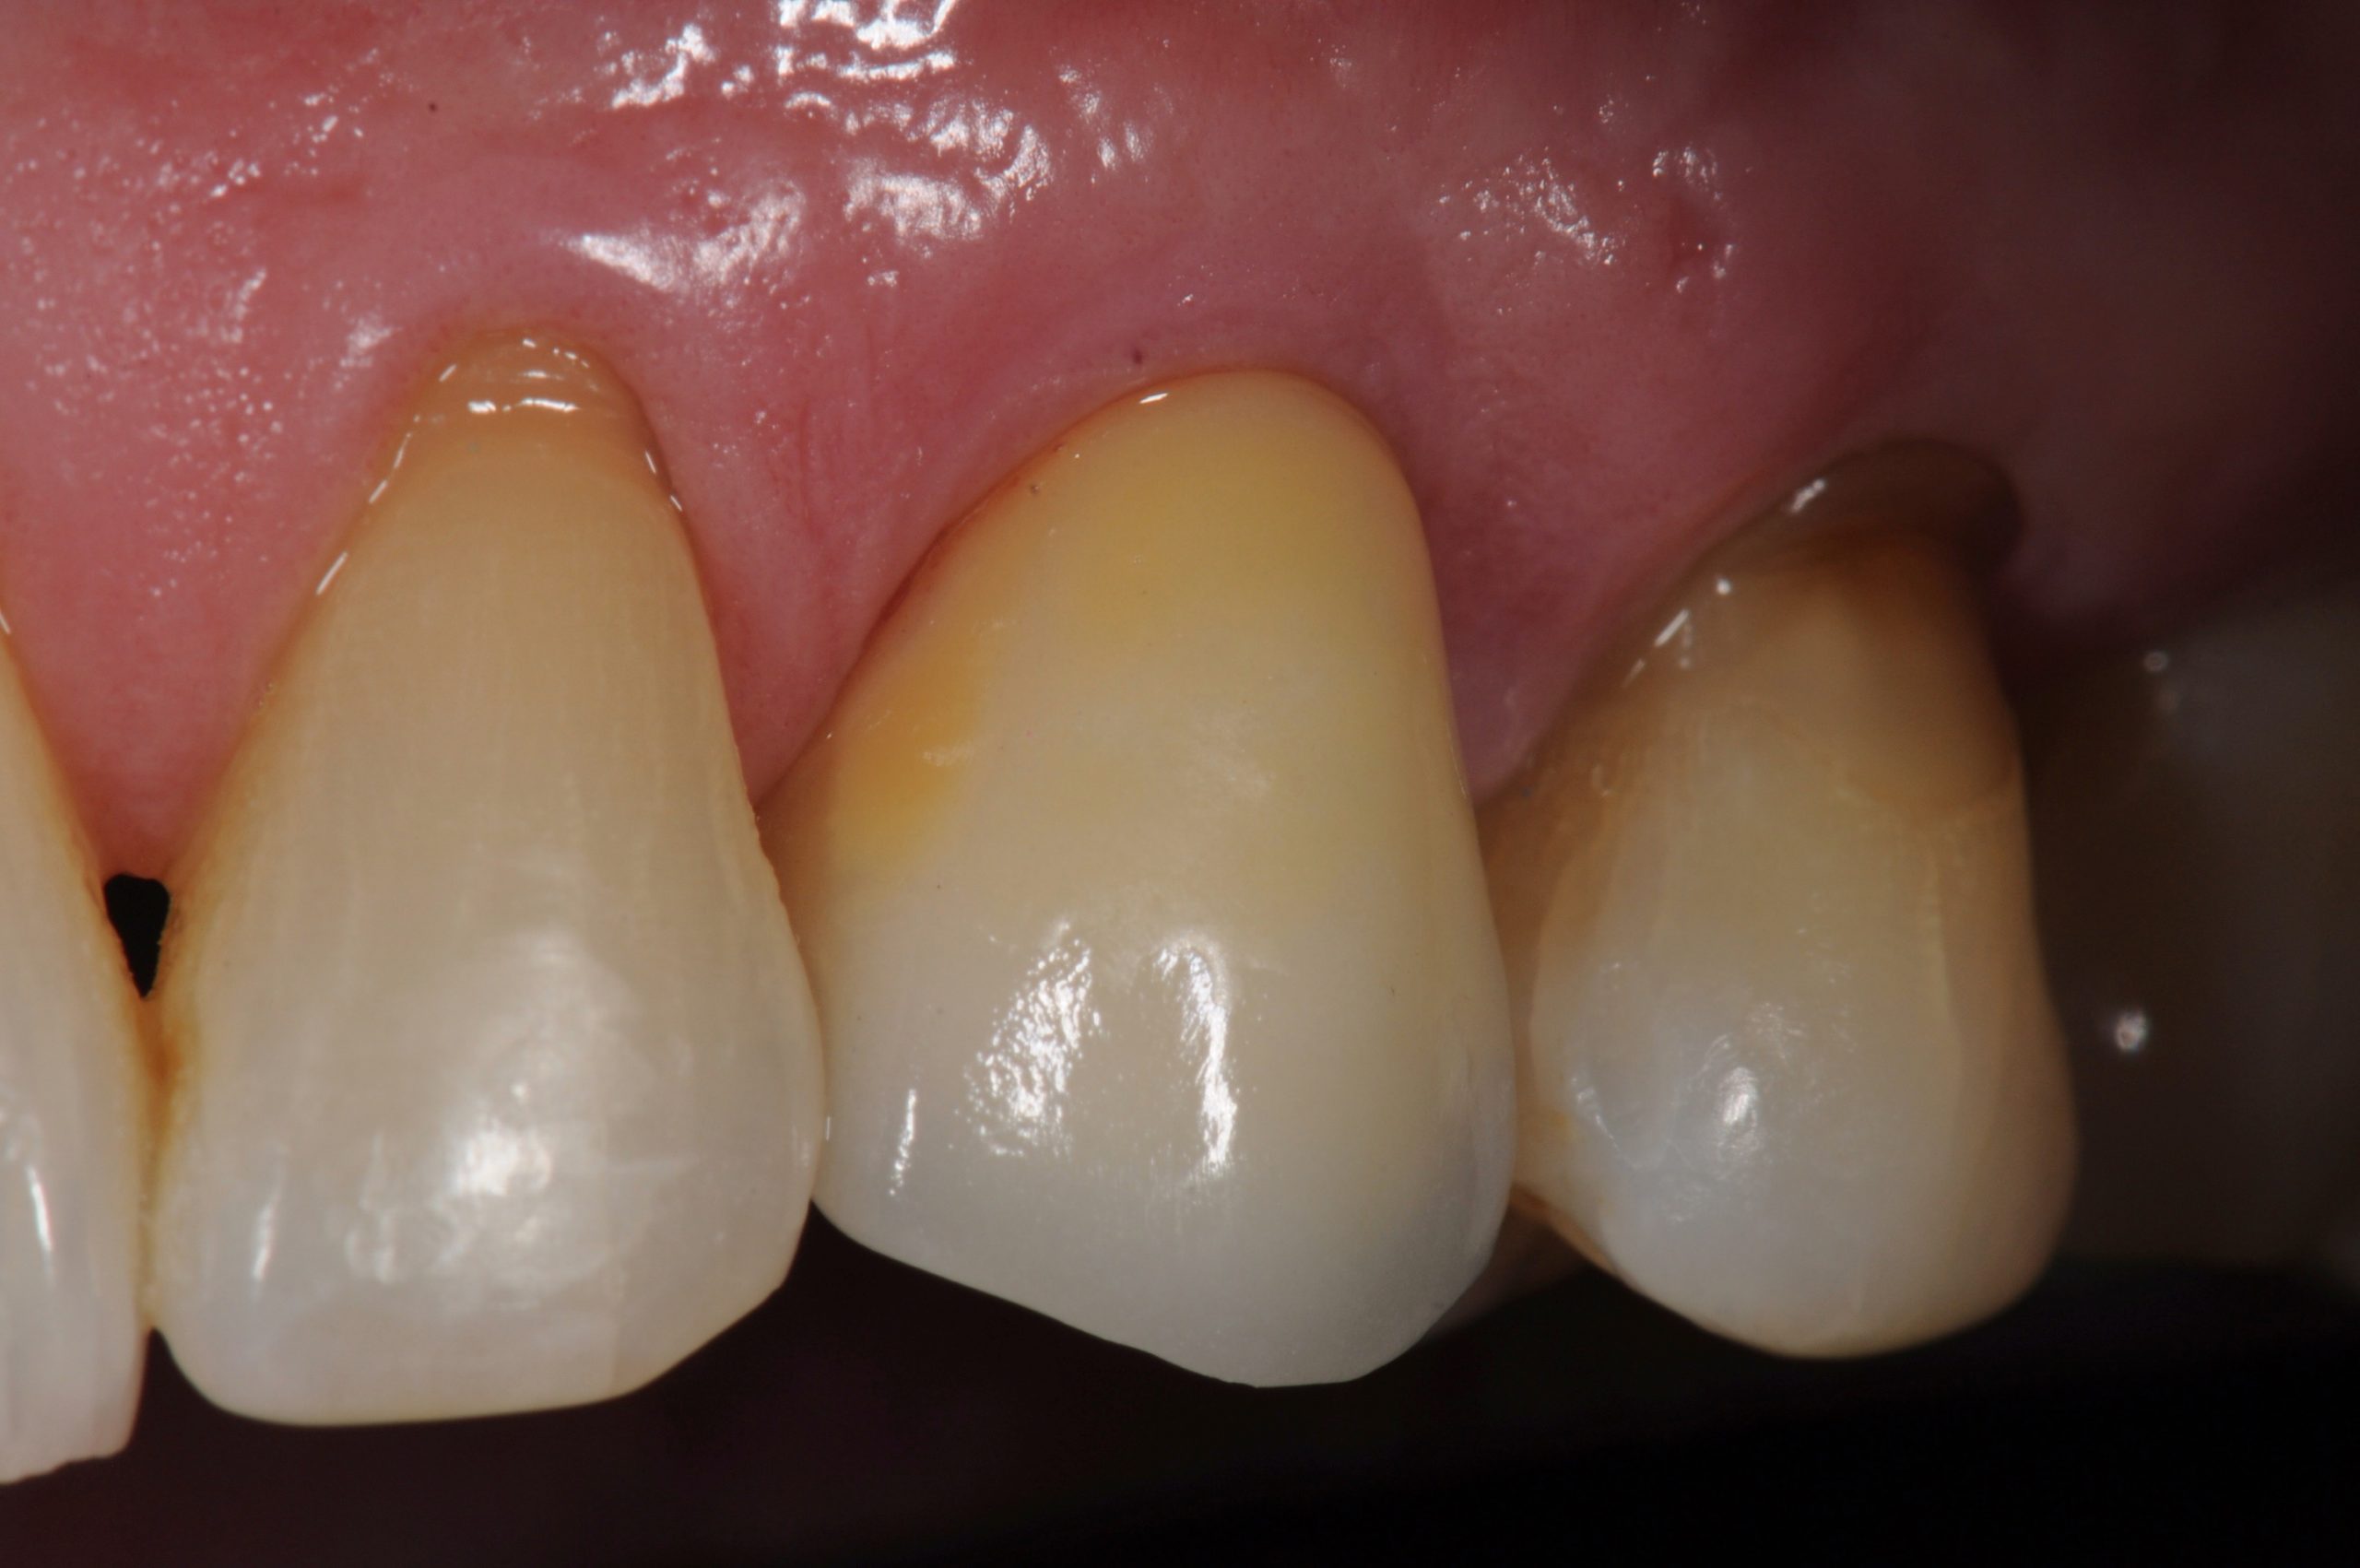
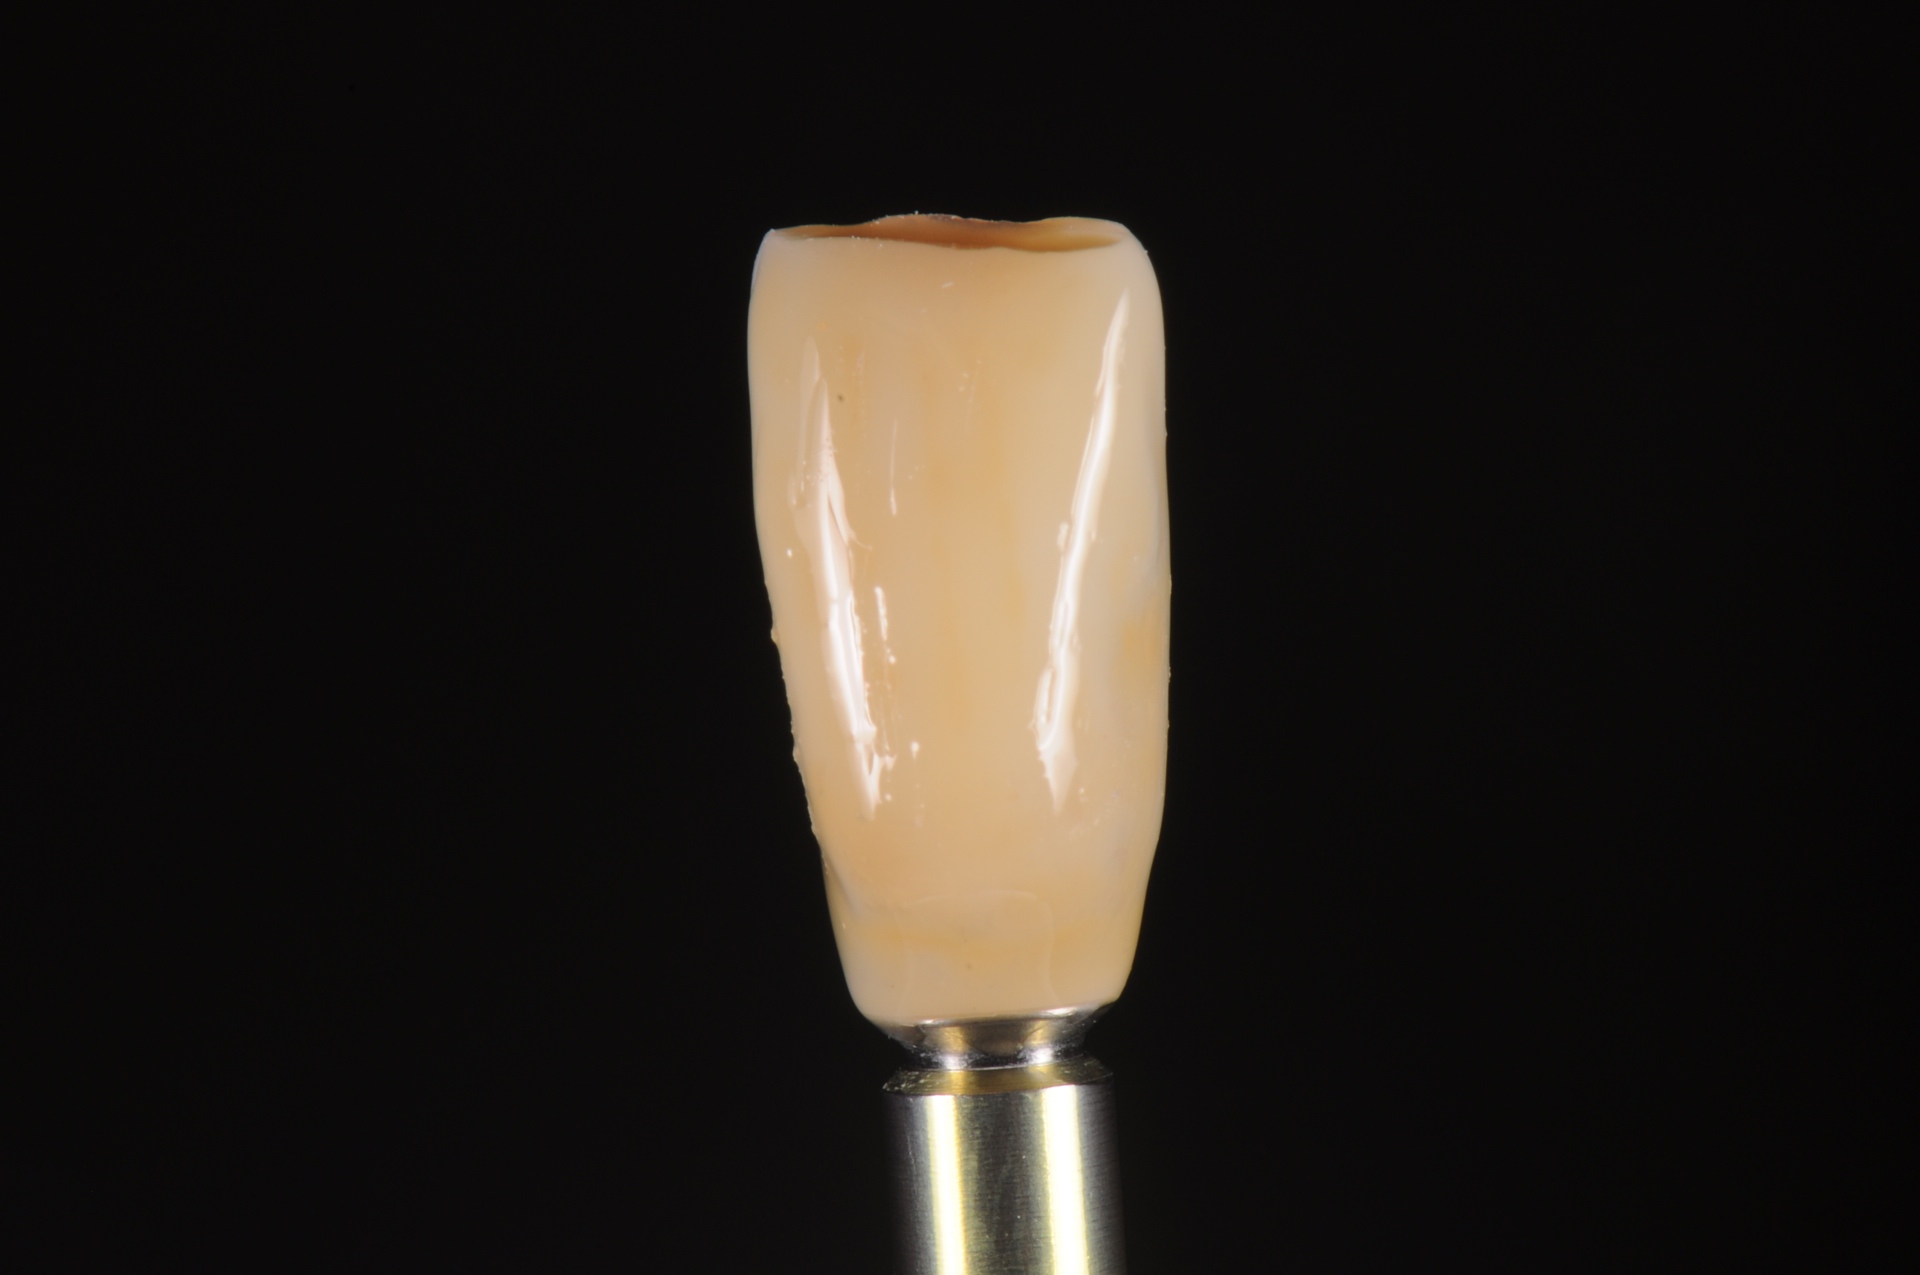
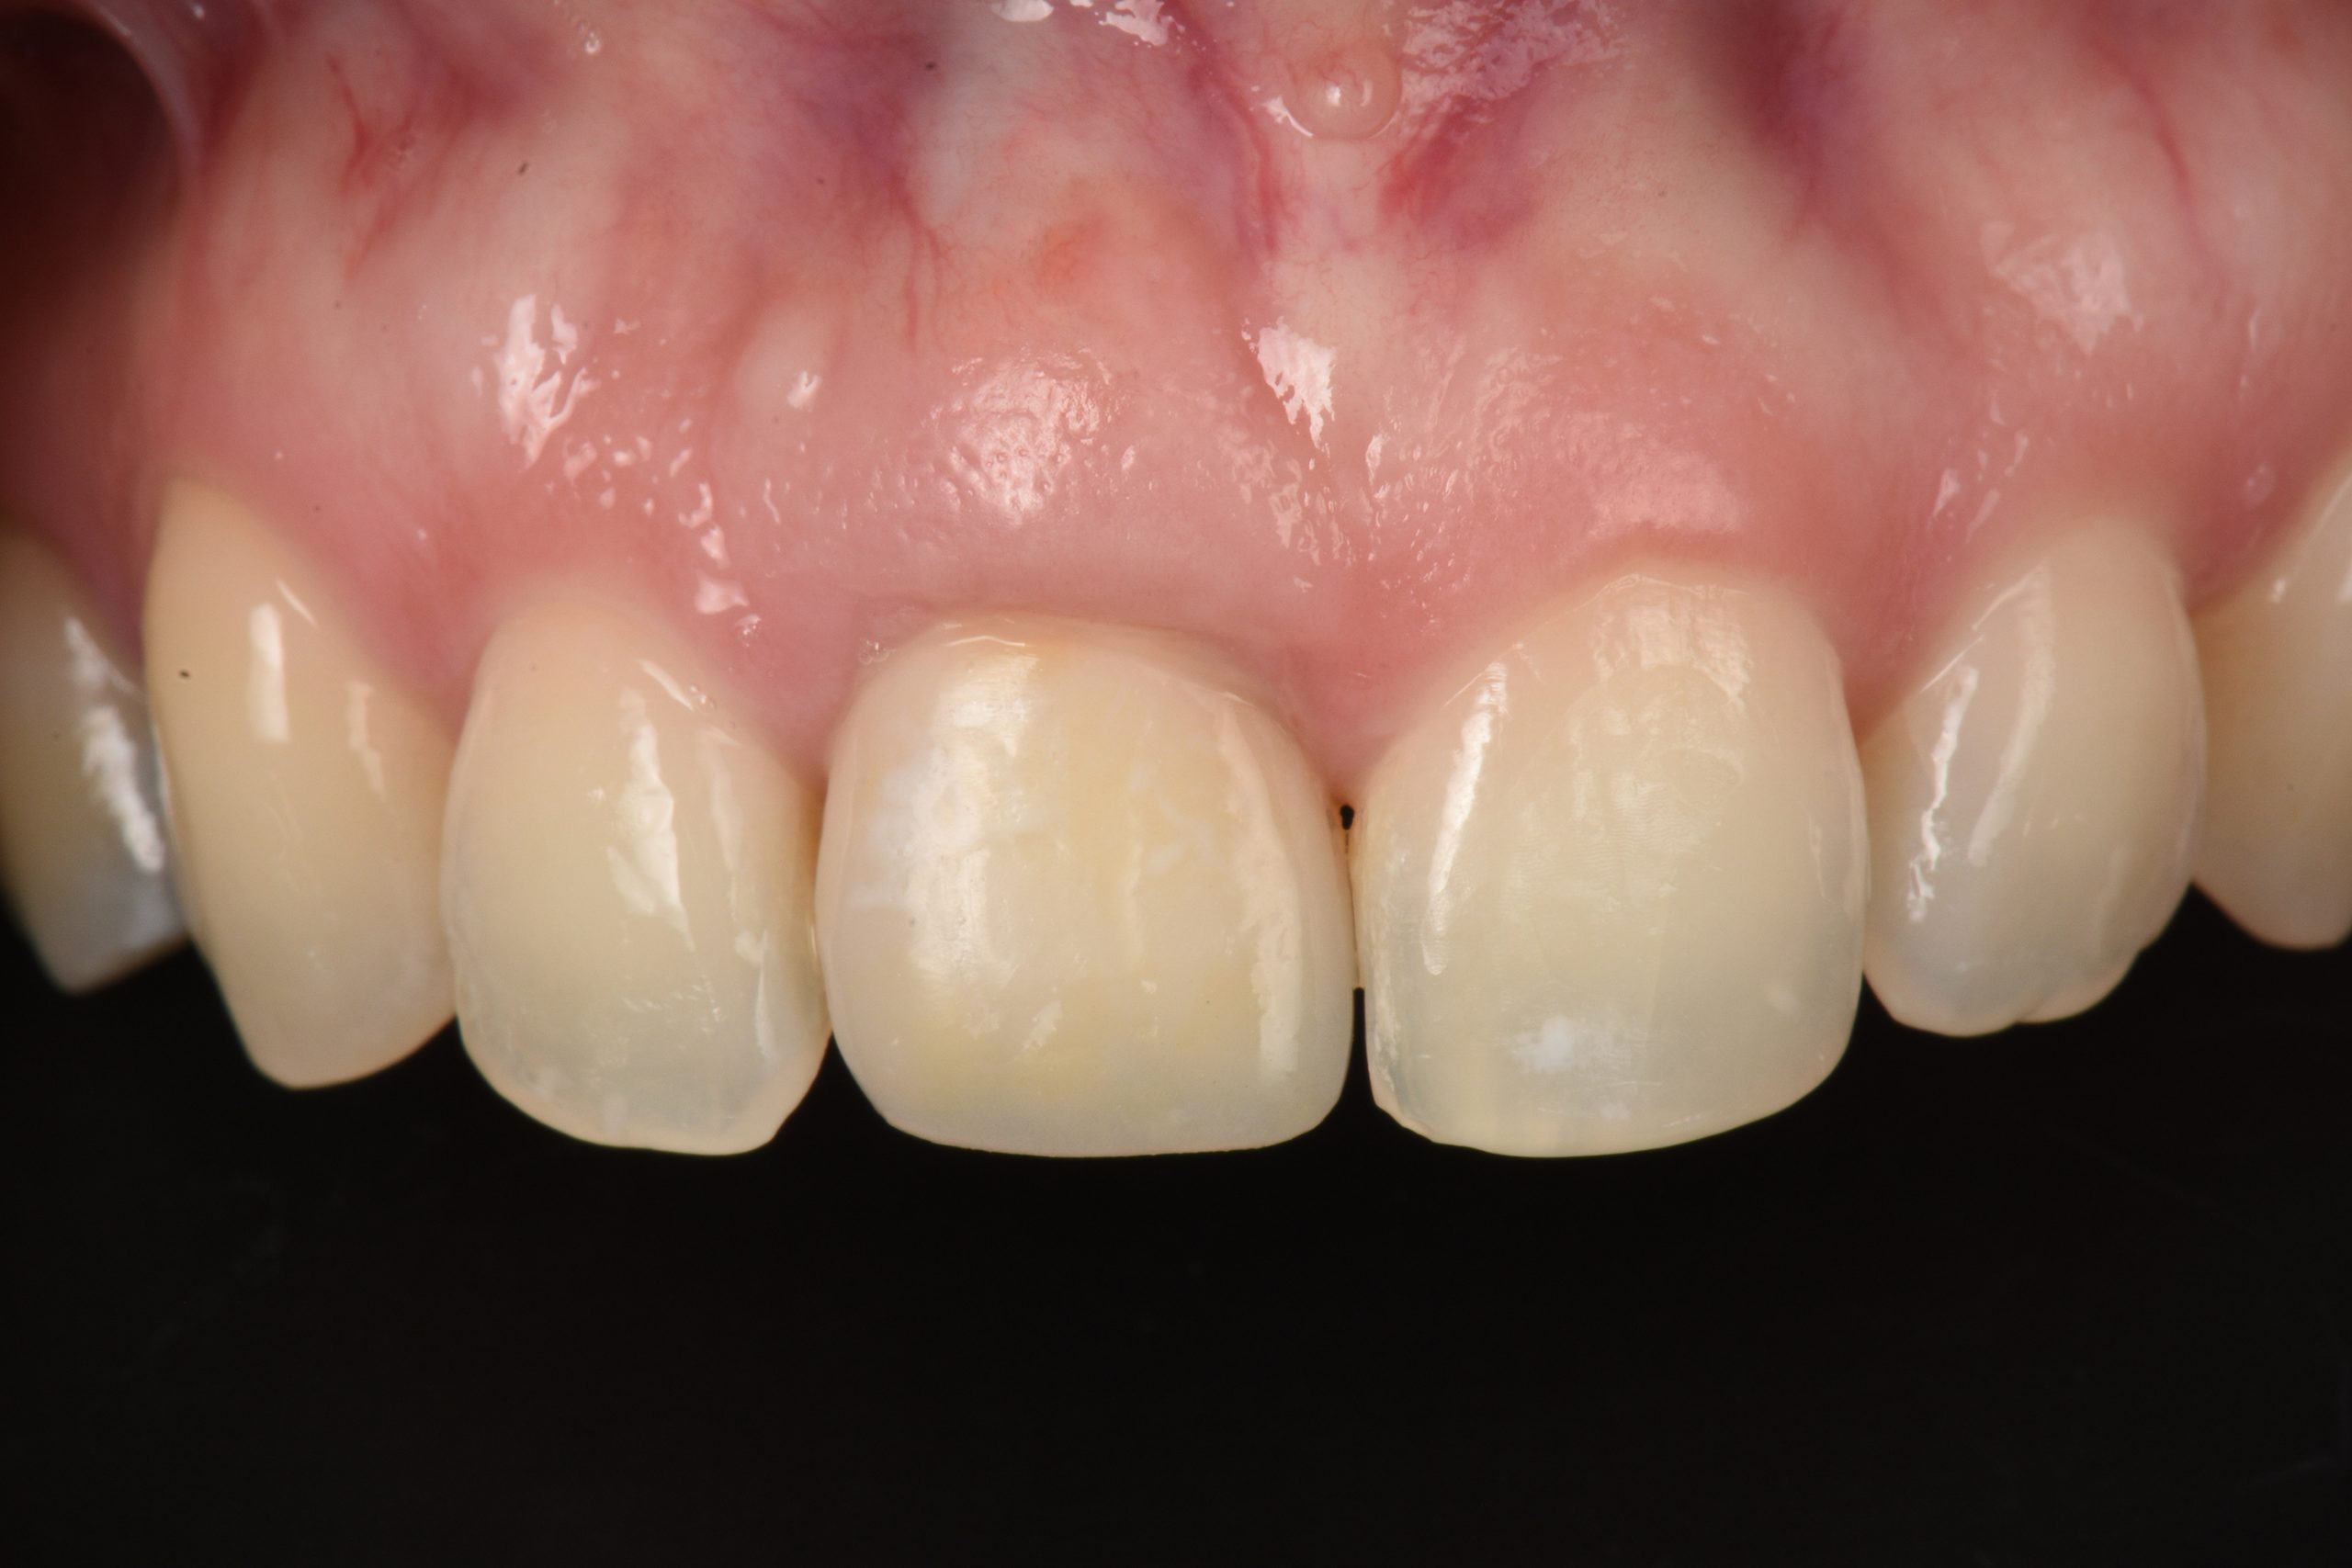
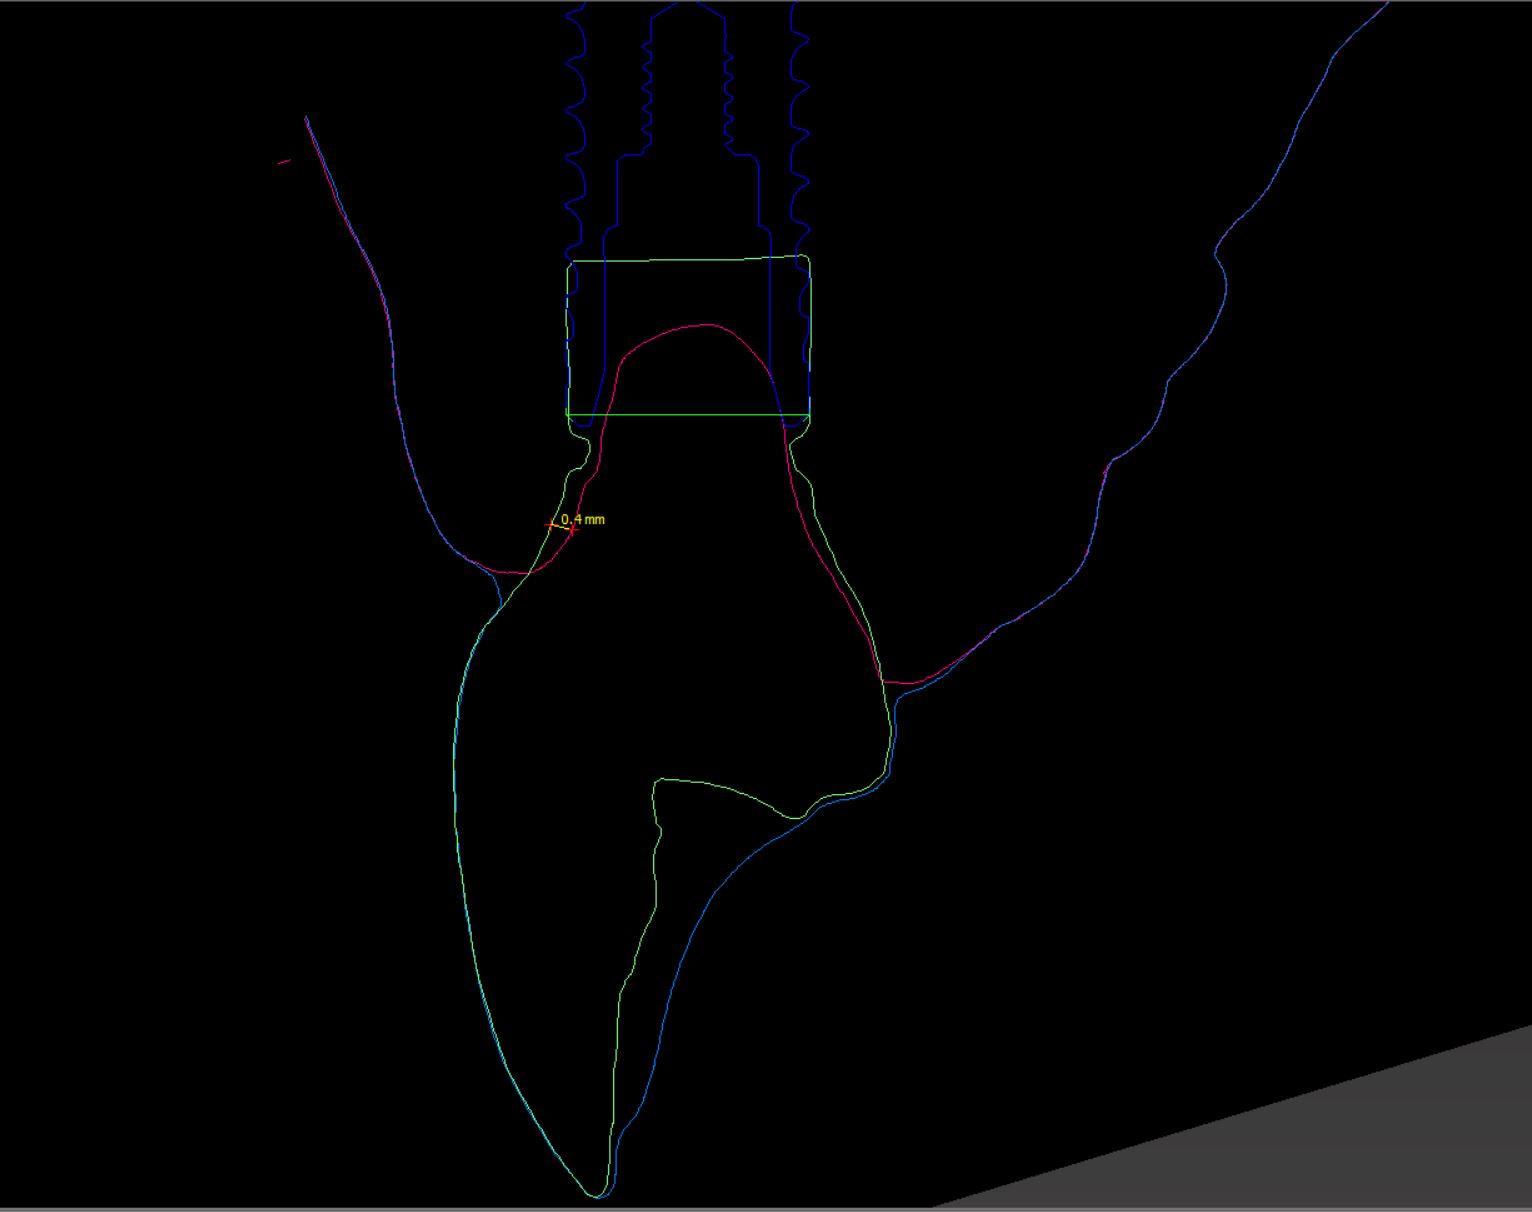
When removing the newly formed provisional, you will notice that the emergence profile needs to be created. That can be done with flowable composite resin. When creating this area it is essential to respect some principles and not over-compress the tissue (Martin et al. 2007). As you will notice, most of the facial contour is concave versus the convex shape of natural teeth. This allows the position of the desired mucosal margin to be influenced without thinning the soft tissue. When trimming the provisional, special attention is given to maintaining the contact points at the ideal position. The provisional restoration should be well polished to minimize plaque accumulation and peri-implant mucositis (Figs. 6 & 7).

The provisional is likely to cause blanching (ischemia) of the surrounding tissue; in my opinion, if blanching presents after 10 minutes, I would remove some of the restoration contours and, if necessary, add more in another visit, most likely one week apart.

Another important point is to confirm the complete adaptation of the restorative parts and the implant. Sometimes the contact point, provisional contours, or the bone interferes with the proper seating of the restoration. Once confirmed, you could torque the restoration to the Ncm recommended by the manufacturer and adjust the occlusion. The access hole is closed with Teflon tape and a light cure resin temporary filling material.
The patient is instructed to clean the area very well and maintain good oral hygiene. Usually, the tissue will assume the transition zone (the area of tissue between the implant shoulder and the mucosal margin) shape in 4 to 6 weeks. At this point, the soft tissue is ready for impression and communication with the laboratory technician for fabrication of the final restoration.
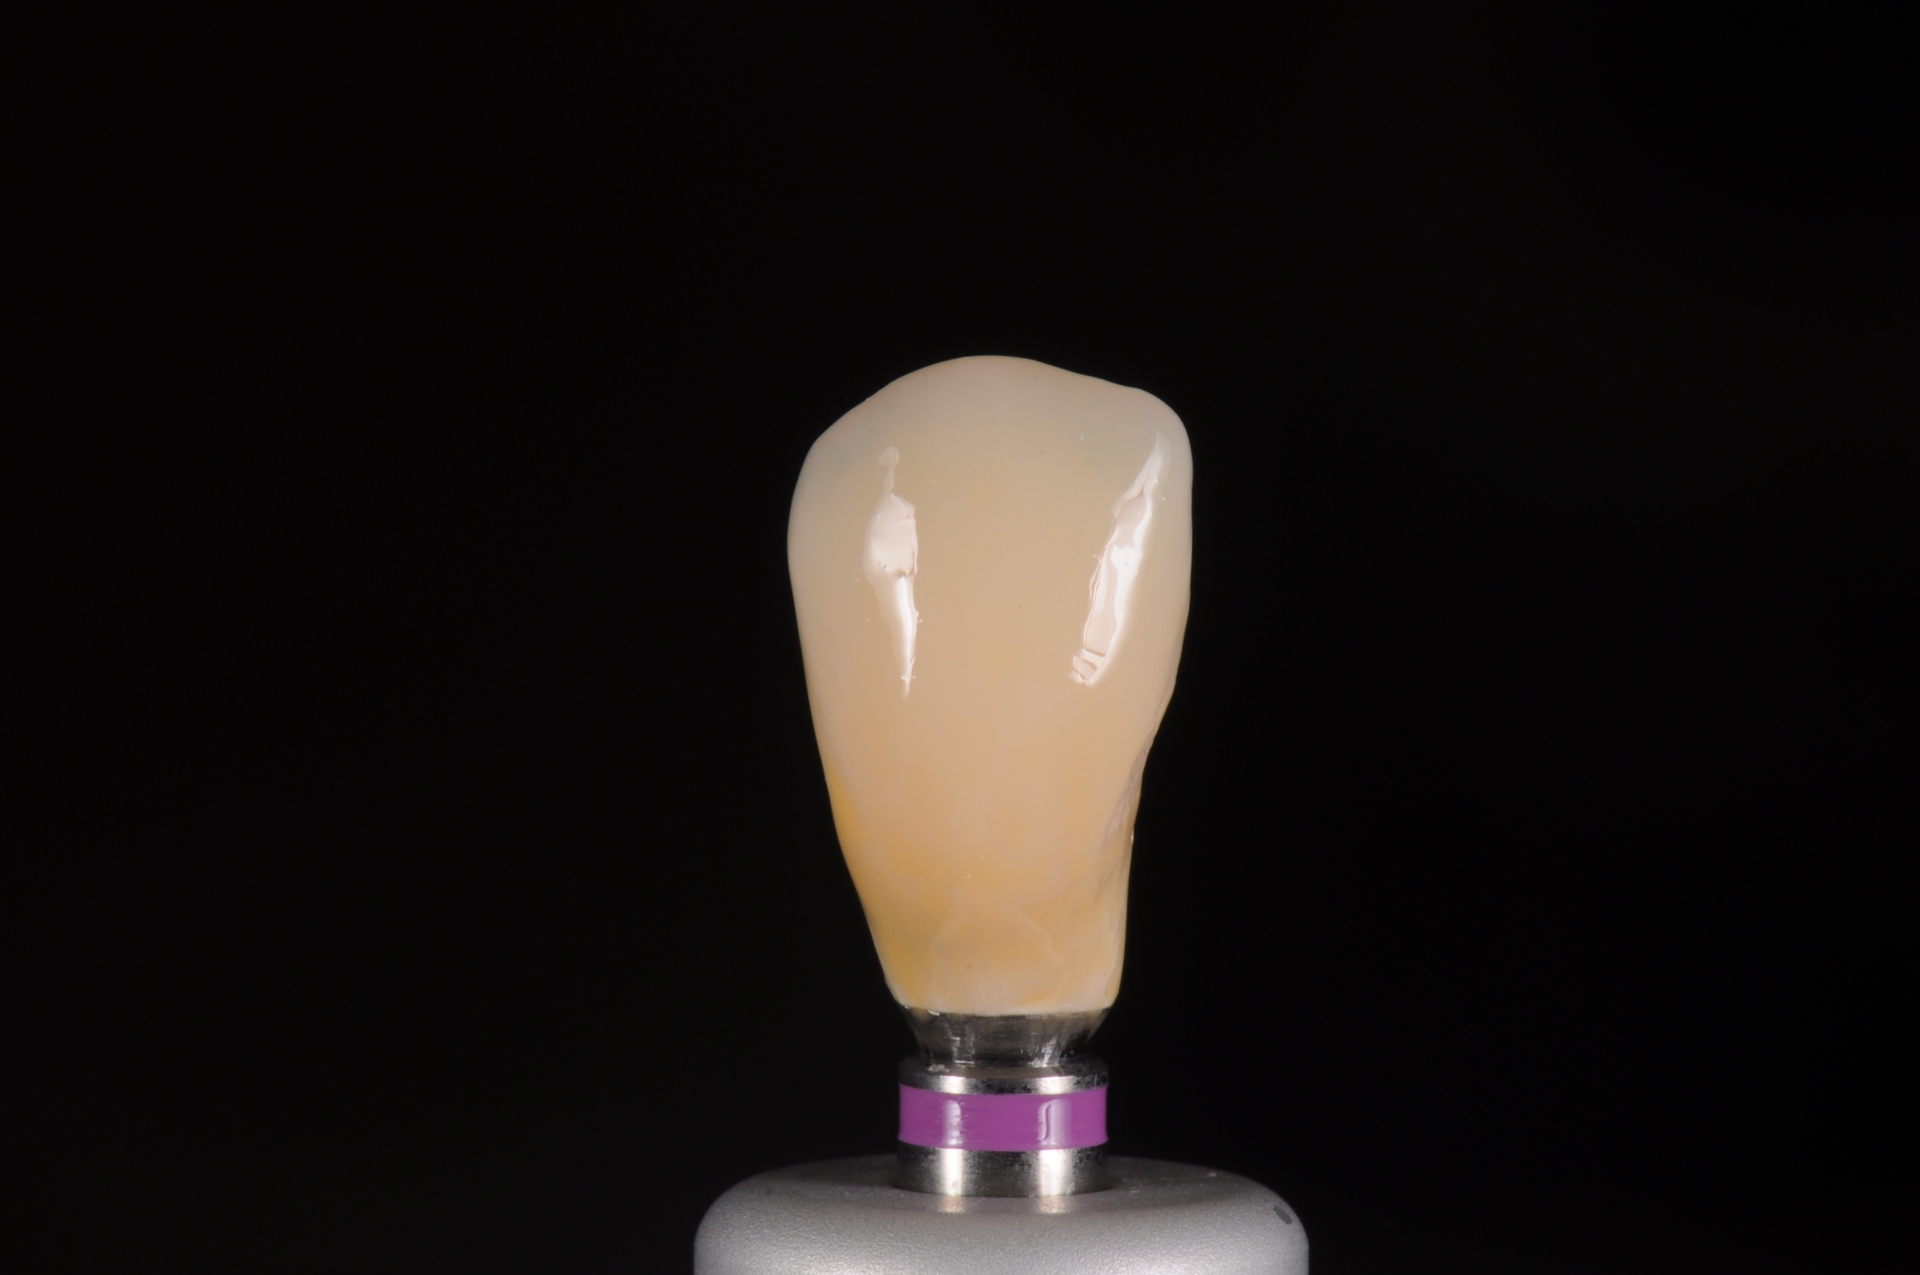
This impression process is as important as shaping the tissue (Levine et al. 2005). The transfer can be done using a custom impression coping in the analog pathway. This technique was first described by Hinds and later modified by Patras (Hinds 1997; Patras & Martin 2007). The process involves creating a copy of the provisional emergence profile around the impression coping. The provisional is removed and placed on an implant analog; an analog holder is highly recommended. After that, clear PVS bite registration material is placed around the provisional, capturing the emergence profile completely. Once the material is set, the provisional can be unscrewed from the analog. An impression coping (open tray or closed tray) is attached to the analog, and the space in between the PVS material is filled with light cure flowable composite material. The excess material can be trimmed, so the custom impression coping is not touching the adjacent teeth or not positioned too far supra-mucosally. The conventional impressions then are performed using your choice of tray and impression material. A video demonstrating the technique can be watched here:
https://vimeo.com/551966633/6e738ecd5d
This transfer of the transition zone can also be done in the digital pathway. Many articles have described different ways to capture the tissue, including modifying the scan bodies or scanning the provisional restoration outside of the mouth and using a merging technique for the multiple STL files (Liu et al. 2016).

Any of these approaches should give your laboratory technician a realistic version of the intraoral tissues, allowing for a final restoration that will not be under-contoured or generate too much pressure in the tissue, causing discomfort to the patient and maybe migration of the mucosal margin.
In conclusion, the fabrication of a provisional restoration allows for loading of the implant and evaluation of osseointegration and esthetics, maintenance of the proximal and occlusal contacts, while also improving patient satisfaction and enhancing laboratory communication.
More information can be found on the ITI Academy, including: