Implant dentistry has made an enormous impact on how we deal with edentulism in our patients. Like many medical interventions, the community has found ways to evolve by shortening treatment time, reducing the number and invasiveness of interventions, thereby increasing the range of candidates for treatment. So, while two-stage and one-stage implant placement is commonplace, immediate implants require correct case selection to perform as routine and predictable treatment options. Immediate implants clearly help to decrease treatment time and the number of interventions. In my experience, this has proven to be very helpful for patients in relation to their anxiety, case acceptance, and overall experience.
While immediate implant placement has become an everyday event for many surgeons, it is important to note that this is not considered a straightforward treatment. With regard to the SAC classification published by the ITI, immediate implant placement, even in the most favorable scenario is at the very least an Advanced procedure. If you are starting your journey into implant dentistry, the SAC classification would be one of the most fundamental tools to better understand the factors involved in either surgical or prosthetic treatment. SAC stands for Straightforward, Advanced, Complex. While the publication is incredibly important to read and become familiar with, there is also an online SAC Assessment Tool that is provided free of charge to help assess every case you are planning. This will greatly help categorize the complexity of any case so as to help avoid getting involved with a case that you may not be fully prepared for.
There are a number of similarities between implant placement in a healed site and immediately after tooth extraction: management of hard and soft tissues, implant stability, three-dimensional positioning, prosthetic placement, implant size and connection choice, the list can go on and on. However, there are several key differences between immediate and healed implant site placement. In my experience, immediate implant placement requires a deep knowledge of four crucial aspects present at the time of the intervention. These aspects are: management of the extraction site, anticipation of the healing of the socket, the position of the implant relative to the available and anticipated hard and soft tissue positions, and finally the stability of the implant in the correct prosthetic positions.


Management of the extraction site
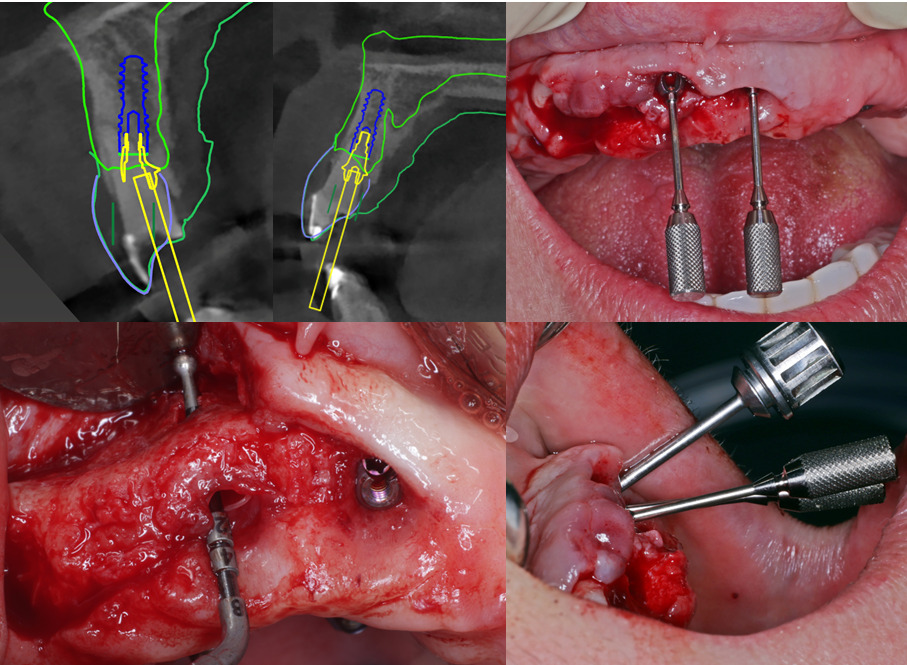
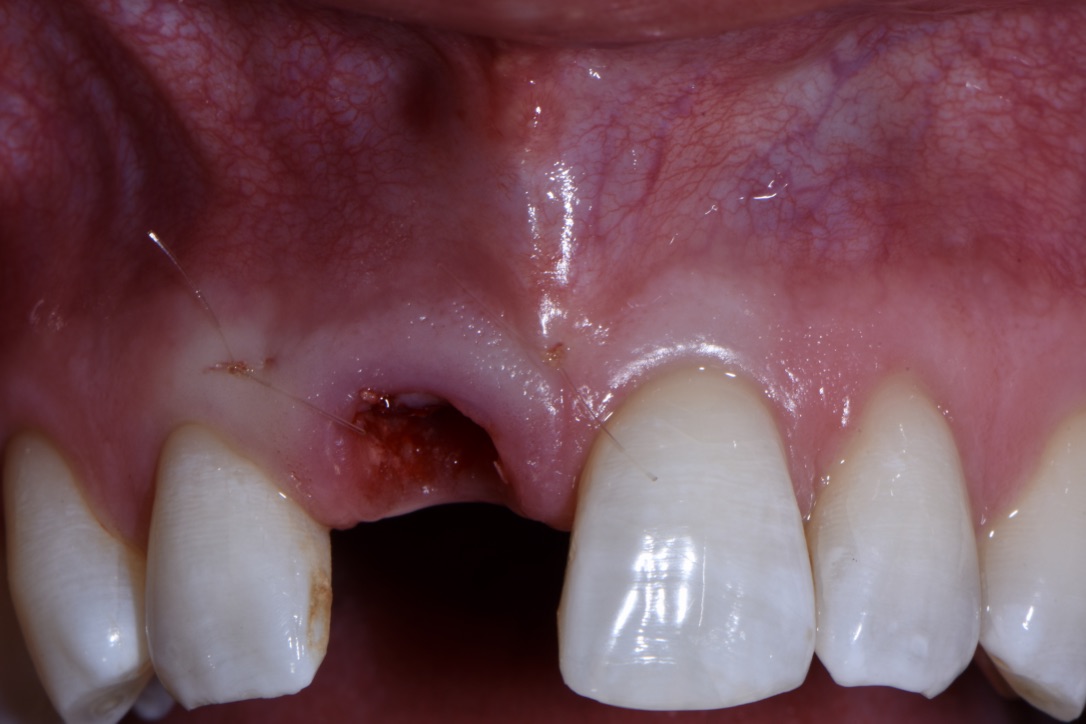
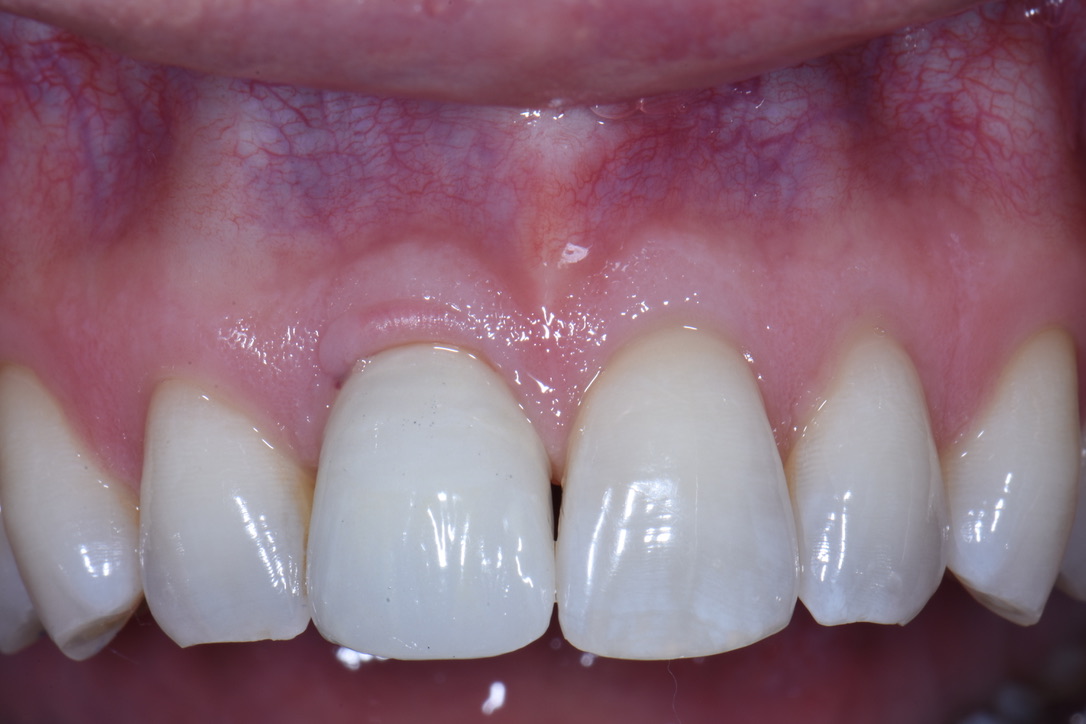
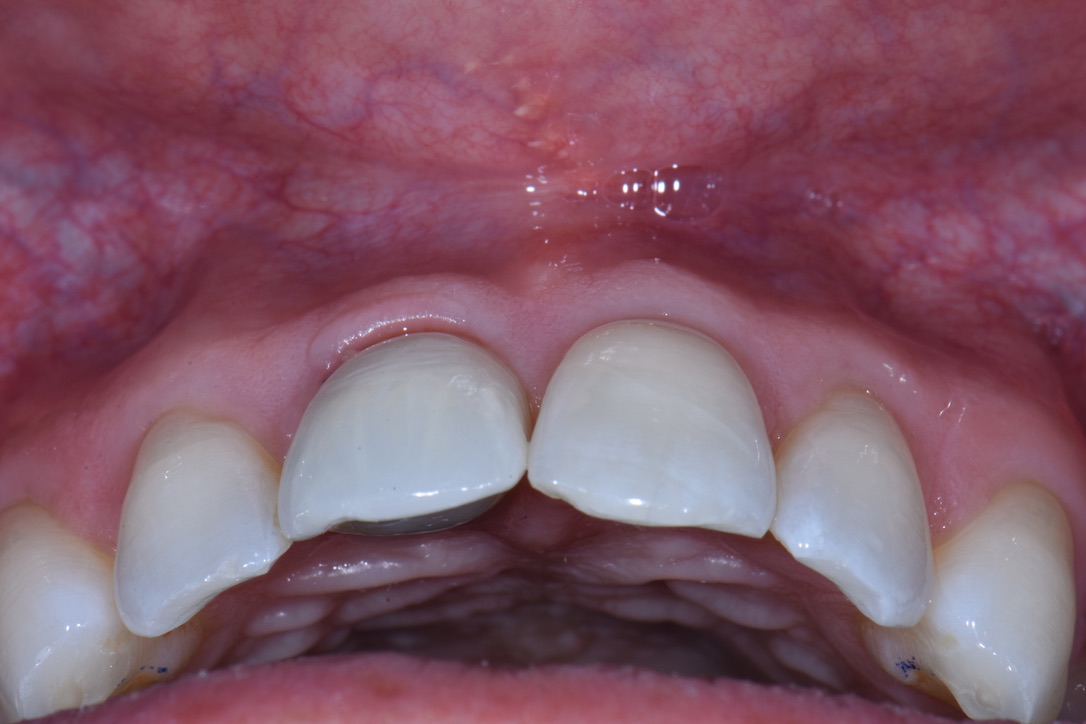
In order to perform immediate implant placement, you must first extract the tooth. Respecting the hard and soft tissues of the site is paramount and the first key to maximizing the outcome. In implant dentistry, especially implant surgery, any mistake made is carried forward, and they are cumulative. In my experience minimizing trauma to the area helps to keep the hard and soft tissues as robust and favorable as possible towards obtaining good stability and accurate three-dimensional placement of the implant. The effort is essentially to “erase” the tooth and leave all surrounding tissues untouched (Figs 1, 2 and 8). My general preference has been to section any multi-rooted teeth or inaccessible single rooted teeth in order to preserve all hard tissue. Removal of any alveolar bone will not only compromise healing, but perhaps also limit your ability to obtain primary stability, accurate prosthetically driven placement, or placement at all.
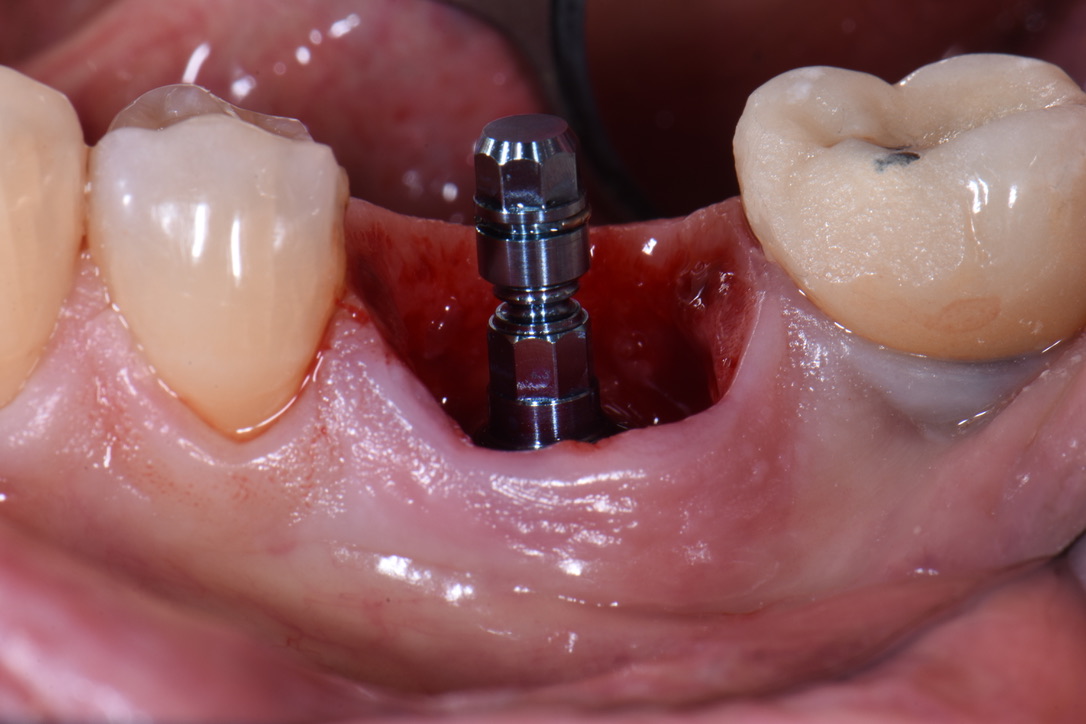
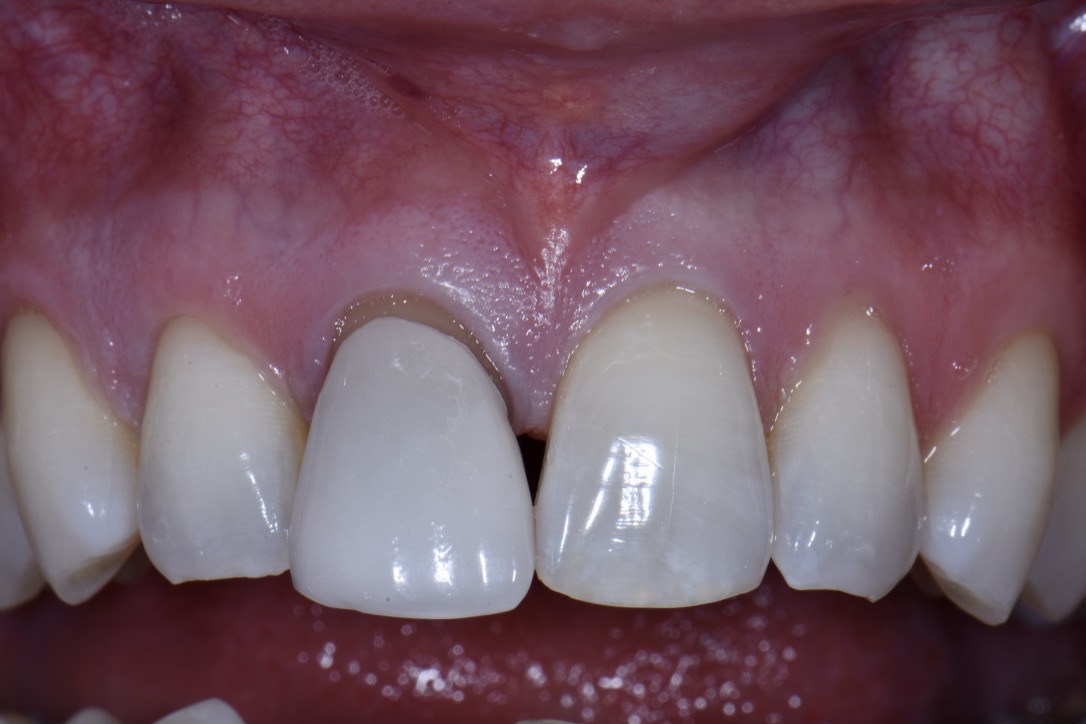
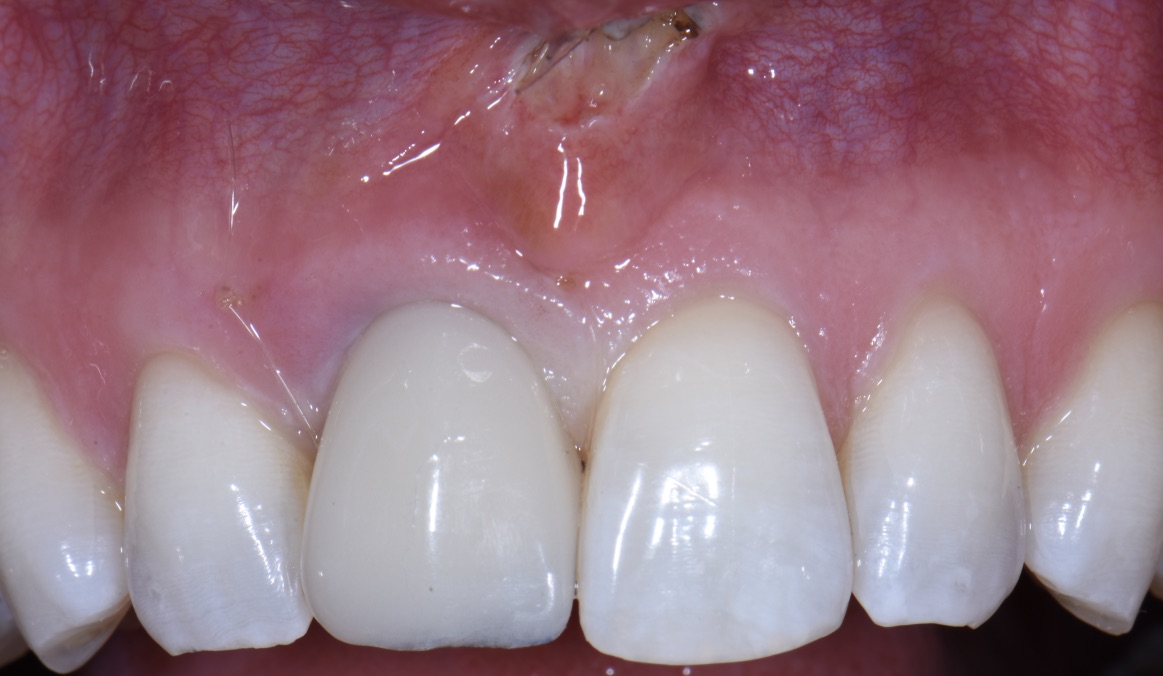
It has been my preference to maintain a flapless approach in the majority of immediate cases. One major challenge of the flapless approach is that the marginal tissue must not be traumatized during extraction. This is usually coupled with a custom healing abutment (or full contour temporary crown) in order to help “freeze” the tissue margins and seal the socket (Figs 7 and 9). We will not focus on this in this blog, as a number of details are involved. However, this is still an important part of extraction site management – allowing for robust healing with minimal trauma to the gingival margin and the fibers supporting its architecture. In my experience this has led to faster tissue maturation and great esthetic outcome and that is one of the advantages of immediate implant placement.
In certain cases, particularly when the tooth is decayed or broken beneath the gingival margin, or there is a soft tissue deficiency, a mucogingival flap may be favorable. A mucogingival flap allows the surgeon to place a hard or soft tissue graft outside of the bony housing, gain better access to the tooth, and, in my opinion, advance the flap coronally (Fig. 3). It should be noted that opening a flap requires an entirely different skill set beyond extraction and implant placement. This is in part because of the socket, but also because of the small papillae present at the time of extraction.
Anticipation of socket healing
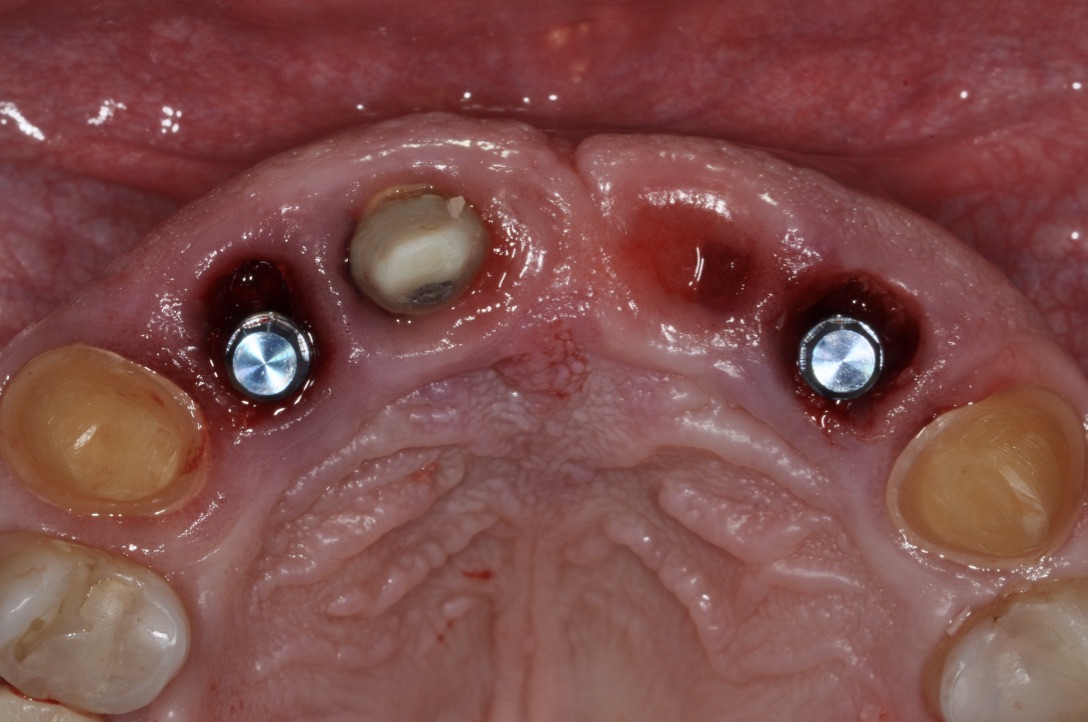
While it may be obvious to state, it must be understood that a fresh extraction socket will heal with dimensional changes to the hard and soft tissue. Thus, immediate implant placement must anticipate these changes so that, at the time of healing, integration, and placement of the prosthesis, the implant will be in an ideal position for long-term health and esthetics. This may be even more important in the esthetic zone where patient expectations, display of restoration, and higher scalloped tissue all increase the risk for an esthetic outcome. Typically, an immediate implant is placed deeper than it would be placed in a healed site. This is exaggerated in the esthetic area where the scallop of hard and soft tissue is more significant. It is generally agreed that the implant shoulder should be placed 3 – 4 mm deep to the gingival zenith, but in the interproximal area this may be 6 – 7 mm deep (Figs 6 and 8). With the correct angulation and palatal placement, this should result in a healed site with adequate tissue volume to create an emergence profile (Fig. 5). This is a scenario you would never experience in a healed site, even if you place the implant 1 mm subcrestally, the variation at the buccal or interproximal sites as well as their position at healing won’t have such significant variation. In my opinion if you don’t note the tissue’s potential for volumetric changes, your three-dimensional implant placement, namely in the vertical and buccal components, may lead to a shallow position with lack of tissue volume for an adequate emergence profile. In fact, if an implant is placed just 1 mm subcrestally to the interproximal tissue in an anterior immediate site, it would likely be supracrestal to the buccal bone zenith. The results for this would be disastrous, as the buccal zenith in the majority of cases will resorb by 1 mm apically, exposing even more of the buccal aspect of the implant. When placing immediate implants make sure to note the buccal bone zenith and in the majority of cases place implants at or 1 mm subcrestally to that for safety.
Damage to any of the surrounding tissue can result in a significant loss of volume, and as mentioned earlier, this must be avoided. If the soft tissue, or, worse, hard tissue is lost during the extraction, a decision needs to be made as to whether or not it can be compensated for. This requires another set of skills in treatment and diagnosis, and for the less experienced surgeon, this is an indication to delay implant placement.
Furthermore, the buccal loss of volume should be anticipated, and an attempt made to compensate for such. Ridge preservation has been shown to be effective in minimizing the loss of buccal volume, but it does not eliminate it altogether. It has been my preference to manage this anticipated loss with a soft tissue modification, namely a connective tissue graft, and usually at the time of extraction and implant placement (Fig. 3). In my opinion, compensation for the loss of the bundle buccal bone should be done outside of the bony housing because the goal of atraumatic extractions is to maintain the bony housing in full. But since we know this will go through some loss, the only place to compensate is outside the housing (assuming the ridge preservation graft is also done). Soft tissue taken from the molar or retromolar areas provide high quality connective tissue that is likely to even improve with time. Note the volume of tissue immediately coronal to the implant restoration in Figs 9 and 10 at just 3 months after extraction. The positive contour is close to the adjacent homologous tooth and will continue to improve with time. Oftentimes, this lack of volume is another tell-tale sign of when an implant restoration is completed, so it is worth making an attempt to compensate either at the time of placement, or during temporization.
Implant positioning
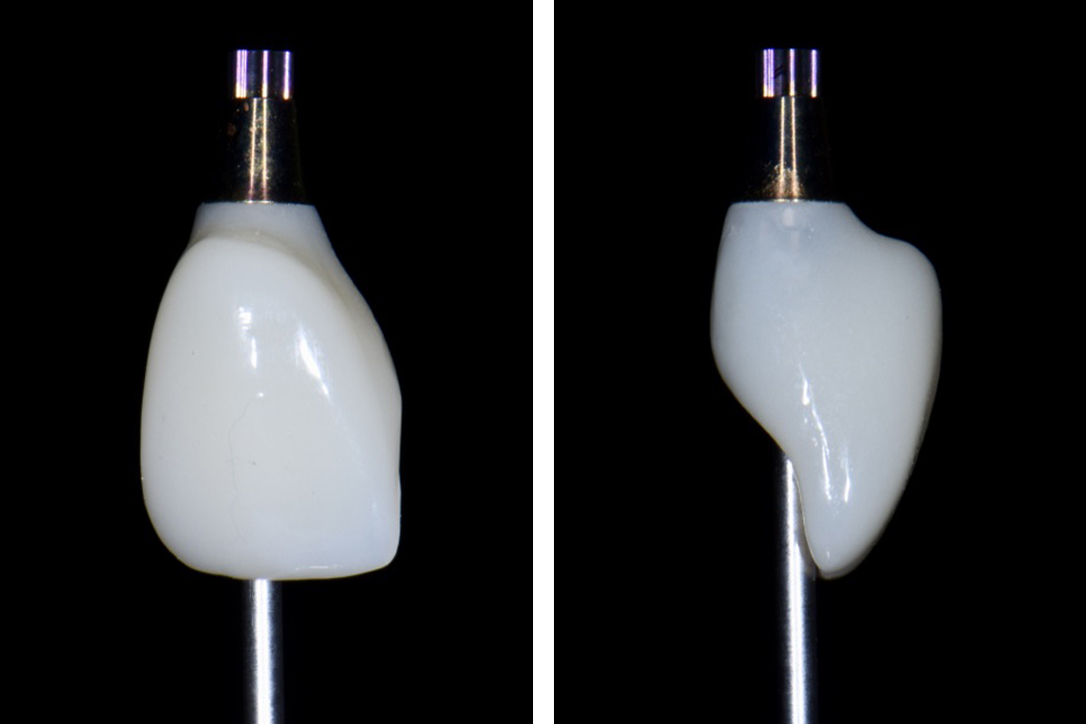
Just like in healed sites, the goal of immediate implant placement is to provide a position that allows for a screw-retained crown with an adequate emergence profile and restorative material (Fig. 4). One note to add to the vertical depth covered above is that typically immediate implants are anchored in bone apical to the socket. Of course, we must be aware of the vital structures: the IAN in the mandible, and the sinus in the maxilla. Depending on the anatomy of the socket and the preservation of the native bone there can still be bony walls that are used in addition to the bone apical to the socket. Therefore, the extraction discussed above is so important – if any of that bone is removed, then there is less potential anchorage.
The next aspect of positioning to discuss is the angulation. For this it helps to think of the anterior and posterior sextants separately. In the anterior sextants it is my experience that the palatal wall is the target for implant placement so as to maximize the amount of native bone surrounding the implant as well as maintaining the screw-retained position. Additionally, this maximizes the gap between the implant and bone, which allows for the buccal bone change to occur without involving the implant surface itself. It is important to note that depending on the angulation of the tooth and the alveolar process you should watch for dehiscence at the implant apex as well. In essence, I note in my cases that there is a need to balance the angulation of staying along the palatal wall yet not perforating the buccal bone apically.
In the posterior sextants the target is in the inter-furcal bone located mostly to the center of the tooth. The inter-furcal bone provides great anchorage for the implant, but you must note its position relative to the most centered screw-retained position of the planned restoration. According to my experience, in order to keep a mesial-distal-centered position in mandibular first molars, you may need to shift the implant to the mesial aspect of the inter-furcal bone and potentially create a dehiscence in which the mesial aspect of the implant will be in the mesial root socket. This is especially true when the molars are mesially tilted and the objective is to maintain them centered and upright within the restoration.
Implant stability
Primary stability is often one of the most thought-about factors, but in reality, it is the culmination of many of the principles mentioned above. Primary stability depends on a number of other factors not mentioned in this article: implant shape, length, thread design, drilling protocol, and bone quality, just to name a few. Of course, implant stability is paramount to making a decision on immediate loading or one-stage placement. However, an implant with high initial stability yet in the wrong position relative to the anatomy or restoration is still inadequate.
During immediate implant placement a key factor to maintaining the ability to maximize implant stability is an atraumatic extraction. Over-manipulating or removing native surround alveolar bone will only detract from the potential stability that can be achieved. Assuming a sound and intact socket, the next challenge for those beginning in immediate placement will be drilling on irregular surfaces. Unlike healed sites, immediate implants will be placed in areas where bone may not occupy all surfaces of the drill. I would argue that this is a major obstacle for obtaining stability for less experienced clinicians because it can be challenging to develop a “feel” for getting the osteotomy in the right prosthetic and biologic position while drilling into partially empty vectors. Chatter from the drilling process can damage the osteotomy and even the adjacent anatomy (particularly inter-furcal bone), this will lead to a less uniform osteotomy and likely less primary stability. In my opinion you need to have significant experience of the “feel” of your manufacturer’s drills and your protocol prior to approaching immediate implant placement.
In single tooth immediate implant placement and loading, typically 35 Ncm or greater is the goal, and without significant experience, it is my opinion that this must be the threshold. This helps with a number of factors, one being the fact that prosthetic components are torqued to 35 Ncm and if it can’t be reached, the abutment may come loose which can have negative impact on the hard and soft tissue healing, leading even to implant failure. If under 35 Ncm, it is still very possible to maintain the procedure as a single stage, and a removable prosthetic can be worn to decrease the complexity of the treatment. In regard to full arch immediate implants and loading, cross-arch stabilization plays a significant role, allowing more variation in single implant insertion torques, but this will not be discussed here.
Summary
In summary, immediate implant placement is a safe and predictable treatment, in which patients and clinicians enjoy the shortened treatment time. However, case selection is incredibly important and when entering into the arena of immediate implant placement, a new set of skills is necessary. Using the online SAC Assessment Tool will help to avoid treatments that carry more risk and require staged and/or interdisciplinary treatment. Just like getting involved with any new treatment, gain experience and confidence with the most straightforward treatments until predictability is obtained. Once straightforward cases are routinely predictable, seek out professional education to begin treating cases that require more experience and skill. However, experience and skill come with time and because our community’s responsibility is to the patients we treat, be sure to select cases carefully that reflect a realistic achievement.
Utilize the ITI platform to gain significant knowledge of implant dentistry. I would argue that the ITI provides the most evidence-based recommendations in the implant discipline. An ITI membership provides access not just to the SAC tool mentioned earlier, but their entire line of Treatment Guides – one of the most applicable bodies of work for implant dentistry around. Evidence-based education is the best way to prepare for providing implant treatment options.
Discover: